
Open Plan Kitchen-Living Room Ideas: 12 Ways to Zone Without Walls
I’ve noticed the open plan spaces that actually feel considered, rather than just one undivided room, all share the same underlying strategy — they create a genuine sense of “here’s the kitchen, here’s the living room” without ever putting up a wall. Below are 12 zoning techniques for an open plan kitchen-living room, each with the real measurements and material guidance that turn a good idea into something you can actually plan for your own space.
Why Zoning Matters in an Open Plan Space
An open plan layout brings light, sociability, and a genuinely larger-feeling home, but without any zoning at all, it can start to feel like one undifferentiated space rather than a home with distinct areas for distinct activities. Zoning solves this — using furniture, color, lighting, level changes, or partial architectural elements to signal “this is the kitchen” and “this is the living room” without sacrificing the openness that made the layout appealing in the first place.
1. Use a Dining Area as a Buffer Zone
Positioning the dining table between the kitchen and living area creates a natural transitional zone, so the living room doesn’t feel like it’s sitting directly inside the kitchen.

I’d choose upholstered dining chairs (or a small dining bench) rather than purely functional kitchen-style seating for this buffer zone specifically, since softer, more “living room” materials at the dining table help it read as connected to the seating area rather than purely kitchen-adjacent.
Budget tier: mid, largely the cost of dining furniture ($400-1,500.)
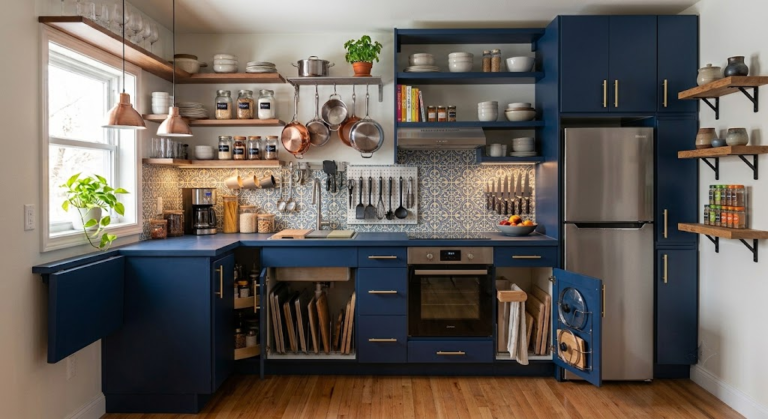
2. Color-Drench the Kitchen Cabinetry
Painting kitchen cabinetry in a distinct, saturated color — separate from the living area’s palette — creates a clear visual boundary between zones without any physical divider at all.

I’d choose a genuinely different color family from the living space (not just a lighter or darker shade of the same color) for this to read clearly as intentional zoning rather than a subtle variation within one cohesive palette.
Budget tier: low-to-mid ($150-400 for cabinet paint and hardware.)
3. Anchor the Kitchen With an Island
A kitchen island remains the most classic zoning tool available, creating a physical boundary between cooking and living areas while adding counter space and often additional seating.

I’d size a standard island at a minimum of 4×2 feet, with at least 36-42 inches of clearance on all sides for comfortable walking and cabinet access — undersizing this clearance is one of the most common island-planning mistakes.
Budget tier: high ($2,000-8,000+ depending on size, material, and whether it includes appliances or plumbing.)
4. Install Glazed Doors for a “Broken-Plan” Layout
Glazed (glass-paned) doors between the kitchen and living area let you fully close off one zone when needed — containing cooking smells or noise — while still allowing light and a visual connection to flow through when open.

I’d choose this specifically if the layout allows for genuine architectural change, since it requires more construction than any other zoning idea on this list, but it offers flexibility that furniture-only zoning can’t match.
Budget tier: high ($1,500-4,000+ depending on door size and glazing style.)
5. Use an Archway to Frame the Transition
An archway between the kitchen and living space creates a soft architectural boundary — more defined than open flow, less committal than a full wall — and can be paired with a peninsula or half-wall beneath it for added function.

I’d size a standard archway to at least 6-7 feet wide for comfortable passage and sightlines, and consider echoing the arch’s curve in another element nearby (a mirror, a light fixture) to tie the space together intentionally.
Budget tier: mid-to-high ($500-2,000+ depending on whether it involves structural changes.)
6. Create a Kitchen “Bar” With One Closed Side
Rather than leaving the kitchen fully open, closing off one side while leaving the other functioning as a bar-height counter creates a partial zone — genuinely closed off from certain angles while remaining a passage and sightline from others.

I’d use a reflective or mirrored backsplash on the closed side specifically if the space is small, since this amplifies light and depth in a way a solid, non-reflective surface wouldn’t.
Budget tier: mid-to-high ($800-2,500+ depending on cabinetry and countertop material.)
7. Define Zones With Rugs
A well-sized area rug under the living room seating (and, separately, potentially another under the dining table) visually marks each zone’s boundary without requiring any furniture rearrangement or construction.

I’d size the living room rug so at least the front legs of all seating sit on it, following standard living room rug rules, and choose a genuinely different rug (not just a matching pair) for the dining area to reinforce the sense of distinct zones.
Budget tier: mid ($150-500 per rug.)
8. Layer Different Lighting Styles by Zone
Using pendant lighting over the dining table, task lighting over kitchen counters, and table or floor lamps in the living area creates zone-specific lighting that reinforces each area’s function, even without any physical divider.

I’d keep bulb temperature consistent (2700-3000K warm white) across all zones for cohesion, letting the fixture style and placement — not the color of light — do the zoning work.
Budget tier: mid ($300-900 for a full lighting refresh across zones.)
9. Use a U-Shaped Kitchen Layout to Create a Wall
A U-shaped kitchen configuration naturally creates a solid wall section facing the living area, which can back a banquette, a sofa, or additional seating — giving the living zone a genuine “backed” wall in a layout that otherwise has none.

I’d measure for at least 42-48 inches of clearance in the U-shape’s open walkway, since this layout can feel cramped if the interior clearance is undersized relative to the kitchen’s overall footprint.
Budget tier: high ($3,000-10,000+ depending on scope, typical of a fuller kitchen renovation.)
10. Mark a Level Change Between Zones
Where the architecture allows, a step down or up between the kitchen and living area creates an unmistakable zone boundary — one of the strongest possible signals that you’ve moved from one distinct space to another.

I’d only pursue this in new construction or a major renovation, since retrofitting a level change into an existing single-level floor is rarely practical, but it’s worth prioritizing in the planning stage if you’re building from scratch.
Budget tier: high, typically only feasible during new construction or major renovation.
11. Use a Consistent Color Story With One Zone-Specific Accent
Rather than fully separating the palettes, keeping walls and flooring consistent throughout the open space while introducing one strong accent color or pattern unique to each zone (a bold mural in the dining area, a distinct rug in the living room) unifies the space while still marking each area as distinct.
I’d choose this approach specifically if you want the openness to feel deliberately unified rather than segmented, unlike the more contrasting color-drenched cabinetry approach.
Budget tier: low-to-mid ($200-600 depending on the chosen accent elements.)
12. Anchor the Living Zone With a Large Sofa or Sectional
Positioning a large sofa or sectional with its back to the kitchen area creates an immediate, furniture-only boundary — no construction, paint, or major layout changes required — simply by using the seating’s orientation to define where the living zone begins.

I’d float the sofa away from any wall specifically for this technique to work, positioning its back toward the kitchen zone rather than pushing it against a wall, which is what actually creates the sense of a defined boundary.
Budget tier: varies based on furniture chosen, no additional cost beyond the seating itself.
My Professional Guide to Zoning an Open Plan Space
I always start by identifying which zoning method fits the home’s actual architecture and budget — furniture-based zoning (rugs, a floated sofa, a dining buffer) costs little and requires no construction, while architectural zoning (an island, an archway, a level change) offers a stronger boundary but requires genuine renovation investment.
From there, I choose one primary zoning method and let secondary techniques (lighting, color accents) support it rather than trying to combine several strong methods at once. An island plus an archway plus color-drenched cabinetry all in the same space can start to feel like it’s working against the open plan concept rather than gently organizing it.
Finally, I’d keep some element consistent throughout the whole space — flooring, wall color, or trim — even while zones are otherwise clearly differentiated, since full consistency across every surface undermines the openness, but zero consistency makes the space feel disjointed rather than intentionally open.
Conclusion
Zoning an open plan kitchen-living room comes down to choosing techniques that fit your specific architecture and budget — from simple, low-cost furniture arrangement and rugs to more involved architectural changes like an island, archway, or level change. Pick one primary zoning strategy, support it with lighting and color choices, and keep some element consistent throughout the space, and an open plan layout can feel like a home with distinct areas rather than one undifferentiated room.
Frequently Asked Questions
How do I zone an open plan kitchen-living room without a wall?
Furniture placement (a floated sofa, a dining table as a buffer), rugs, lighting style differences, and color contrast in cabinetry are all effective ways to define zones without any construction or physical division.
What size should a kitchen island be for an open plan layout?
A minimum of 4×2 feet is standard, with at least 36-42 inches of clearance on all sides for comfortable walking space and cabinet access.
Is a broken-plan layout better than a fully open plan?
It depends on your priorities — a broken-plan layout (using glazed doors or partial partitions) offers more flexibility to close off noise or cooking smells when needed, while a fully open plan maximizes light flow and social connection at all times.
Do zones in an open plan space need matching decor?
No — in fact, a genuinely distinct color, pattern, or material in each zone often reinforces the sense of separate areas more effectively than fully matching decor throughout the space.