15 DIY Plant Stands
15 DIY Plant Stands: Designs You Can Actually Build
A good plant stand does more than lift a pot off the floor — it changes how light reaches the plant, how the plant reads visually in a room, and in a lot of cases, how long the plant actually thrives. Below are 15 DIY plant stand designs, each with real build details: material, rough dimensions, and which plants actually suit the structure, so you can build something that holds up rather than just looks good in a first photo.
1. Rustic Wooden Crate Stand
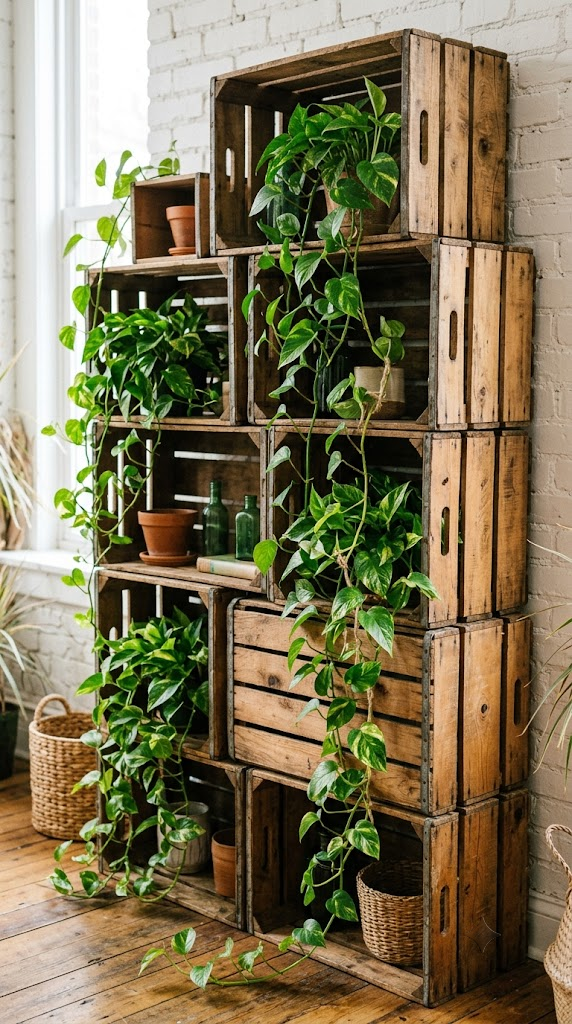
This is one of the simplest true beginner builds — stack two or three wooden crates (new or reclaimed) in a staggered, offset pattern rather than a straight tower, securing each layer to the one below with L-brackets on the interior corners so the stack can’t shift.
I’d choose crates with slightly different footprints for the staggered look to read intentionally rather than accidental. Trailing plants like pothos or string of pearls work especially well here, since they can spill downward through the open crate slats rather than being blocked by a solid surface.
Build time: under an hour. Weight capacity: solid for small-to-medium pots given the crates’ inherent structural strength.
2. Copper Pipe Ladder Stand
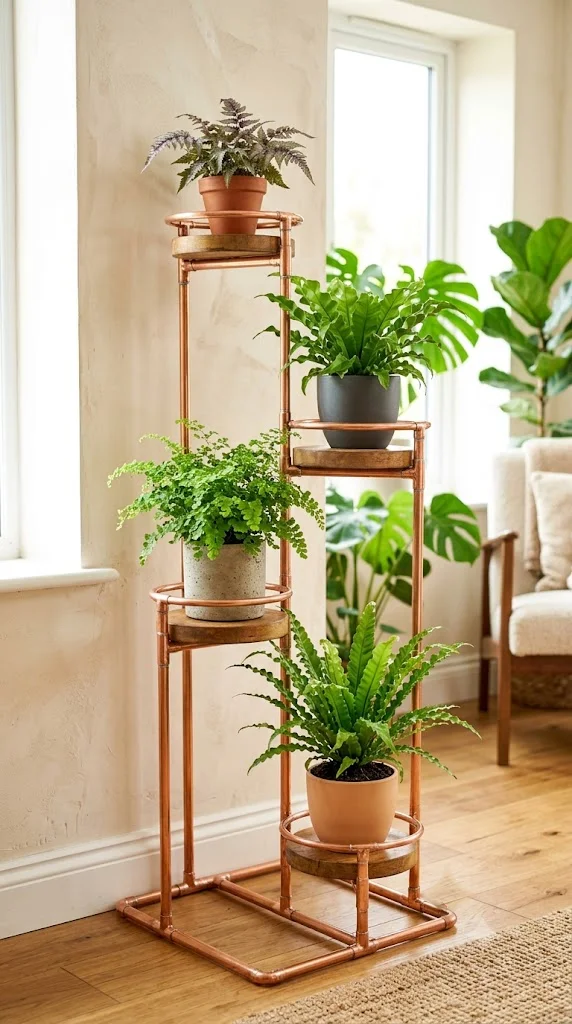
Copper pipe fittings create a genuinely sleek, minimal frame without requiring any welding — everything connects with standard copper elbow and T-fittings, which you can assemble dry (no soldering needed) for a display piece that doesn’t need to hold water pressure.
Cut 1/2-inch copper pipe into matching lengths for the vertical supports and shorter horizontal pieces for each shelf level, then dry-fit the whole structure before cutting a final piece, since copper pipe can’t easily be shortened once assembled. Use thin wood or glass discs as the actual shelf surfaces, resting inside the pipe framework rather than attached to it.
Ferns and other plants that prefer indirect light suit this design well, since the reflective copper tends to be styled in brighter, indirect-light spots rather than direct sun exposure that would overheat the metal.
3. Floating Rope Shelf Tower
This design suspends solid wood shelves using thick rope threaded through drilled corner holes, creating a plant tower with no rigid vertical frame at all — just rope, wood, and ceiling or wall-mounted anchor points.
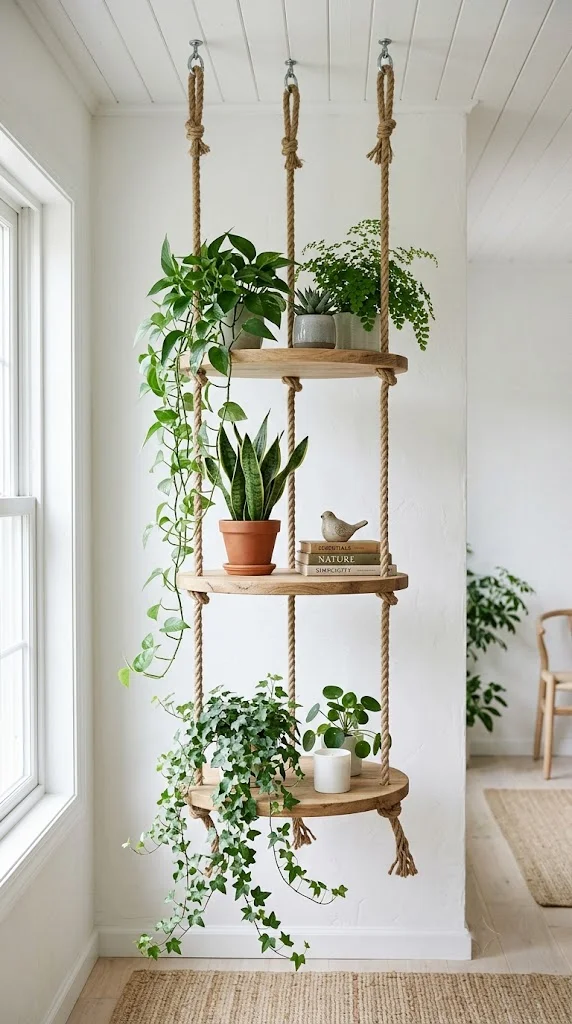
Cut 3-4 wood rounds or rectangular boards (3/4-inch plywood works well), drill matching holes near each corner, then thread rope through all boards at once, tying a secure knot beneath each shelf level to hold its position. I’d use manila or cotton rope rather than synthetic for both the look and the grip needed to hold knots securely under weight.
Mount the top of the rope to a ceiling hook rated for at least 20-30 lbs, well above the combined weight of the shelves and plants. This works well for a mix of upright and trailing plants, since the natural sway gives trailing varieties room to move without tangling.
4. Repurposed Vintage Stool
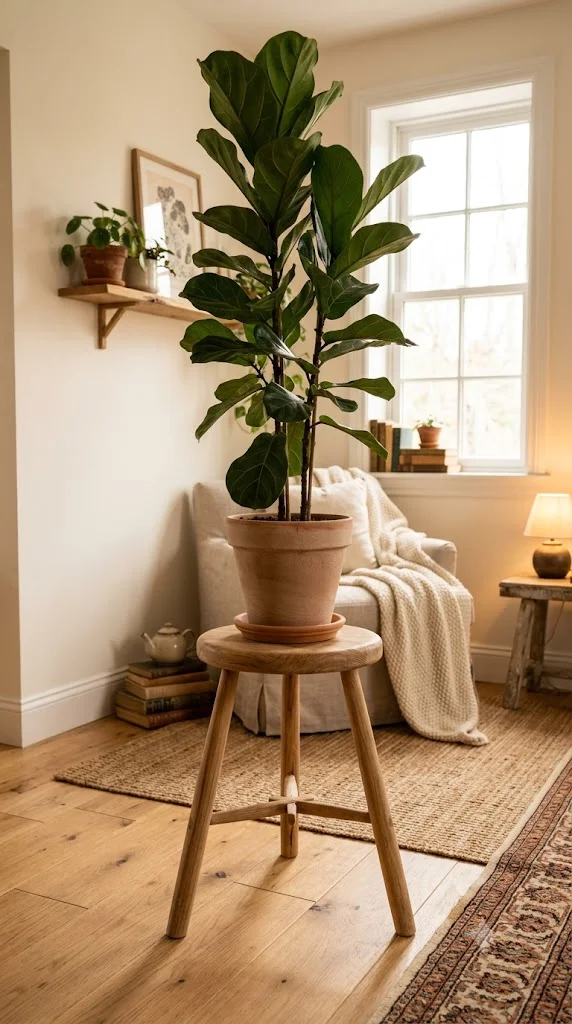
An old wooden stool — the kind you might find secondhand for very little — makes one of the fastest plant stand conversions possible, since the structural work is already done.
I’d check the joints for wobble before using it functionally, tightening any loose screws or adding wood glue to loose joints if needed, since a plant stand that wobbles risks tipping over time. Light sanding and a fresh coat of paint or stain can update the look without any structural changes.
The stool’s height (typically 18-24 inches) makes it well suited to medium-to-large statement plants like a fiddle leaf fig or rubber plant, elevating them to a height where they become a genuine visual focal point rather than sitting at floor level.
5. Geometric Hexagon Stand
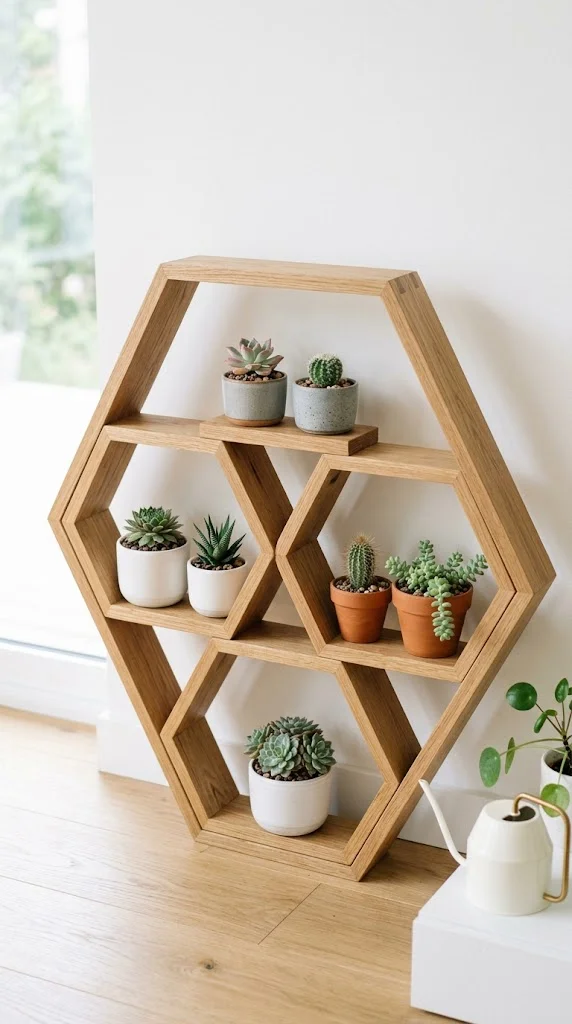
A hexagon frame reads as distinctly more modern than a standard rectangular stand, and it’s a manageable build if you have access to a miter saw capable of cutting consistent 120-degree angles.
Build each hexagon from six equal-length wood strips (1×2 works well for a small stand), joined at the angled cuts with wood glue and reinforced with small L-brackets on the interior corners for real strength. Stack 2-3 hexagon frames at different sizes for a tiered effect, or build a single hexagon frame with a solid shelf insert.
Succulents and small cacti suit this design especially well, since their compact size complements the geometric structure rather than overwhelming it visually.
6. Natural Tree Branch Pedestal
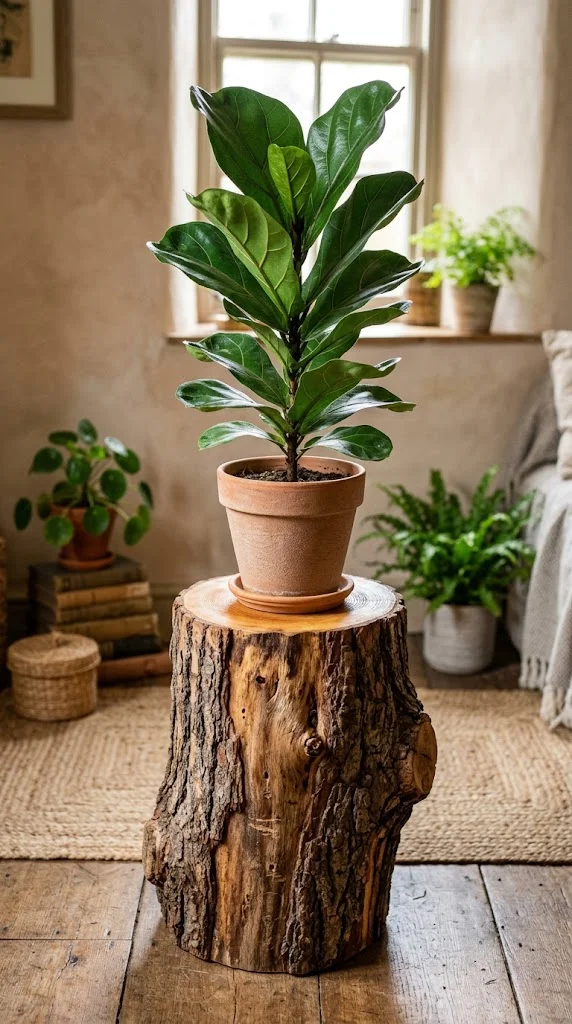
For a genuinely organic option, a thick branch segment (6-10 inches in diameter, cut to your desired height) can become a plant pedestal with almost no construction beyond leveling the top and bottom cuts.
I’d select a branch from a rot-resistant species if it’ll be used outdoors (cedar or oak hold up better than softer woods), and let it dry out for several weeks if freshly cut, since green wood can crack as it dries. Sand the top surface flat enough for a pot to sit securely, and consider adding a thin round of plywood on top if the branch’s natural surface isn’t quite level.
This works well anywhere you want a single statement plant rather than a grouped display, since the branch itself is often visually striking enough to stand alone.
7. Repurposed Rolling Cart
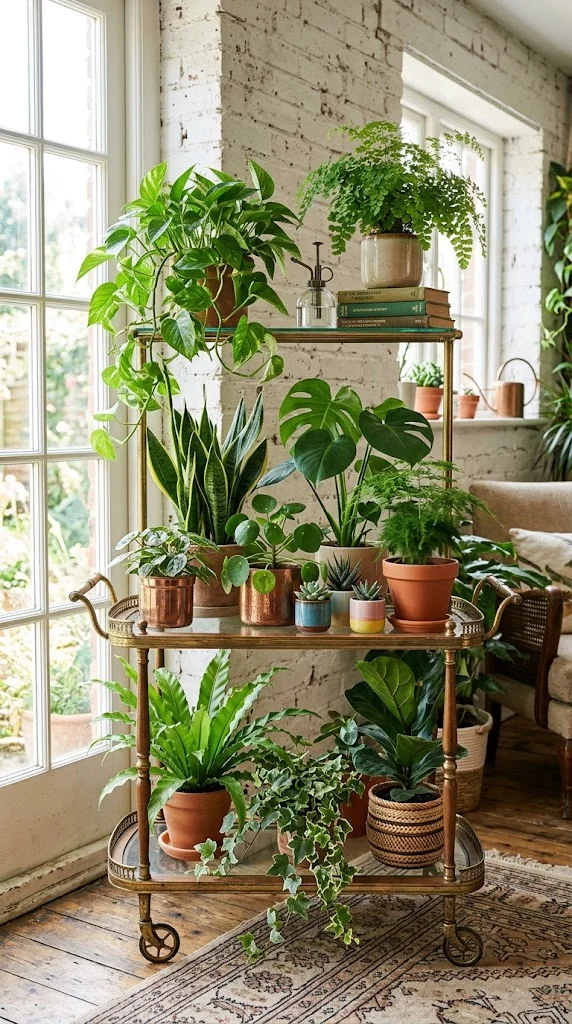
An old rolling utility cart or bar cart, thrifted or repurposed from another room, creates an instantly mobile, multi-tier plant station that can be moved to chase sunlight through the day or across seasons.
I’d check that the wheels roll smoothly and lock if needed, and add a thin layer of cork or rubber matting to each shelf to protect the surface from water damage and soil residue over time. A light sanding and repaint can update an older or mismatched cart to fit your space.
This design suits plants with genuinely different light or watering needs particularly well, since each tier can be positioned or angled slightly differently, and the whole unit can be relocated as a group rather than moving pots individually.
8. Macrame Hanging Tower
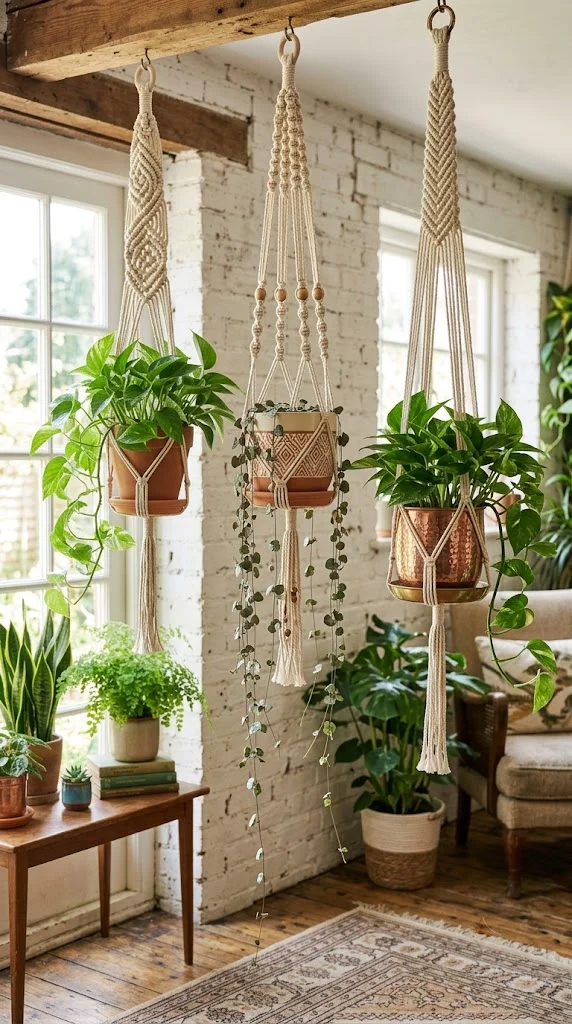
A macrame plant hanger arrangement uses knotted cord rather than any rigid structure, making it one of the more forgiving builds if you’re comfortable with basic knotting but not woodworking.
Using 4mm cotton cord, I’d create a series of basic square knots and spiral patterns to form a cradle for each pot, working from a central mounting point down to 2-3 staggered levels. Standard macrame plant hanger patterns are widely available and don’t require advanced technique — most of the visual complexity comes from repetition of a few simple knots.
Trailing plants like pothos, string of hearts, or spider plants complement this style especially well, since their cascading growth continues the flowing movement the macrame cord itself creates.
9. Cinder Block and Wood Stack
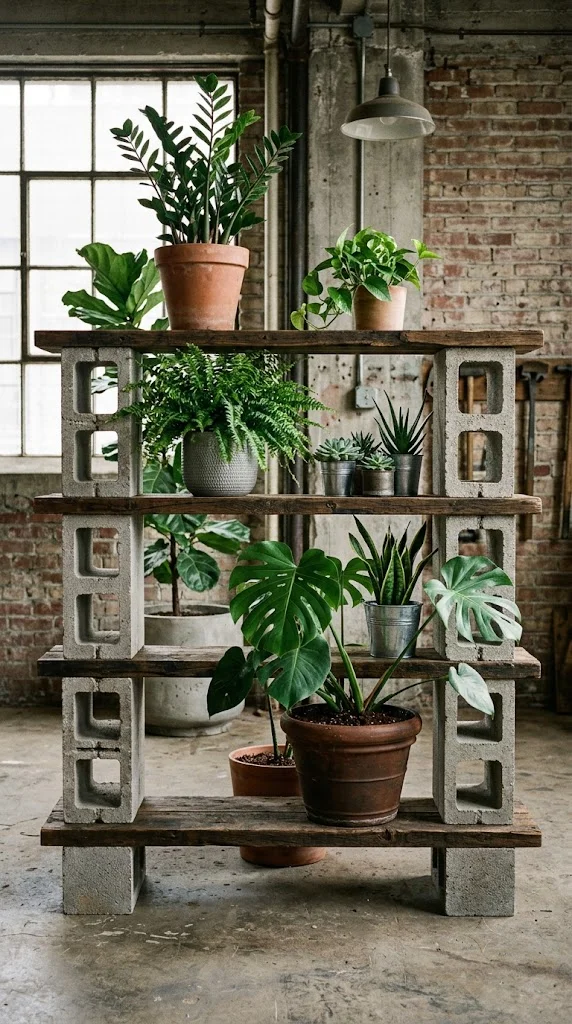
This is one of the most budget-friendly and beginner-proof builds on this list — cinder blocks provide instant structural stability with zero fasteners required, simply stacked with wood planks resting across the openings as shelves.
I’d use standard 8x8x16 inch cinder blocks, positioning them so the hollow openings face outward as additional small display niches, then rest 2×8 or 2×10 boards across pairs of blocks to create each shelf level. No screws, brackets, or glue are needed, which makes this one of the few entries on this list that’s genuinely a same-afternoon build.
The significant weight of the blocks makes this one of the most stable options available, well suited to larger, heavier pots that would risk tipping a lighter wood-only stand.
10. A-Frame Tiered Shelf
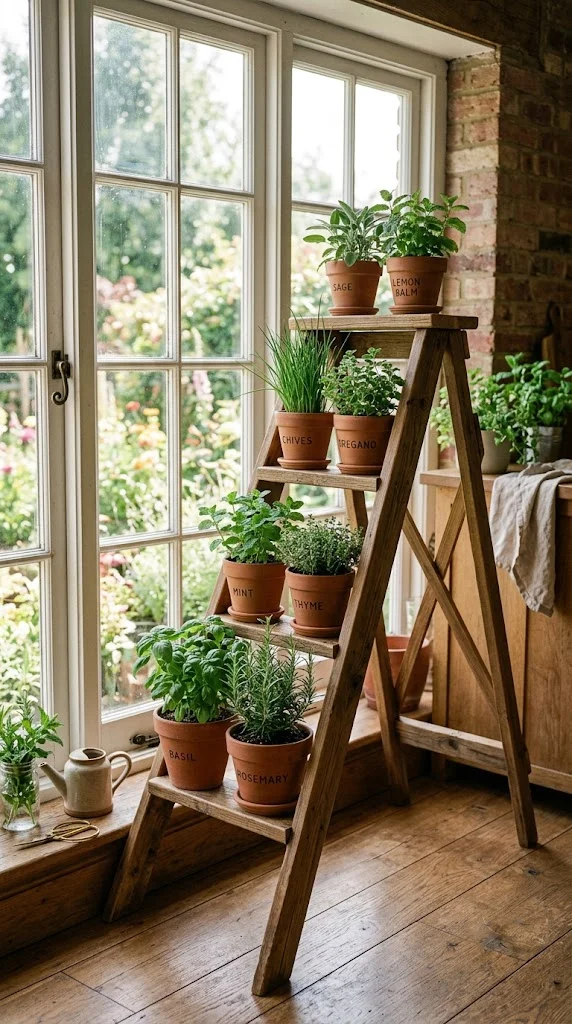
An A-frame design uses two angled side panels joined at the top, with shelves descending between them at graduated widths — wider at the bottom, narrower toward the top, similar in silhouette to a small ladder shelf.
Build each side panel from a single angled 1×4 board, then cut shelf boards to fit between the two panels at your chosen heights, securing each shelf with screws driven through the side panels into the shelf ends. I’d angle the side panels at roughly 15-20 degrees from vertical for a stable, self-supporting stance that doesn’t require wall anchoring.
This design works particularly well for a collection of herbs in a sunny kitchen window, since the graduated tiers let you position sun-loving smaller plants on the higher shelves without shading the ones below.
11. Repurposed Drawer Shelf
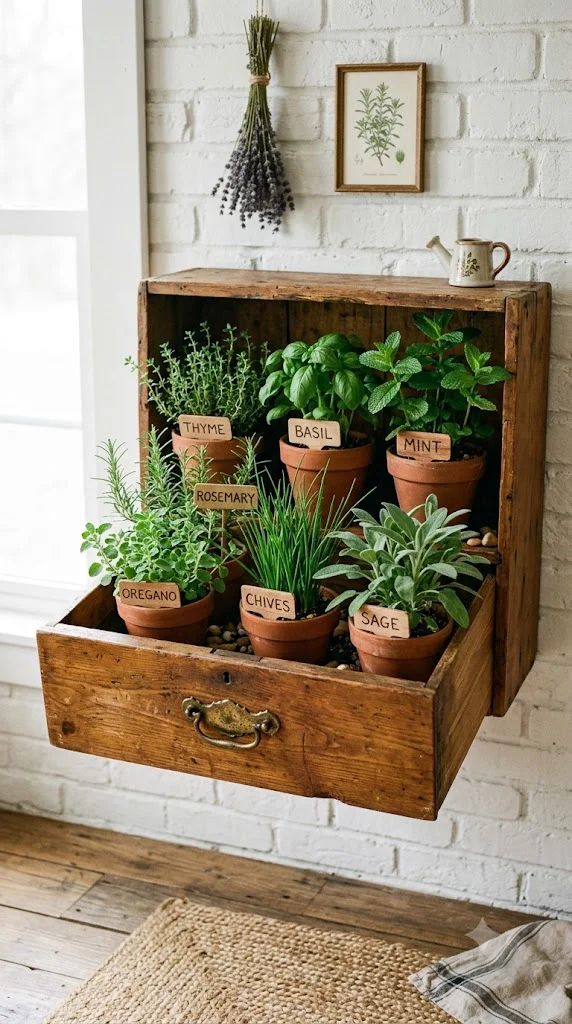
An old dresser or cabinet drawer, removed from its original furniture piece, becomes a deep, enclosed plant shelf capable of holding more soil-based mess or drainage than most open designs.
I’d mount the drawer horizontally on the wall using L-brackets screwed through the drawer’s back panel, or lean it against a wall on a small support ledge if you’d rather avoid wall mounting. Line the interior with a thin plastic liner or tray if you’re placing pots without saucers directly inside, to protect the wood from consistent moisture exposure.
This design suits small potted plants or a mixed herb garden well, since the drawer’s depth comfortably fits several small pots side by side.
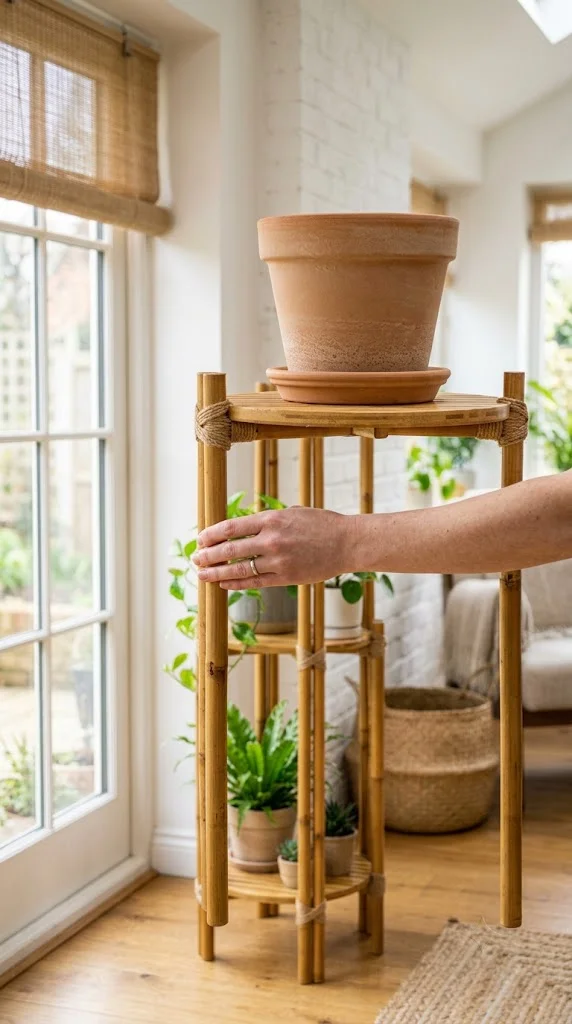
12. Bamboo Pole Frame Stand
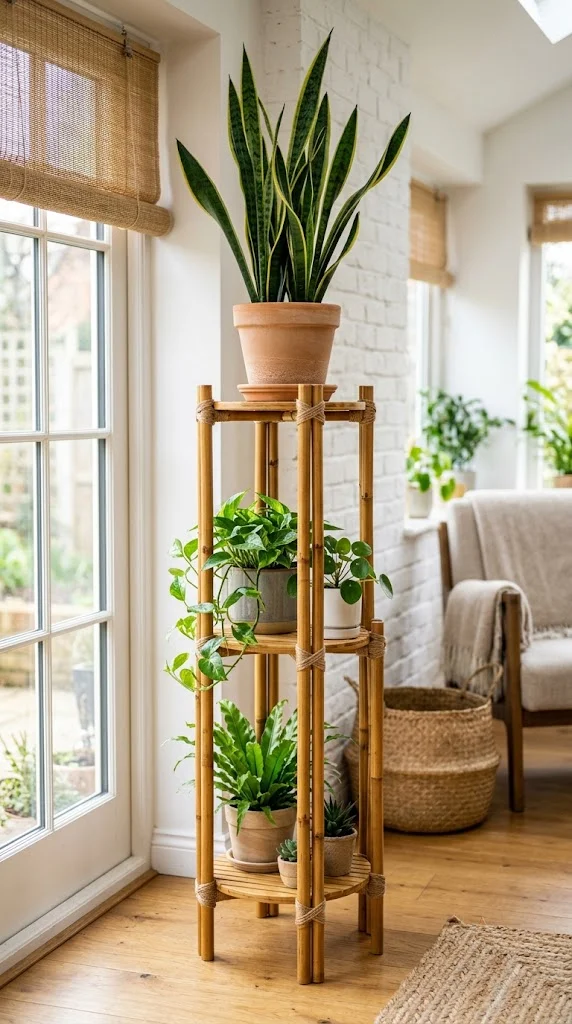
Bamboo poles create a genuinely lightweight frame that’s easy to move and visually pairs naturally with plants, given the shared organic material.
Using bamboo poles roughly 1-1.5 inches in diameter, I’d join sections using pre-drilled holes and exterior wood screws driven through both walls of the pole at each joint, since bamboo’s hollow structure means standard screws alone won’t hold securely without pre-drilling. Lash joints with garden twine at visible connection points for both extra stability and a more finished, cohesive look.
This design works especially well for plants with a naturally structured, upright growth habit — snake plants or ZZ plants both complement the clean vertical lines bamboo creates.
13. Reclaimed Pallet Wood Wall Rack
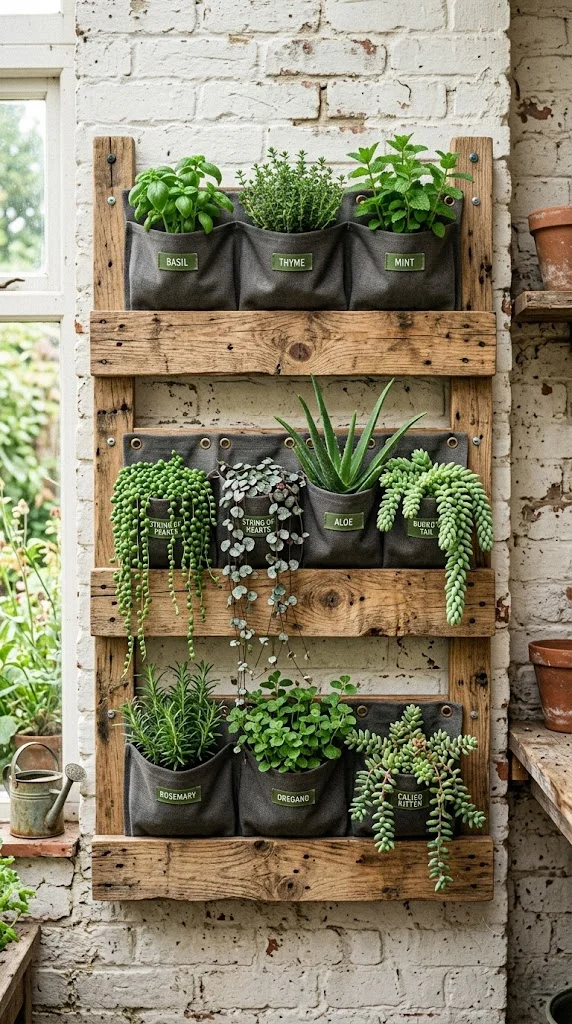
A vertical pallet wood rack turns floor-space-limited walls into genuine growing space, using the pallet’s existing slat structure as built-in shelf divisions.
I’d disassemble a standard pallet carefully with a pry bar, sand any rough edges, then reassemble select boards into a vertical rack with small shelf ledges or fabric pocket inserts at 2-3 heights. Since pallet wood isn’t weather-treated, I’d apply an exterior sealant if this will be used outdoors, and expect a shorter lifespan (2-4 years) compared to naturally rot-resistant woods.
Small herbs or trailing succulents both work well in this format, since the vertical, pocketed design suits compact root systems better than larger potted plants.
14. Minimalist Concrete Pedestal
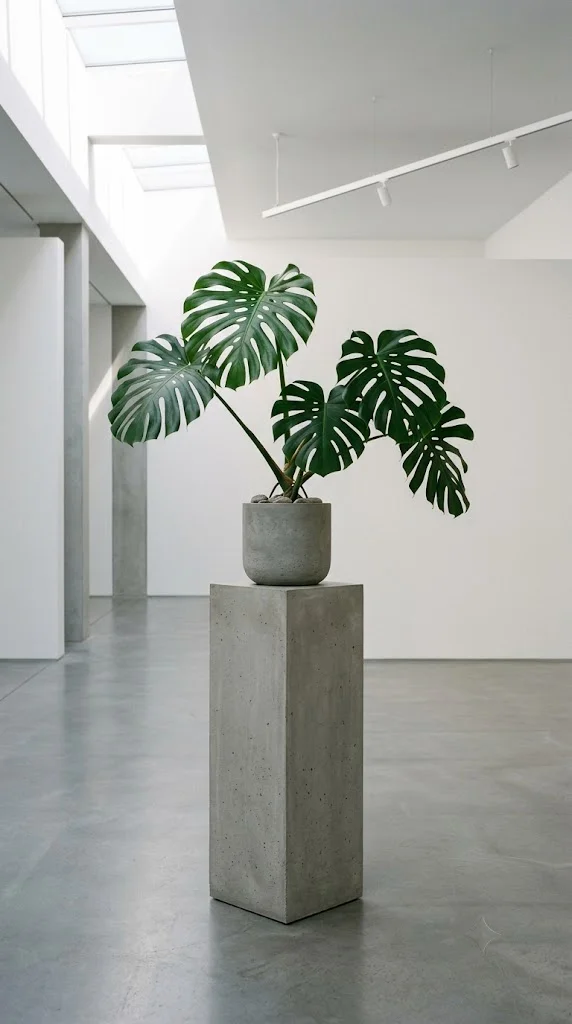
A poured concrete pedestal is a more involved build than most on this list, but it creates real weight and visual permanence that wood or metal stands can’t quite replicate.
Using a simple cardboard tube or plastic form as a mold, mix a quick-setting concrete product according to package directions, then pour and let cure fully (typically 24-48 hours minimum before removing the form, longer before placing weight on top). I’d sand the top surface smooth once cured, and consider a concrete sealant to prevent staining from soil or water over time.
This works best as a single-statement pedestal for one substantial plant, since the weight and visual presence of the concrete tends to compete with, rather than complement, a busier grouped display.
15. Wire Basket Vertical Stand
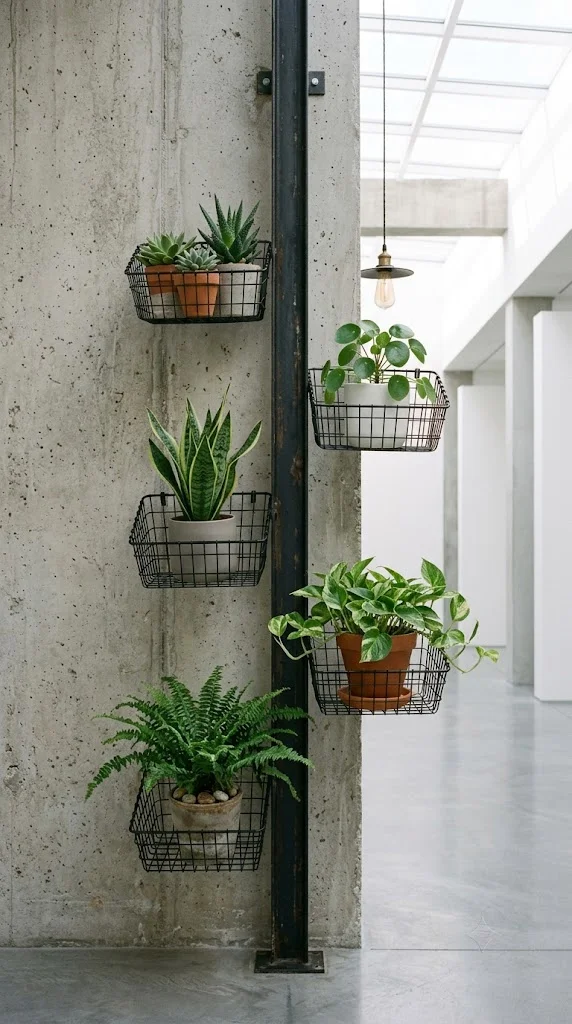
Wire baskets, mounted at staggered heights on a simple vertical support, create an airy, industrial-feeling display that doesn’t visually compete with the plants themselves.
I’d attach 2-3 wire baskets to a mounted board or two vertical support posts using zip ties or small hose clamps threaded through the basket’s existing wire frame, positioning each basket at a slightly different height and depth for visual movement rather than a flat, even row. Black or dark-finished wire baskets tend to read as more intentionally styled than raw galvanized wire.
Small to medium potted plants that don’t require much soil depth work best here, since standard wire baskets typically need a liner or a plastic pot insert to actually hold soil without spilling through the gaps.
My Professional Guide to Building a Plant Stand That Lasts
Before choosing a design, I always think about weight first — both the plant’s mature weight and the stand’s actual load capacity. A young snake plant in a 6-inch pot weighs very little, but that same plant in a mature 14-inch pot filled with wet soil can weigh 30-40 lbs or more, and a lot of decorative stands simply aren’t built to hold that safely long-term.
Material choice should follow the plant’s environment next. Outdoor or high-humidity indoor stands need rot-resistant wood (cedar, teak) or naturally weatherproof materials like metal or concrete, while a lightweight indoor stand in a dry room has far more flexibility in material choice.
Finally, I’d always test stability before fully loading a finished stand — give it a firm nudge from the side with an empty pot in place before committing your actual plants to it. A stand that wobbles under a light test load will only get less stable as the plant grows heavier over time.
Conclusion
A DIY plant stand can be as simple as a stacked crate arrangement or as involved as a poured concrete pedestal, but the ones that genuinely last come down to matching material and structure to the actual weight of a mature plant, not just a small starter pot. Choose a design that fits your space, skill level, and the specific plant you’re building for, and it’ll hold up well beyond the first season.
Frequently Asked Questions
What is the best material for an outdoor plant stand?
Rot-resistant wood like cedar or teak, along with metal or concrete, hold up best against consistent outdoor moisture exposure, compared to untreated softwoods which deteriorate faster.
How much weight can a DIY plant stand hold?
This varies significantly by design and material — cinder block and concrete stands handle the most weight reliably, while rope-suspended or wire designs are better suited to lighter pots unless built with rated hardware for heavier loads.
Can I build a plant stand without power tools?
Yes — designs like the vintage stool conversion, macrame hanging tower, and cinder block stack require minimal to no power tools, making them good options if you don’t have a full workshop setup.
How do I keep a wooden plant stand from water damage?
Apply an exterior wood sealant, especially to any surface in direct contact with pots, and consider a thin liner, tray, or saucer under pots to prevent standing water from sitting directly on the wood over time.