Small Kitchen Organization Ideas: 14 Ways to Reclaim Every Inch
I’ve organized more small kitchens than I can count, and the ones that actually stay organized long-term have a few things in common — they use vertical space most people overlook, they’re built around how you actually cook rather than how a showroom kitchen looks, and every solution has a real dimension behind it, not just a vague “add storage” suggestion. Below are 14 small kitchen organization ideas, each with the specifics — sizing, placement, and real cost — that make the difference between a system that works and one that looks nice for a week.
1. The One-In, One-Out Declutter Method
Before adding any storage, I’d clear every cabinet and drawer completely and sort items into three piles: daily essentials, occasional use, and donate/discard. This single step solves more small-kitchen clutter than any organizer product will.
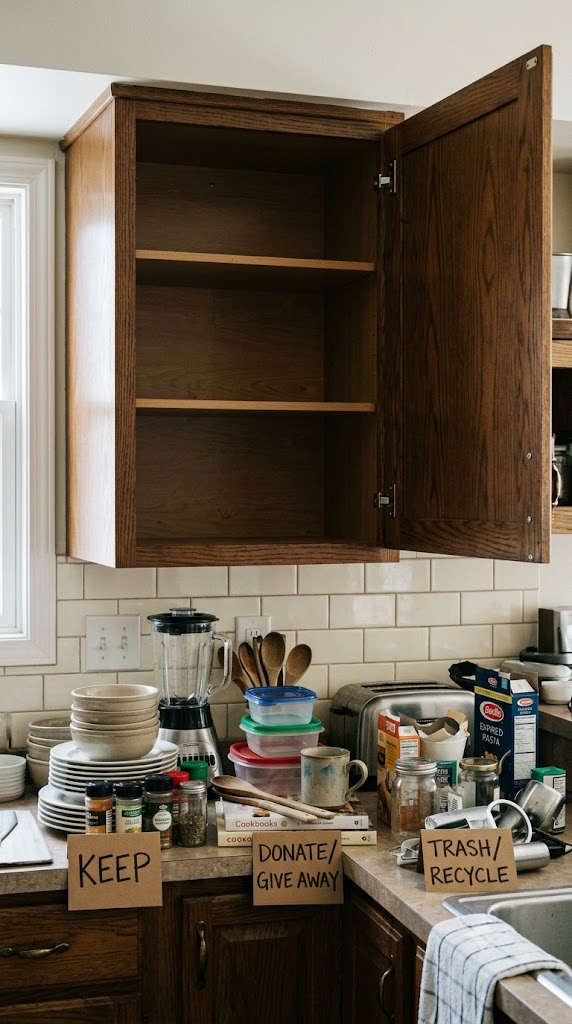
Going forward, apply a one-in, one-out rule specifically for kitchen tools — when you buy a new gadget, something comparable leaves. This keeps the decluttering from being a one-time event that slowly creeps back to where it started within a few months.
Cost: free. Time: 2-4 hours for a full kitchen.
2. Toe-Kick Drawers
The gap beneath your lower cabinets — the toe-kick space — is typically 3-4 inches tall and almost always empty. Retrofit or purchase toe-kick drawer units sized to fit this space, and use them for genuinely flat items: baking sheets, cutting boards, or a rolled-up stack of reusable bags.
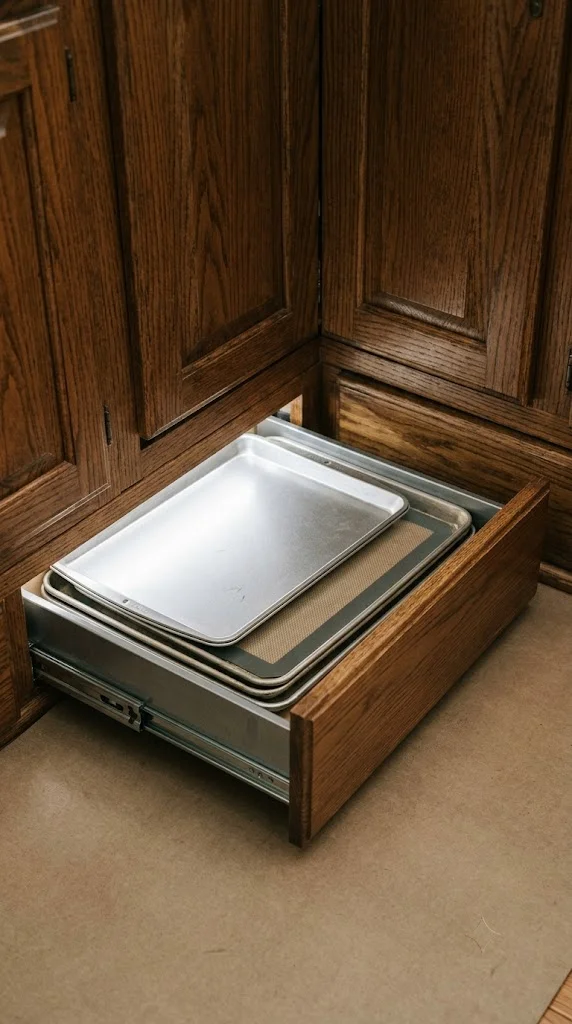
This is a bigger project than most on this list since it usually involves cutting into existing cabinetry, so I’d consider it for a longer-term kitchen investment rather than a weekend fix.
Cost: mid-to-high ($150-400 professionally installed, less for a DIY kit.)
3. Pegboard for Pots, Pans, and Tools
A pegboard mounted on an open wall near the stove lets you hang pots, pans, and frequently used tools vertically, freeing up an entire lower cabinet that would otherwise store cookware.
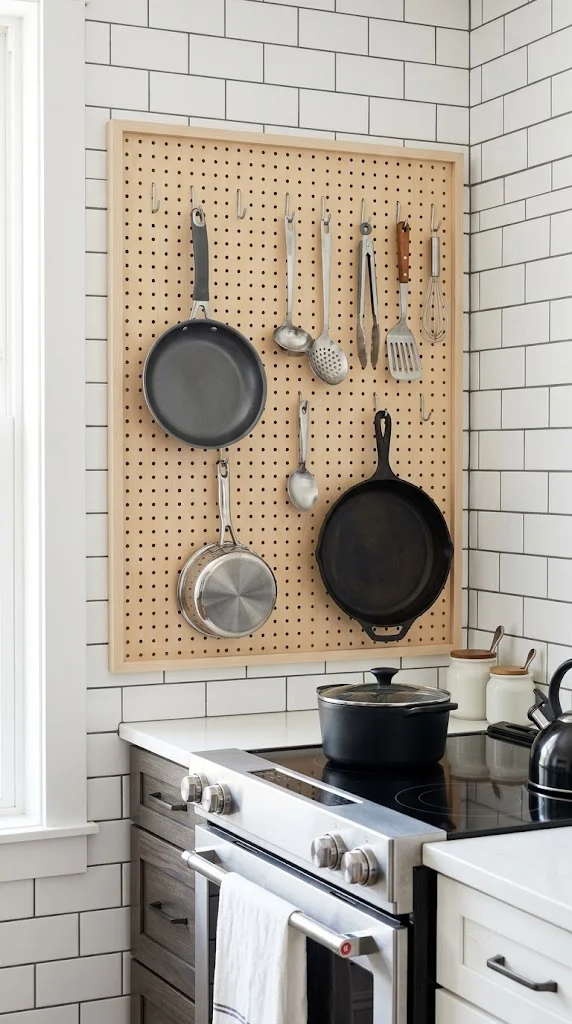
I’d size the pegboard to roughly 2×3 feet for a small kitchen — large enough for genuine capacity, small enough not to dominate the wall. Standard pegboard hooks hold most cookware without needing specialty hardware.
Cost: low ($25-60 for board and hooks.)
4. Magnetic Knife Strip and Spice Holders
Mounting a magnetic strip for knives, and magnetic spice tins on the side of a refrigerator or cabinet, clears a knife block and a spice drawer simultaneously — two of the more space-hungry items in most small kitchens.
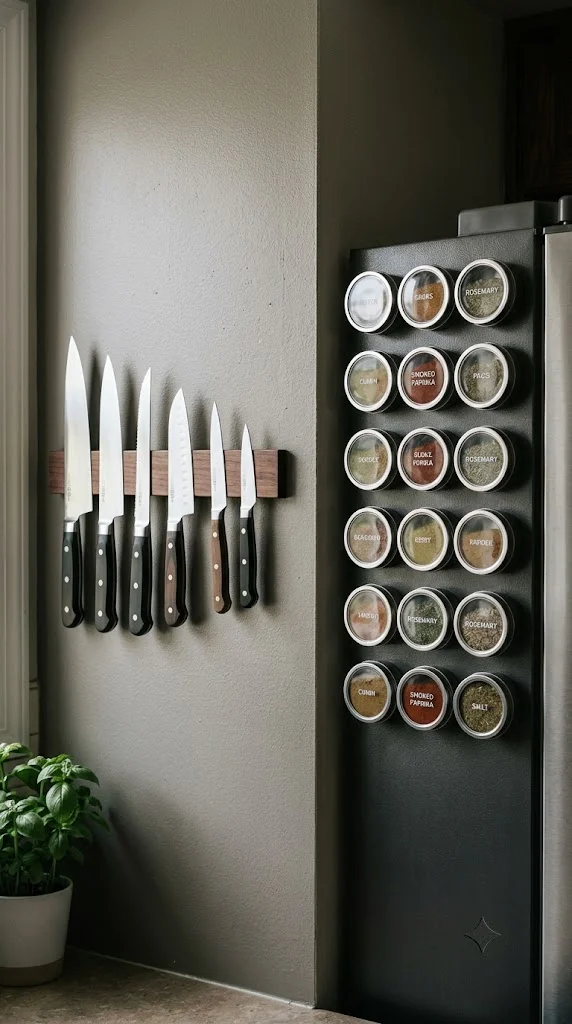
I’d mount the knife strip at least 6 inches above the counter for safety and easy visibility, away from the stove where heat and steam can affect blade edges over time.
Cost: low ($15-40 for a strip, $20-50 for a magnetic spice tin set.)
5. Over-the-Cabinet-Door Storage
The inside of cabinet doors is genuinely wasted space in most kitchens. Slim wire or plastic organizers mounted here hold cleaning supplies, lids, cutting boards, or foil and wrap boxes.
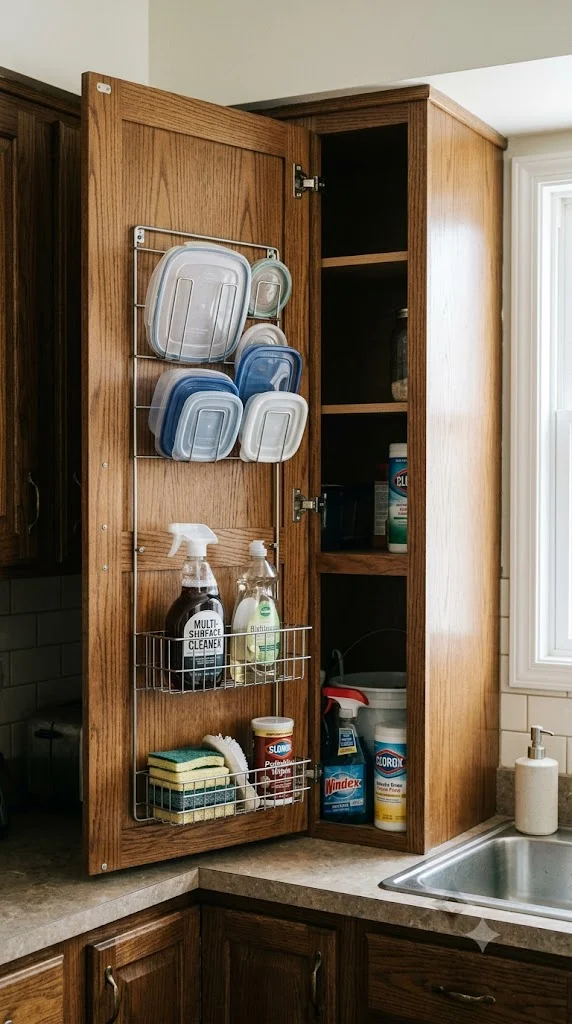
I’d measure the door’s interior clearance before buying — most standard doors accommodate a 3-4 inch deep organizer without interfering with shelves inside, but it’s worth confirming before purchasing.
Cost: low ($15-35 per door organizer.)
6. Pull-Out Spice Rack for Narrow Gaps
A narrow gap between the fridge and a wall or cabinet (even as slim as 3-6 inches) can fit a pull-out pantry or spice rack, turning genuinely dead space into real storage.
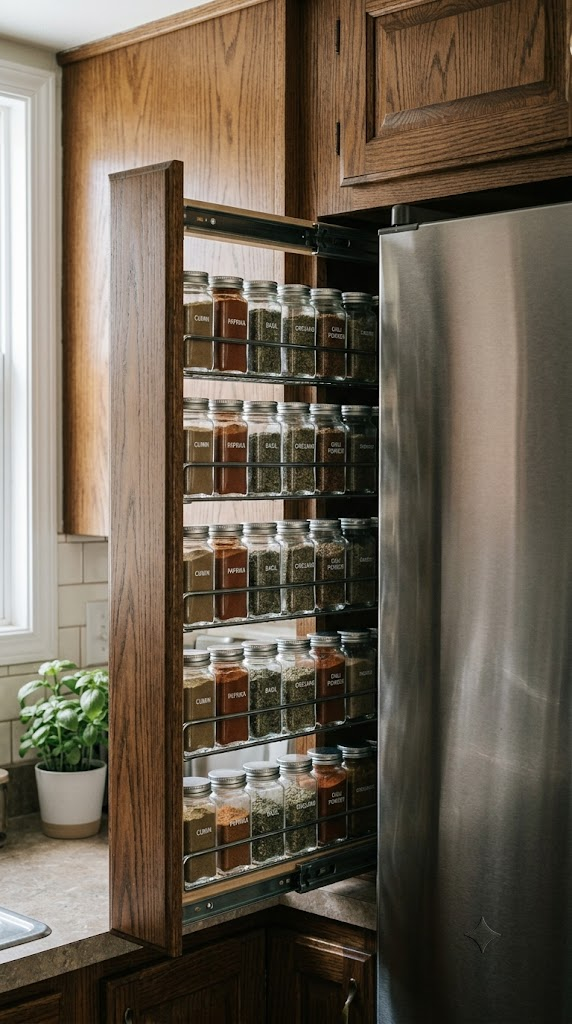
I’d measure this gap carefully before buying, since pull-out units come in fairly specific width increments and a poor fit either won’t slide smoothly or will leave visible gaps on either side.
Cost: mid ($60-150 depending on size and material.)
7. Drawer Dividers and Inserts
Standard drawers waste significant depth when items are piled loosely. Adjustable drawer dividers let you customize compartment sizes for cutlery, utensils, or small tools, while deeper drawers benefit from stackable or tiered inserts for pots and lids.
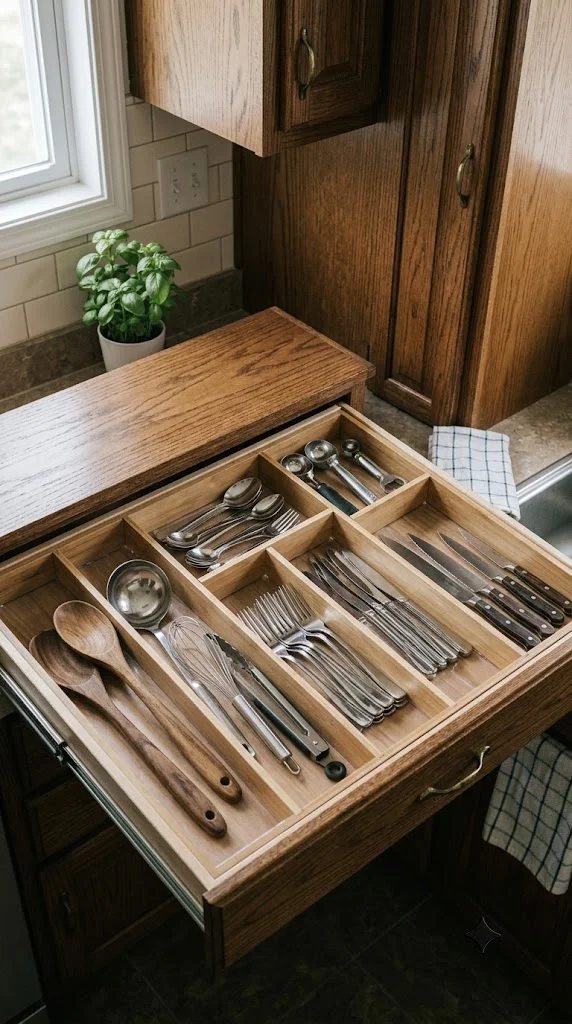
I’d measure your drawer’s interior dimensions before buying inserts, since a divider system that’s slightly too large won’t fit, and one too small will shift around and lose its organizing function.
Cost: low-to-mid ($20-60 per drawer.)
8. Adjustable Shelf Risers
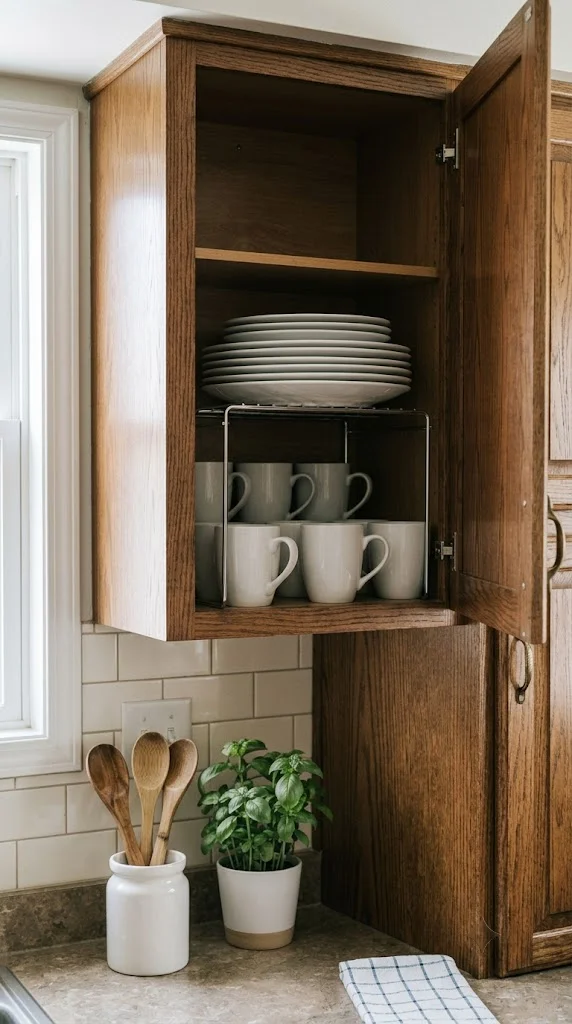
A shelf riser adds a second usable level inside a cabinet without any permanent modification, letting you stack plates or cups on top while still accessing items underneath.
I’d choose risers with adjustable height and width specifically, since fixed-size risers often don’t fit every cabinet uniformly, and a kitchen typically has more than one cabinet depth to accommodate.
Cost: low ($10-30 per riser, typically sold in sets.)
9. Lazy Susan for Corner Cabinets
Corner cabinets are consistently the most wasted storage space in any kitchen, small or large. A lazy Susan (rotating turntable) makes the full depth of a corner cabinet genuinely accessible instead of losing items in the back.
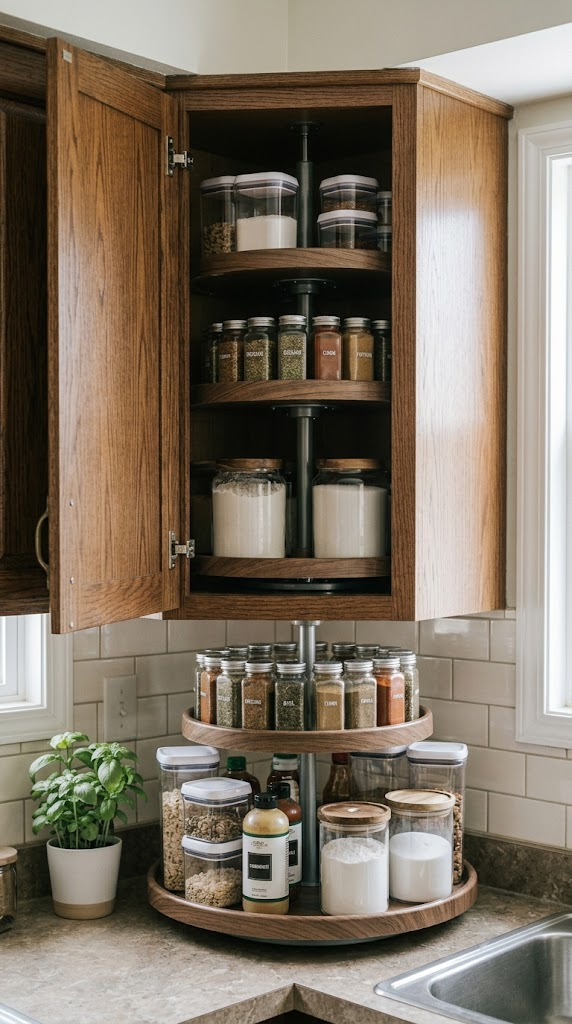
I’d measure your corner cabinet’s interior diameter before buying — most lazy Susans come in 18-22 inch diameter options, and an undersized turntable leaves usable space unaddressed around its edges.
Cost: low-to-mid ($20-50.)
10. Slim Rolling Cart for Narrow Gaps
A narrow rolling cart (as slim as 6-10 inches wide) slides into gaps between appliances or cabinets, providing genuine extra storage or workspace that didn’t previously exist in the room’s layout.
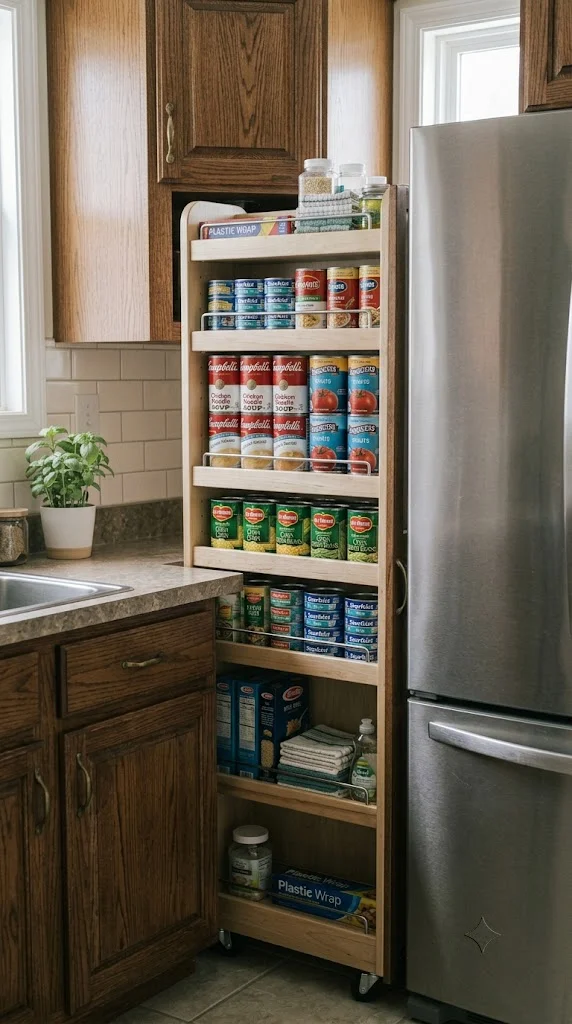
I’d choose a cart with locking wheels specifically, so it stays in place during regular use but can still be moved when needed for deep cleaning or rearranging.
Cost: low-to-mid ($30-80.)
11. Over-the-Sink Cutting Board or Drying Rack
The space directly above your sink is functional real estate that most kitchens leave empty. An over-sink cutting board creates instant extra counter space, while an over-sink drying rack keeps dishes off the counter entirely while they dry.
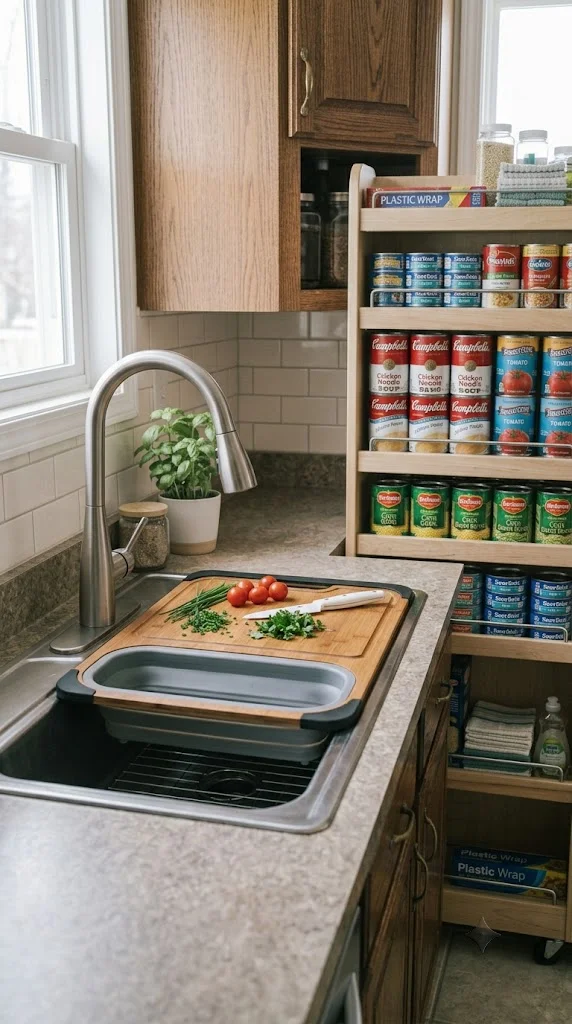
I’d measure your sink’s exact width before purchasing either option, since these are designed to rest on the sink’s edges and won’t sit securely if sized incorrectly.
Cost: low ($20-45.)
12. Zone-Based Layout Planning
Rather than storing items by category alone, organize your kitchen into functional zones — prep, cook, clean, and store — keeping each zone’s tools together near where that task actually happens.
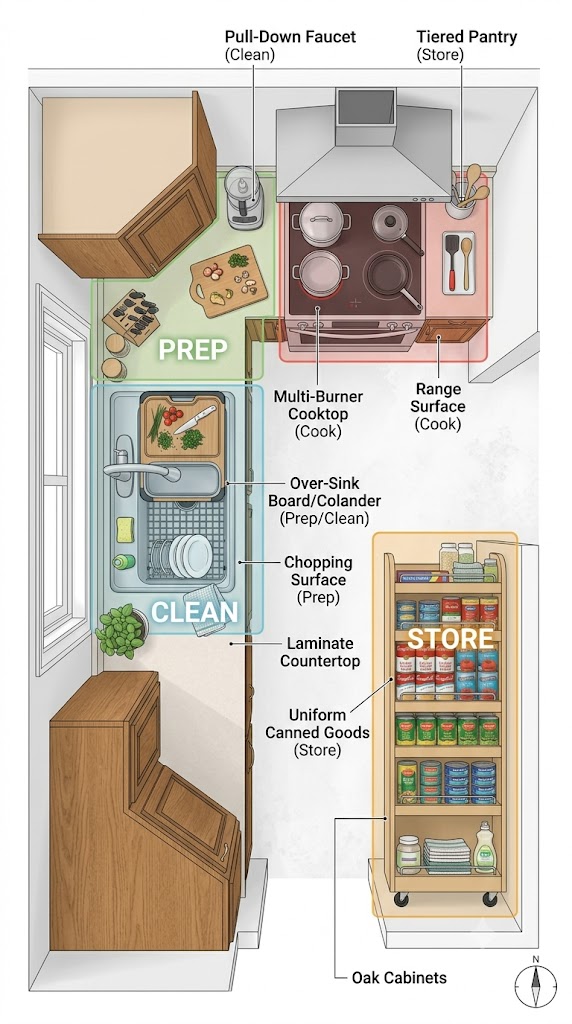
This mirrors the classic “kitchen work triangle” concept, adapted for small spaces: knives and cutting boards near your prep area, pots and oils near the stove, and cleaning supplies under or near the sink. This reduces the back-and-forth that makes a small kitchen feel more chaotic than its size alone would suggest.
Cost: free — this is a reorganization strategy, not a purchase.
13. Clear, Matching Containers for Pantry Items
Transferring pantry staples (rice, pasta, flour, cereal) into clear, uniform containers does two things at once: it makes contents genuinely visible at a glance, and it eliminates the irregular shapes and sizes of original packaging that waste shelf space.
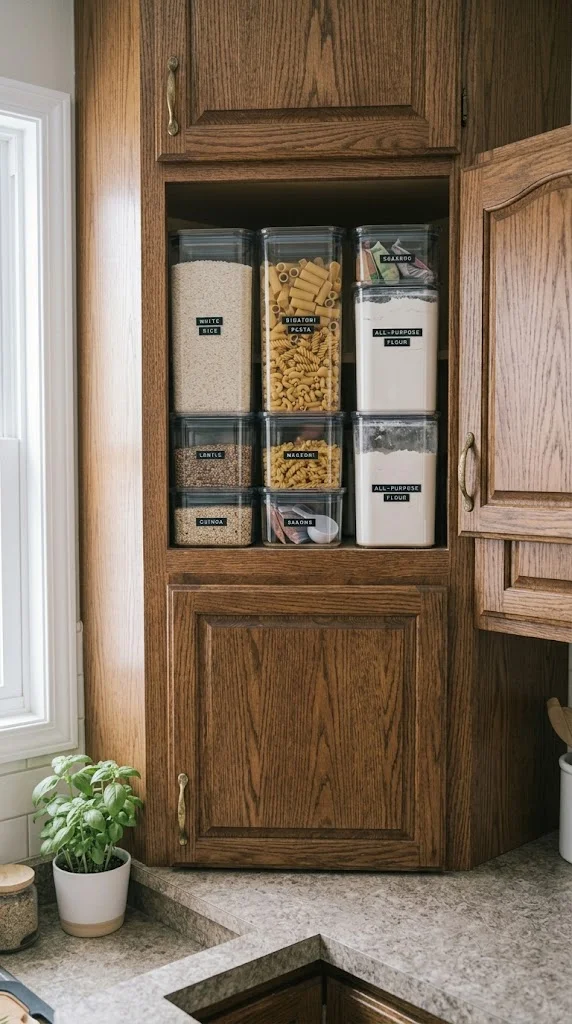
I’d choose stackable, square or rectangular containers over round ones specifically, since square shapes use shelf space more efficiently than round containers leave gaps between them.
Cost: mid ($40-100 for a full pantry set, depending on quantity and material.)
14. Hooks and Rails for Vertical Display Storage
Mounted rails with S-hooks, installed under a cabinet or along an open wall, let you hang mugs, utensils, or even small potted herbs, combining storage with a genuinely decorative element rather than hiding everything behind closed doors.
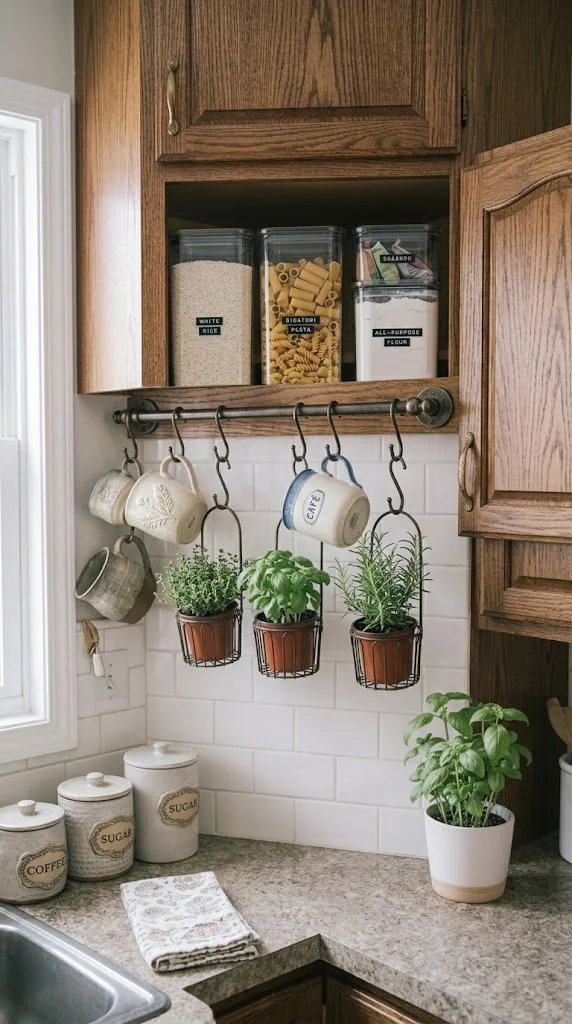
I’d limit this to items you use frequently and don’t mind displaying, since a rail overloaded with every kitchen tool starts to look cluttered rather than intentionally styled.
Cost: low ($15-40 for a rail and hook set.)
My Professional Guide to Organizing a Small Kitchen
I always start with a full declutter before buying any organizing products — it’s tempting to solve clutter by purchasing storage, but adding organizers to a kitchen full of unused items just organizes the clutter rather than removing it. Clear everything out first, and you’ll often find you need less storage than you initially thought.
From there, I prioritize vertical and genuinely dead space (toe-kicks, cabinet door interiors, corner cabinets, narrow gaps) before investing in furniture-level solutions like rolling carts, since these often solve more storage need per dollar spent.
Finally, I’d build the kitchen around zones that match how you actually cook, not a generic layout. A household that bakes often needs baking tools accessible near the counter they roll dough on, not filed away by “category” in a cabinet across the room — the zone should follow your actual workflow, not an abstract organizing principle.
Conclusion
A small kitchen doesn’t need more square footage to function well — it needs storage that matches its actual dead space (corners, toe-kicks, door interiors, narrow gaps) and a layout organized around how you really cook. Start with a genuine declutter, then work through the vertical and hidden-space solutions before considering bigger investments, and even a genuinely tiny kitchen can function like a much larger one.
Frequently Asked Questions
What is the cheapest way to organize a small kitchen?
Decluttering costs nothing and solves the most clutter overall. After that, magnetic strips, drawer dividers, and shelf risers are among the lowest-cost storage additions, typically under $50 each.
How do I organize a small kitchen with no pantry?
Use over-the-cabinet-door organizers, a pull-out rack in any narrow gap between appliances, and clear stackable containers on existing shelves to maximize what pantry-adjacent storage you do have.
What’s the best storage solution for corner kitchen cabinets?
A lazy Susan (rotating turntable) makes the full depth of a corner cabinet accessible, since corners are otherwise one of the most commonly wasted spaces in any kitchen.
How much does it cost to organize a small kitchen?
A full organization overhaul using budget-friendly options (dividers, risers, magnetic strips, a lazy Susan) typically runs $150-400 total; larger investments like toe-kick drawers or built-in pull-outs can push that higher.