
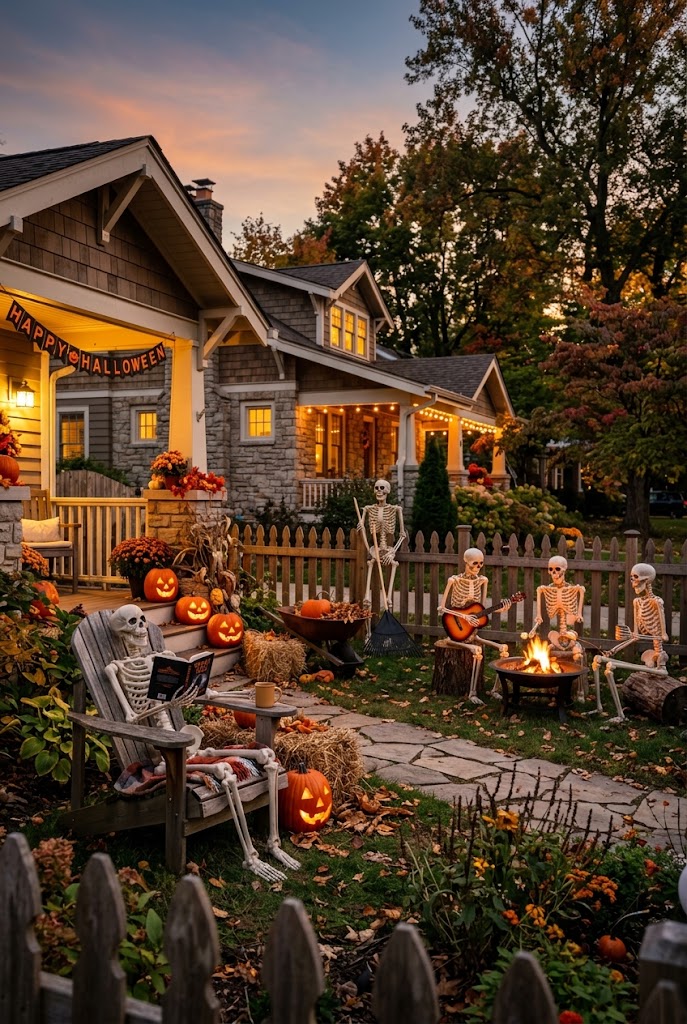
16 Halloween Yard Ideas for a Spooky Outdoor Makeover
The best Halloween yard ideas build one connected scene instead of scattering random props. A haunted graveyard entrance, a spooky ghost-lined walkway, and a single oversized spider are the three highest-impact, lowest-cost setups for most yards. Small yards should focus on the walkway or porch alone rather than the whole lawn.
I’ve spent years styling seasonal outdoor displays, and the yards that actually stop people on the sidewalk are never the most expensive ones — they’re the most composed ones. Below are 16 Halloween yard ideas, each with the materials, the exact steps, a styling tip, and a ready-to-use image prompt so you can visualize the scene before you buy a single prop.
At-a-Glance Comparison Table
| Idea | Best For | Difficulty | Approx. Budget |
|---|---|---|---|
| Haunted Graveyard Entrance | Front yards | Easy | $$ |
| Spooky Walkway With Ghosts | Narrow paths | Easy | $ |
| Halloween Chain Fence Scene | Yards with fencing | Easy | $ |
| Giant Spider Attack | Porches, rooflines | Easy | $$ |
| Haunted House Walkway | Front paths | Medium | $$ |
| Creepy Pumpkin Graveyard | Front lawns | Medium | $$ |
| Floating Witch Landing | Small corners | Easy | $ |
| Eerie Tree With Hanging Decorations | Yards with mature trees | Easy | $ |
| Skeleton Family Front Yard | Front lawns | Medium | $$ |
| Sidewalk Halloween Decor With Lanterns | Small/urban yards | Easy | $ |
| Foggy Witch Garden | Garden beds | Medium | $$ |
| Monster Mouth Entry | Porches, gates | Medium | $$ |
| Full Halloween-Themed Graveyard Scene | Large front yards | Advanced | $$$ |
| Budget DIY Yard From Recycled Materials | Any yard, tight budget | Easy | $ |
| Layered Porch Steps Display | Porches with steps | Easy | $ |
| Spooky Sign Trail | Walkways, driveways | Easy | $ |
Haunted Graveyard Entrance
A haunted graveyard entrance works because of spacing, not volume — uneven tombstone heights and visible gaps read as eerie, while perfectly even rows read as staged. I always start with the tallest markers at the back and let the smaller ones drift toward the walkway, so the eye travels naturally into the scene.
What You’ll Need: foam or plastic tombstones, faux bones, artificial moss, low outdoor lights, black fabric or netting.
Quick How-To: Place tallest tombstones toward the back, smaller ones near the walkway. Tuck bones and moss around the bases, then angle low lighting so it throws shadows across the display rather than flattening it.
Styling Tip: Tilt two or three tombstones slightly off-vertical instead of standing every piece straight.
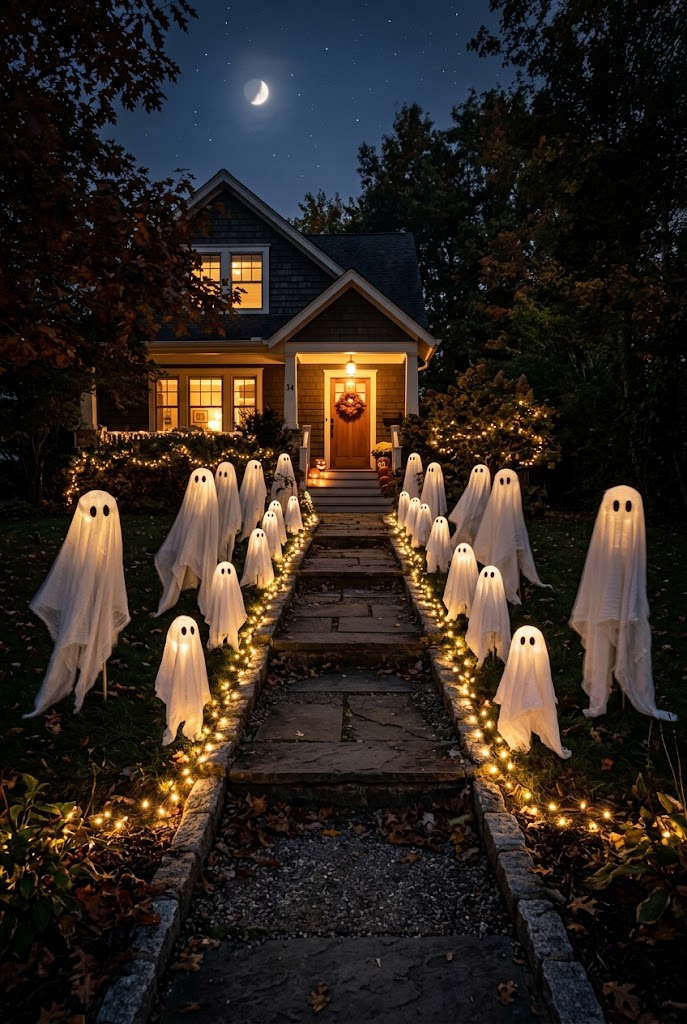
2. Spooky Walkway With Ghosts
White fabric ghosts placed with irregular spacing along a path catch moonlight in a way that reads as “floating” rather than staged. The trick is restraint — three or four ghosts with real space between them will always look creepier than eight crowded together.
What You’ll Need: white lightweight fabric, small garden stakes, wire or foam forms, outdoor-safe lights, black markers.
Quick How-To: Build simple ghost forms from wire or foam, drape fabric over each, and secure firmly at varying distances along both sides of the walkway.
Styling Tip: Fewer ghosts with more breathing room beats a crowded row every time.
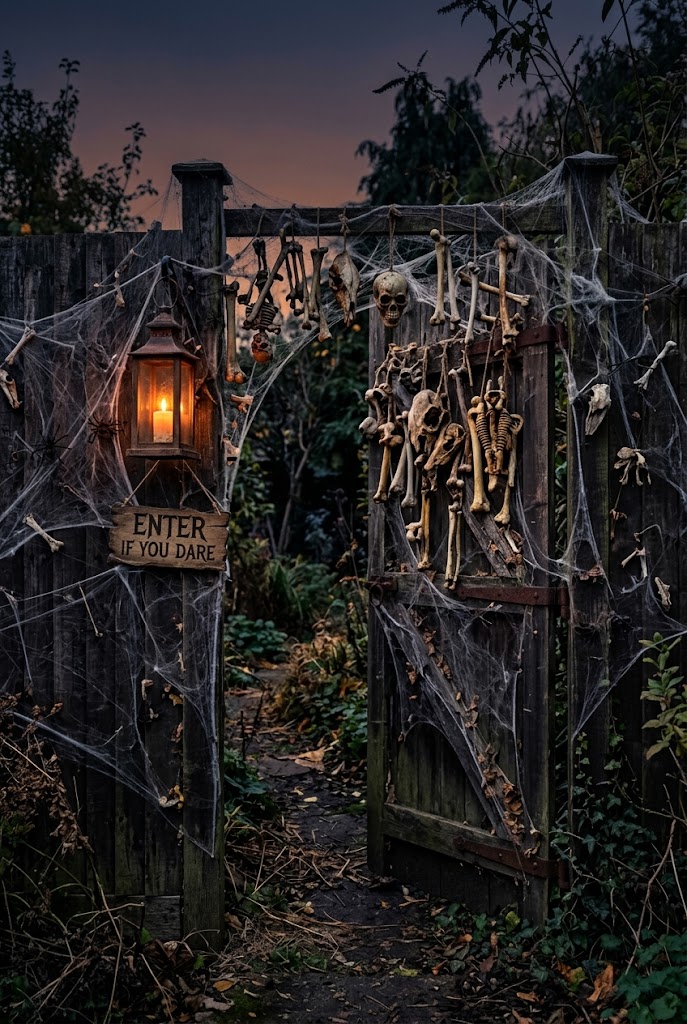
3. Halloween Chain Fence Scene
An existing fence is one of the easiest surfaces to theme because you’re not starting from nothing. I concentrate the heaviest detail — webbing, hanging bones, weathered props — around one section near the entrance, and leave the rest of the fence visible so the addition looks deliberate rather than overwhelming.
What You’ll Need: chain-link or garden fencing, faux spider webs, plastic bones, hanging decorations, outdoor clips.
Quick How-To: Stretch webbing loosely across one fence section, attach props at varying heights, and clip everything securely so wind can’t pull pieces loose.
Styling Tip: Keep the center of the fence darker and busier than the outer edges.
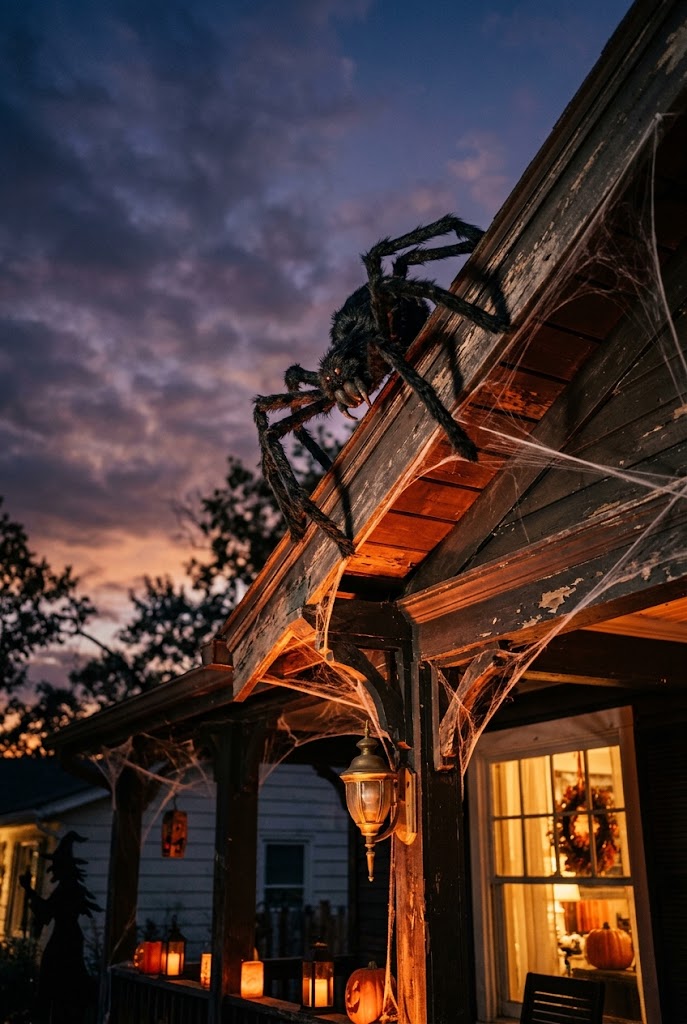
4. Giant Spider Attack
One oversized spider outperforms a dozen small ones because it reads clearly from the street and gives the display an obvious focal point. I position it at an angle rather than head-on, so it looks like it just arrived rather than being mounted for display.
What You’ll Need: large faux spider, faux webbing, black rope or wire, outdoor attachment clips, optional spotlight.
Quick How-To: Secure the spider to a sturdy structure — porch beam, tree limb, or roofline — then add loose webbing around its legs and the surrounding surface.
Styling Tip: Angle the spider toward the walkway so it’s the first thing visitors notice.
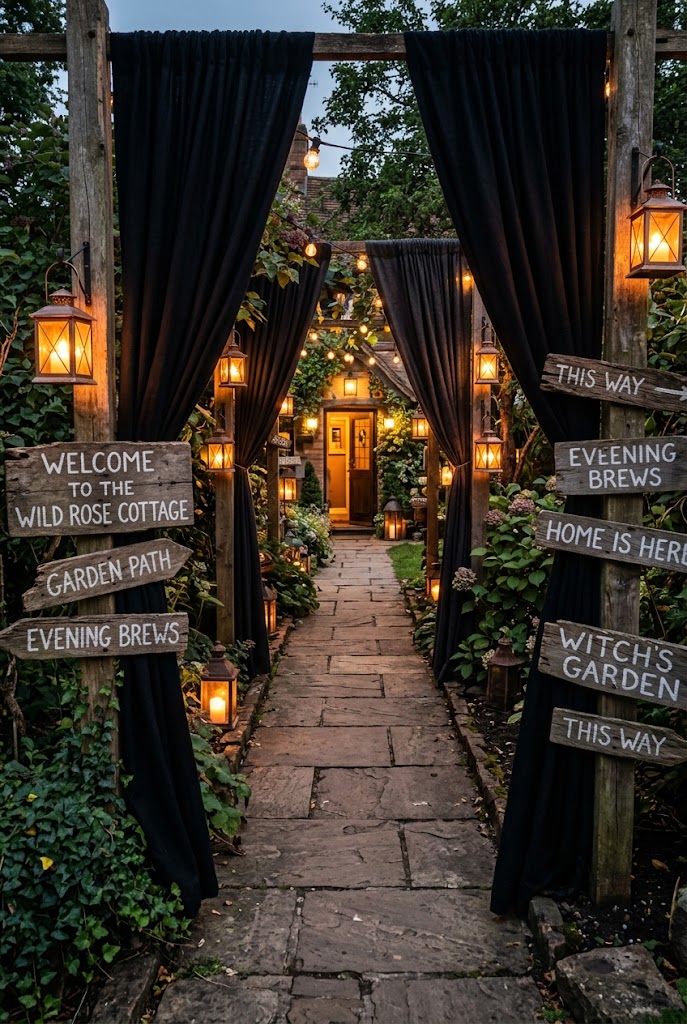
5. Haunted House Walkway
Turning a plain front path into a short “haunted transition zone” only works if the walking surface itself stays completely clear — the atmosphere lives in the edges, not underfoot. Lanterns spaced at intervals do more work here than any single large prop.
What You’ll Need: outdoor lanterns, wooden signs, black fabric, faux branches, small Halloween props.
Quick How-To: Set lanterns at even intervals along the path, then build small vignettes between them using branches, crooked signs, and fabric, keeping every piece outside the footpath.
Styling Tip: Use warm, low lighting instead of bright floodlights to protect the mood.
6. Creepy Pumpkin Graveyard
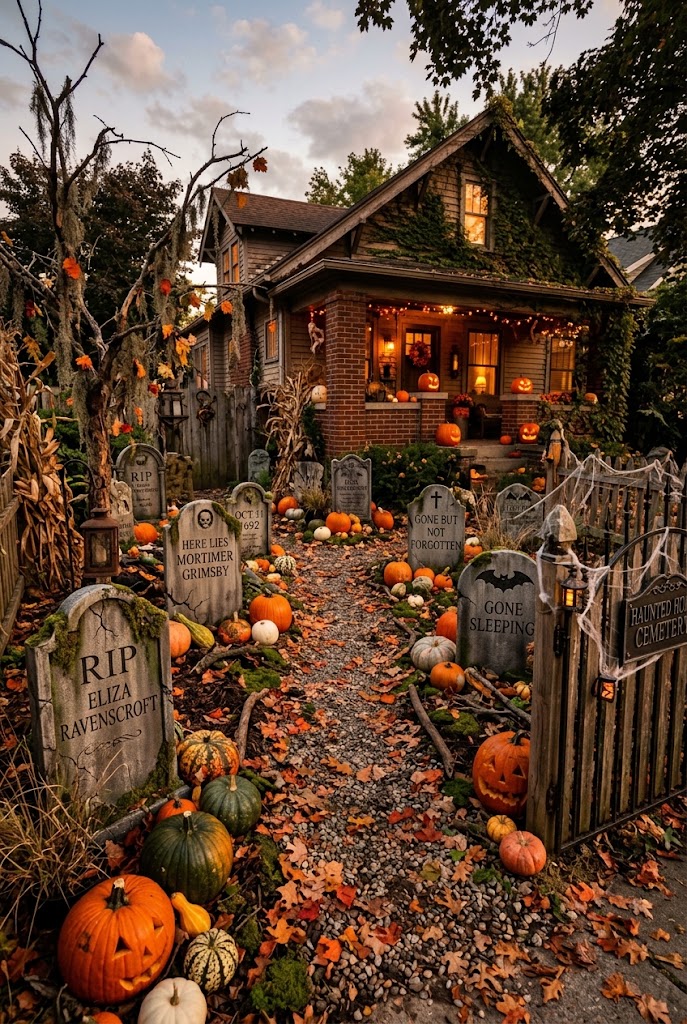
Mixing pumpkins with tombstones adds depth that a pumpkin-only display can’t achieve. I use three to five different pumpkin sizes and colors, then let some sit upright, some tilted, and a few partially hidden behind the markers.
What You’ll Need: pumpkins in varied sizes, small tombstones, faux moss, leaves or branches, outdoor lighting.
Quick How-To: Set the tombstones first as your structure, then build pumpkins in around the bases, filling small gaps with moss and fallen leaves.
Styling Tip: Vary pumpkin size and color rather than repeating the same shape throughout.
7. Floating Witch Landing
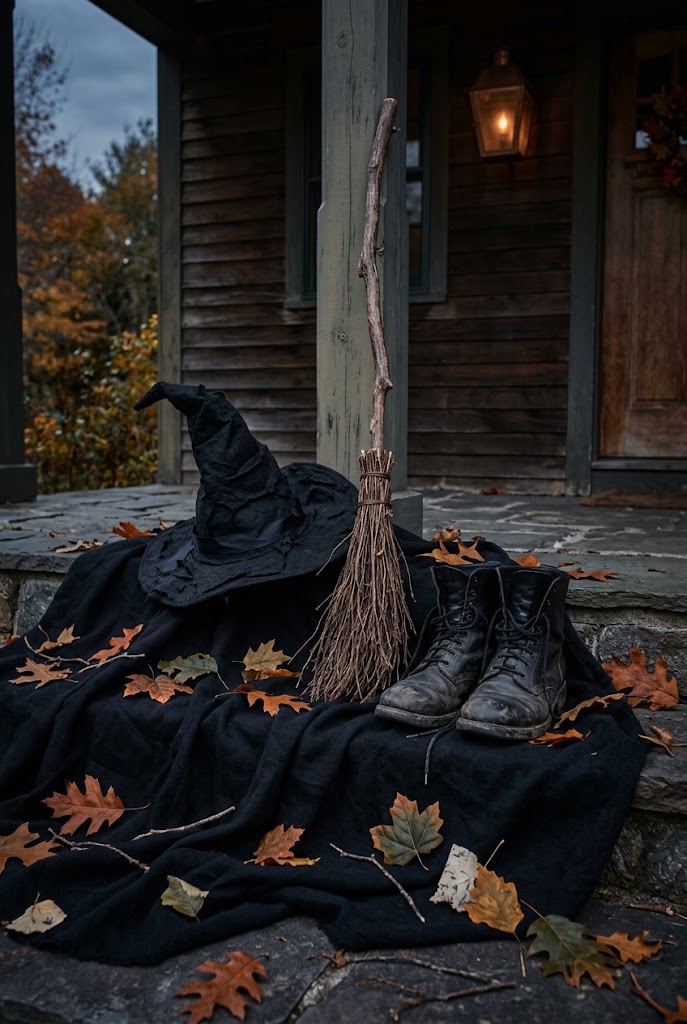
This is the highest style-to-cost ratio idea on the list — a hat, broom, boots, and dark fabric arranged like a witch just landed, with no full figure required. Positioning it near a tree or porch corner gives the “story” a structure to lean on.
What You’ll Need: witch hat, old broom, black boots, dark fabric, artificial leaves.
Quick How-To: Arrange boots beneath draped fabric, place the broom diagonally beside them, and set the hat slightly off-center. Secure lightweight pieces against wind.
Styling Tip: Leave open space around the scene so the “character” stays easy to read at a glance.
8. Eerie Tree With Hanging Decorations
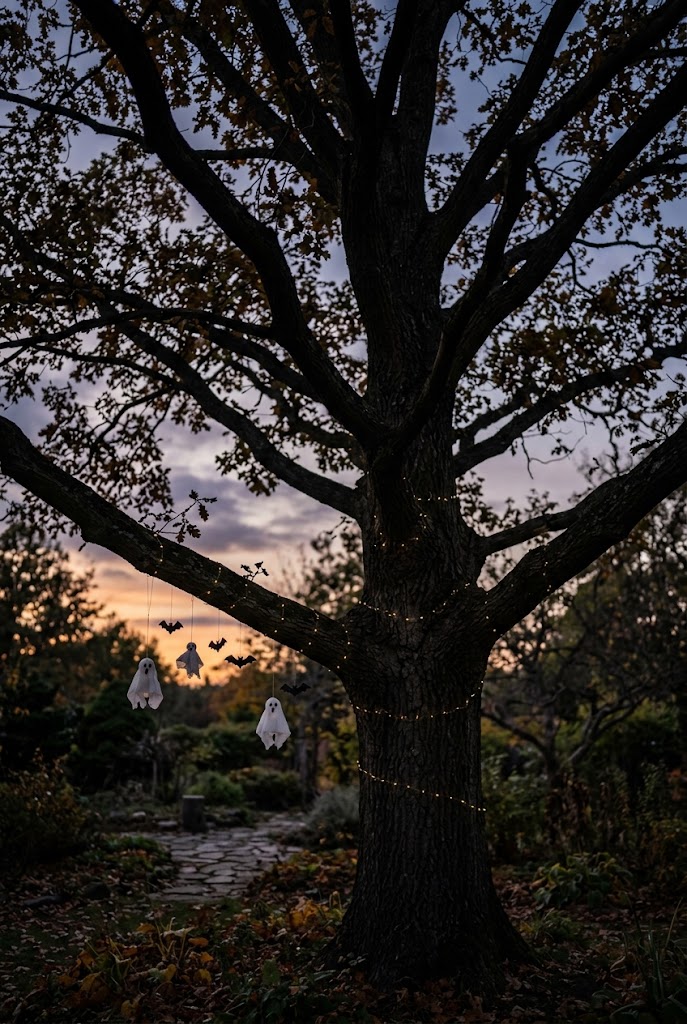
A mature tree does most of the work for you. Hanging ghosts, bats, and small skeletons from a few visible limbs — not every branch — keeps the tree’s natural silhouette intact while adding depth after dark.
What You’ll Need: lightweight Halloween decorations, outdoor string lights, weather-resistant cord, tree-safe hanging ties.
Quick How-To: Choose two or three sturdy, visible branches. Hang decorations at different heights and secure everything so nothing swings into a walkway.
Styling Tip: One larger piece hung low with several smaller ones higher up creates better visual balance than uniform sizing.
9. Skeleton Family Front Yard
Skeletons posed as though they’re mid-activity — one seated, one pointing, one leaning against a fence — create a small visual story that holds attention far longer than a row of identical standing figures.
What You’ll Need: plastic skeletons, outdoor chairs, simple household props, garden stakes, weather-resistant ties.
Quick How-To: Assign each skeleton a distinct pose or activity, secure them in natural positions, and add a household-style prop (a chair, a mug, a newspaper) to sell the scene.
Styling Tip: Stagger heights across the group rather than lining figures up evenly.
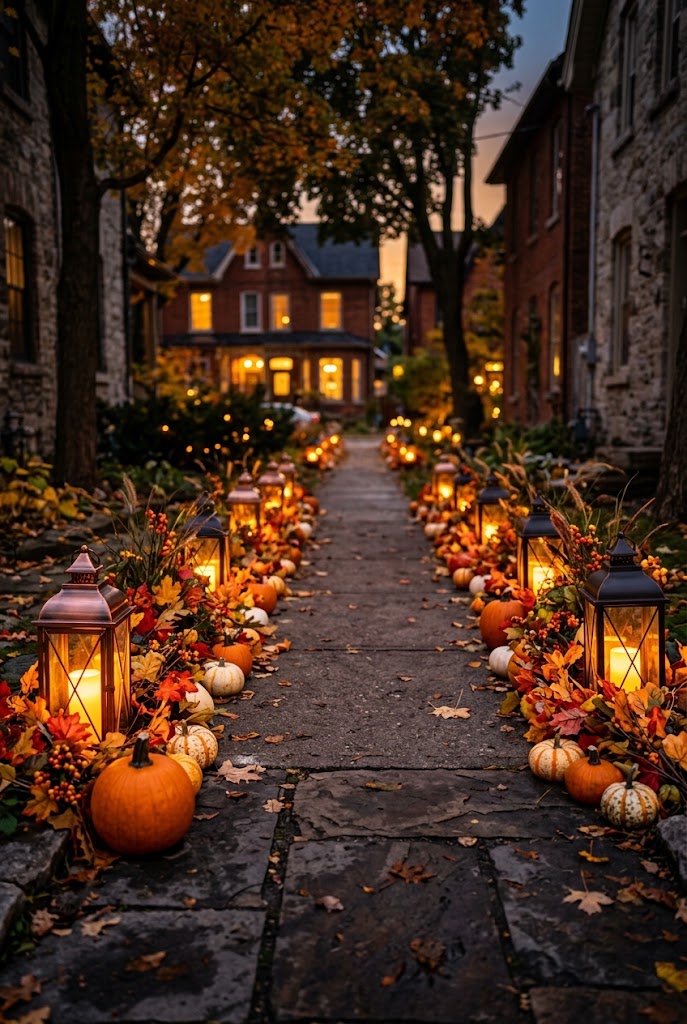
10. Sidewalk Halloween Decor With Lanterns
For small or narrow yards, decorating the sidewalk instead of the whole lawn keeps things visually organized. Repeating the same lantern style and one or two materials throughout is what makes a compact space look finished rather than sparse.
What You’ll Need: battery-operated lanterns, small pumpkins, autumn branches, decorative signs, outdoor-safe containers.
Quick How-To: Line lanterns along one or both sides of the sidewalk, group pumpkins and branches between them, and keep the walking path fully open.
Styling Tip: Repeat the same lantern style end to end for a more polished, cohesive look.
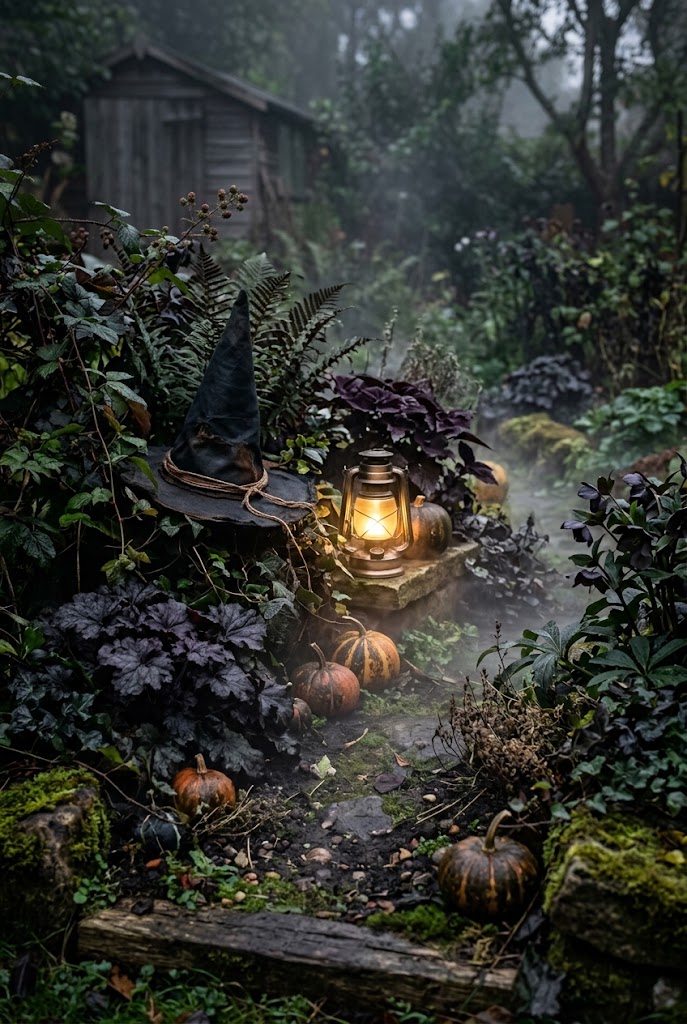
11. Foggy Witch Garden
Working with an existing garden bed instead of covering it keeps this idea budget-friendly and natural-looking. Dark foliage acts as a background that makes orange pumpkins and small lit props pop without extra clutter.
What You’ll Need: pumpkins, faux branches, witch-themed props, battery lanterns, dark garden fabric.
Quick How-To: Build around the plants already in the bed, placing tall branches toward the back, then layer pumpkins and small props toward the front with discreet lighting.
Styling Tip: Let existing greenery stay visible as part of the design rather than hiding it.
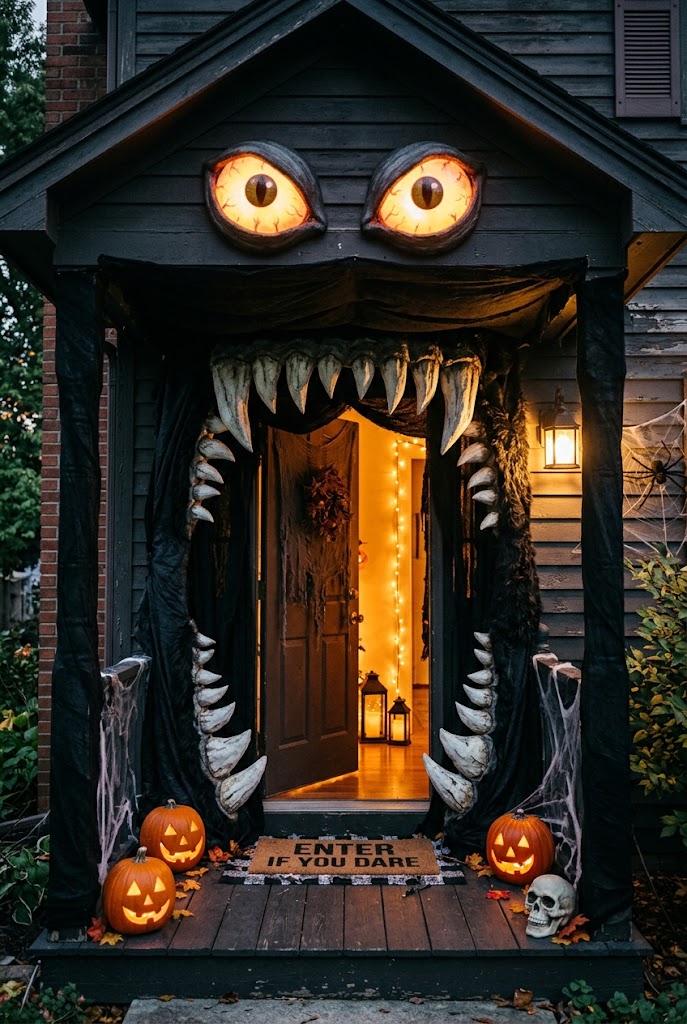
12. Monster Mouth Entry
A porch opening, gate, or covered entry gives this idea a natural frame — oversized eyes and foam teeth turn the entrance itself into the decoration. Keep the “mouth” wide enough that people can walk through without brushing against props.
What You’ll Need: black fabric, foam teeth, oversized craft eyes, outdoor clips, battery lighting.
Quick How-To: Drape black fabric around the entrance opening, attach foam teeth along the edges and eyes above, and secure everything so the doorway stays fully clear.
Styling Tip: Make the eyes slightly uneven for a more playful, handmade look.
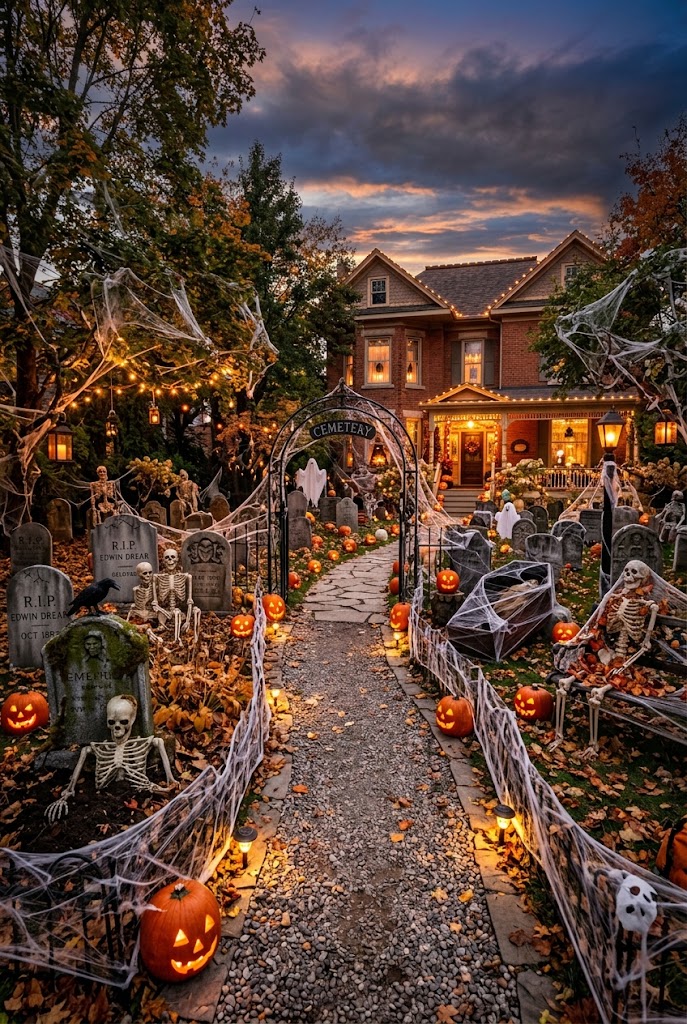
13. Full Halloween-Themed Graveyard Scene
This is the combination idea for larger yards — tombstones as the base layer, then skeletons, pumpkins, branches, webs, and a defined walkway layered in. The biggest mistake I see is using every prop at once; building distinct zones with open space between them almost always looks more convincing from the street.
What You’ll Need: tombstones, skeletons, pumpkins, faux webs, branches, outdoor lighting, ground stakes.
Quick How-To: Plan the layout before placing anything. Build from back to front, establish the walkway first, then add skeletons, pumpkins, webs, and lighting in smaller groupings.
Styling Tip: Choose one focal point and let every other element support it instead of competing with it.
14. Budget DIY Yard From Recycled Materials
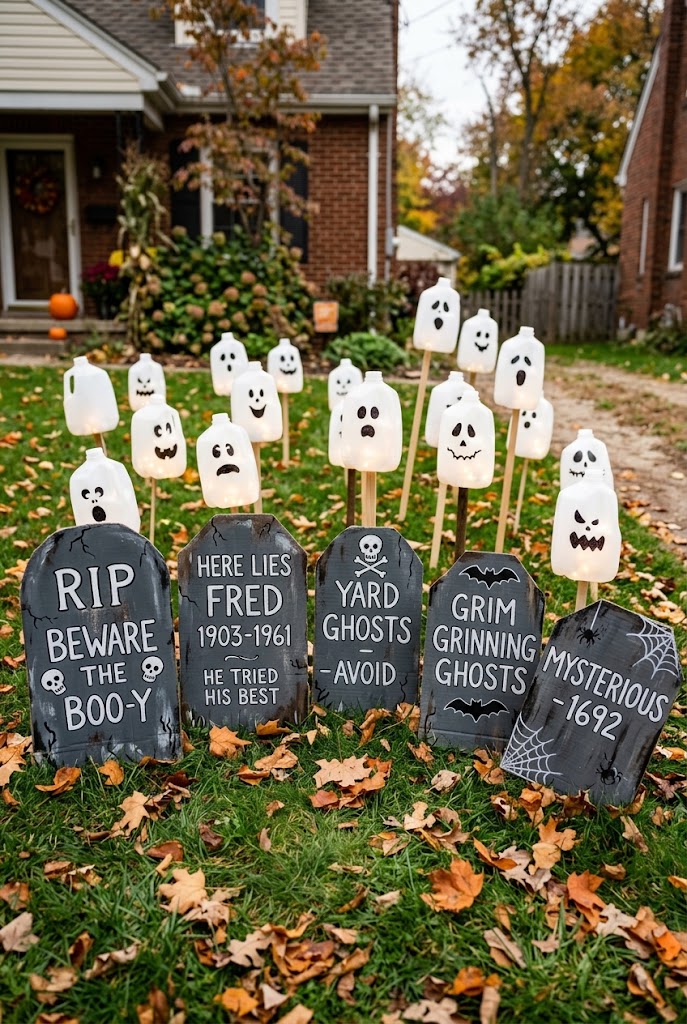
You don’t need store-bought props for an effective display — cardboard tombstones painted gray, milk-jug ghosts, and twisted wire hangers for spiders cost almost nothing and hold up fine for one season. This is the idea I recommend most for renters or first-time decorators testing the hobby.
What You’ll Need: cardboard, gray and black paint, empty milk jugs, wire hangers, garden stakes.
Quick How-To: Cut and paint cardboard into tombstone shapes, paint milk jugs white with simple faces for ghosts, and bend wire hangers into spider leg shapes. Stake everything securely.
Styling Tip: Matte gray and black paint reads far more convincingly than glossy finishes under outdoor lighting.
15. Layered Porch Steps Display
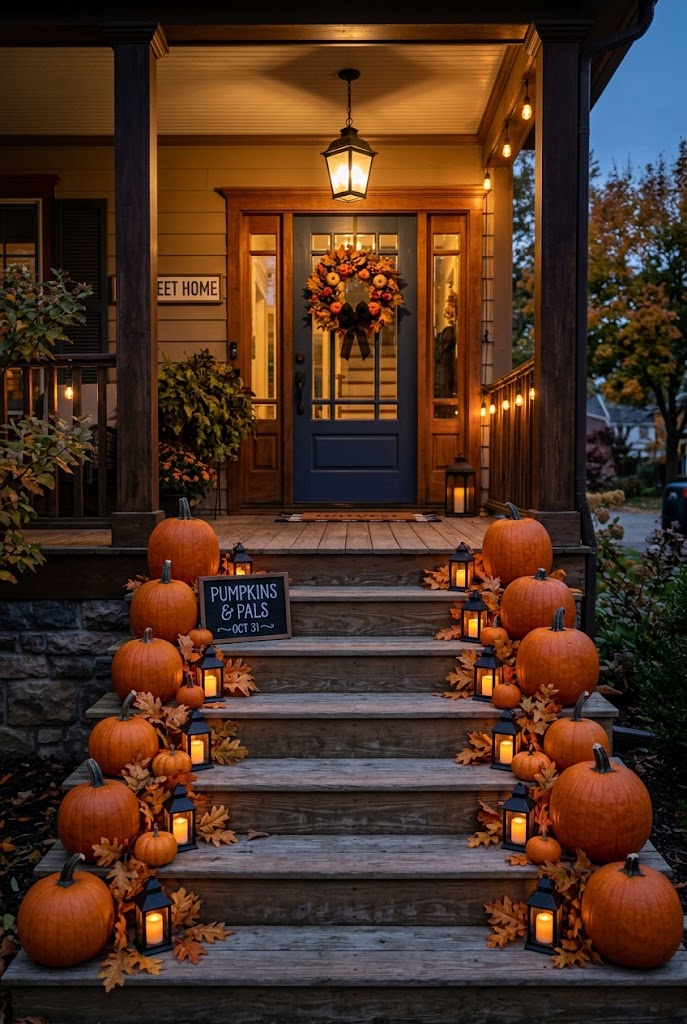
Porch steps are an underused display surface. Lining each step with a slightly different pumpkin size or lantern style creates a layered look that’s visible from the street without touching the lawn at all — ideal for townhouses or yards with no front grass.
What You’ll Need: pumpkins in graduated sizes, small lanterns, faux autumn leaves, mini gourds.
Quick How-To: Place the largest pumpkins on the bottom step, decreasing in size toward the top, and tuck lanterns and leaves into the gaps between them.
Styling Tip: Keep one consistent color story (all orange and black, for example) so the steps read as one display rather than scattered items.
16. Spooky Sign Trail
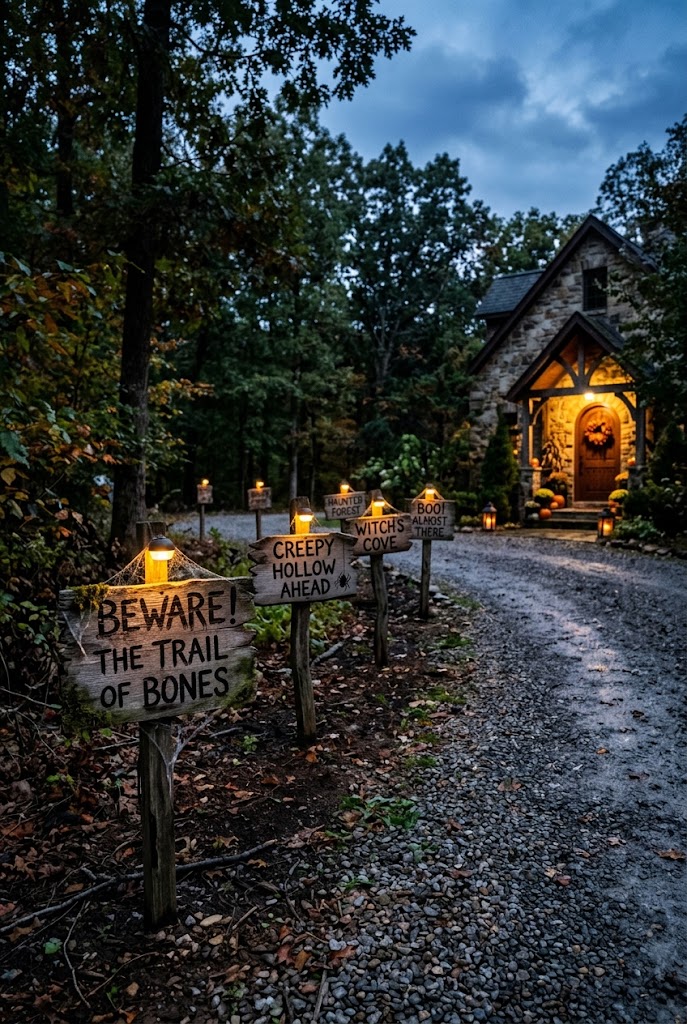
A trail of small, crooked wooden signs with playful warnings (“Turn Back,” “Beware,” “Enter If You Dare”) leading from the sidewalk to the door adds narrative without needing a single figure. It’s especially effective for driveways or longer walkways that would otherwise feel empty.
What You’ll Need: wooden or foam board signs, black and white paint, garden stakes, small string lights.
Quick How-To: Paint three to five signs with short spooky phrases, stake them at slight angles along the path, and add a small light near each so they’re readable after dark.
Styling Tip: Vary the tilt angle of each sign so the trail feels handmade rather than mass-produced.
My Professional Guide
Budget Breakdown by Display Size
- Small (sidewalk/porch only): $30–$80 — lanterns, a few pumpkins, one focal prop
- Medium (front yard section): $80–$200 — tombstones, skeletons, lighting, fencing accents
- Large (full front yard scene): $200–$500+ — combined graveyard, multiple focal points, professional-grade lighting
Weatherproofing Basics
Use ground stakes and outdoor-rated clips on anything with fabric or paper components — wind is the single biggest cause of Halloween display failure. Battery-operated lights rated for outdoor use should always be chosen over indoor string lights, even for a one-night display.
Timing Your Setup
Most materials (fabric, foam props, painted signs) hold up for 3–4 weeks outdoors without visible wear. I recommend setting up 2–3 weeks before Halloween so the display has time to “settle” — slightly weathered props often look more convincing than freshly placed ones.
Safety Checklist
Keep all walkways completely clear of stakes, cords, and props. Route extension cords along edges, not across foot traffic. Avoid open-flame lanterns near dry leaves or fabric.
Conclusion
A great Halloween yard doesn’t need to be expensive or packed with decorations — it needs one strong focal point, a few supporting layers, and enough open space for each detail to actually be seen. Whether you start with a simple ghost-lined walkway or build toward a full graveyard scene, the displays people remember are the ones that feel personal, not store-bought. Pick two or three ideas from this list that fit your space and budget, and build outward from there.
FAQ
How can I decorate a small yard for Halloween?
Focus on one strong area — the walkway, porch, or a single garden bed — instead of the whole lawn. A smaller number of well-spaced decorations reads better than a lawn covered in props.
How do I make Halloween yard decorations look less cluttered?
Stick to a limited color palette and repeat two or three materials throughout, such as pumpkins, black fabric, and warm lighting. Leave intentional empty space between larger displays.
What Halloween decorations work best outdoors?
Weather-resistant tombstones, plastic skeletons, faux pumpkins, outdoor-rated lighting, and securely staked fabric hold up best. Always confirm electrical decorations are rated for outdoor use before setup.
How can I make a Halloween walkway look spooky?
Frame the path with low lighting, pumpkins, ghosts, or branches while keeping the walking surface completely clear. Uneven spacing looks more natural than symmetrical placement.
How do I keep outdoor Halloween decorations from blowing away?
Use ground stakes, outdoor-rated clips, weighted bases, and weather-resistant ties. Tall or lightweight fabric pieces need the most extra support in windy conditions.
How much does a DIY Halloween yard display typically cost?
A small sidewalk or porch display runs $30–$80, a medium front-yard scene runs $80–$200, and a full combined graveyard display can run $200–$500 or more depending on lighting and prop count.