15 DIY Wood Trellis Ideas: Designs You Can Actually Build
I’ve built more than a few trellises over the years, and the ones that actually last aren’t necessarily the prettiest in photos — they’re the ones built with the right wood, proper spacing, and joints that can handle a season of wind and a fully grown vine’s weight. Below are 15 DIY wood trellis designs, each with real build details: wood type, rough dimensions, and the plants that actually suit the structure, so you’re not just looking at a pretty picture but working from something you can genuinely build this weekend.
1. Classic Ladder Trellis
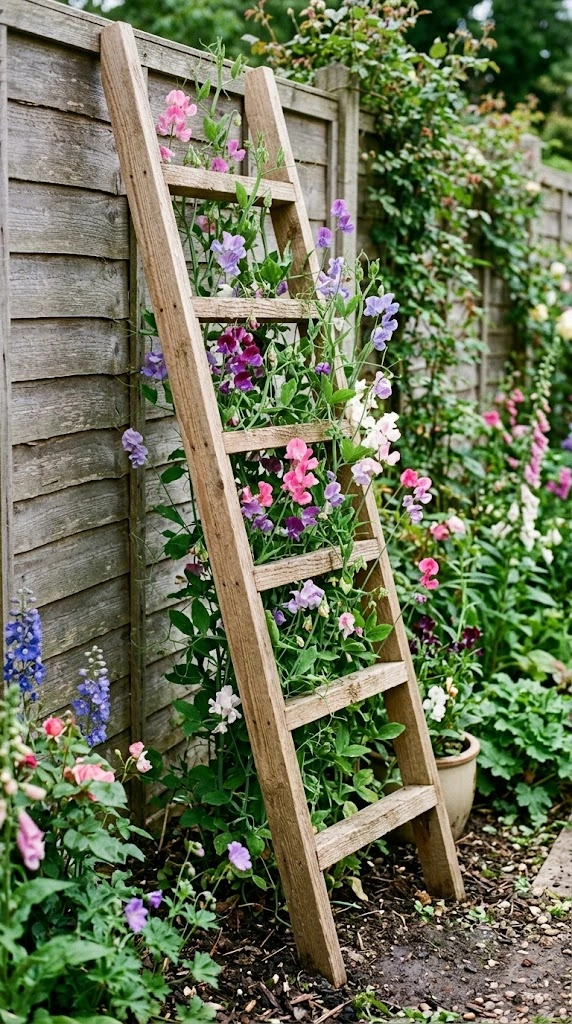
This is the easiest true beginner build on this list, and a great starting point if you’ve never built a trellis before. Take two 6-8 foot 1×2 cedar or redwood boards as the side rails, then attach horizontal 1×2 “rungs” every 8-10 inches using exterior wood screws and a bit of exterior wood glue at each joint for extra hold.
Cedar and redwood are both naturally rot-resistant, which matters more here than in almost any other outdoor project since the base of the trellis sits in constant soil moisture. I’d still treat the bottom 12 inches with an exterior wood sealant before installing, even with a rot-resistant species, since that’s where moisture exposure is heaviest.
Angle the ladder slightly against a wall or fence (roughly 10-15 degrees off vertical) rather than standing it perfectly upright — this gives it more stability against wind without needing to sink posts into the ground. For a freestanding version, sink the base 12-18 inches into the soil and set it in quick-setting concrete for real stability.
This design works especially well for lighter climbers like sweet peas, morning glories, or beans, which don’t put excessive weight strain on the rung joints. For heavier climbers like grapes or climbing roses, I’d upgrade to 2×2 lumber throughout rather than 1×2.
2. Diamond Lattice Panel
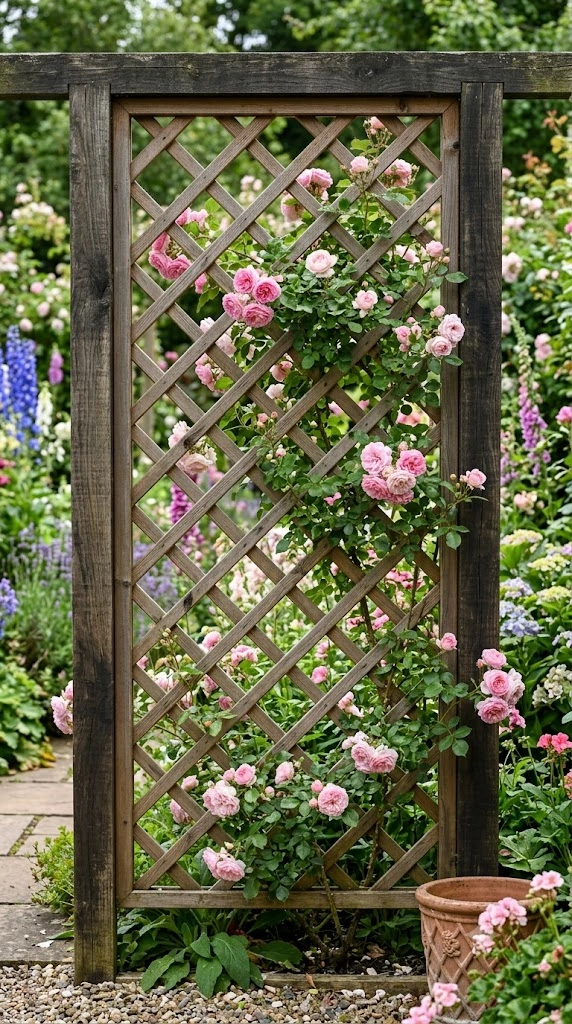
A diamond lattice panel is more time-intensive than a ladder trellis, but it creates significantly more surface area for a climbing plant to grip, which matters for vines that don’t twine well around a single vertical support.
Build this using 1×2 strips set at a 45-degree angle in both directions, overlapping at each intersection point. I’d pre-drill at every crossing point before screwing to avoid splitting the thinner strips, and use a single exterior screw at each intersection rather than nails, which tend to work loose under repeated wind movement over a season.
Frame the whole lattice with a sturdier 2×2 or 2×4 border, since the diamond strips alone aren’t structurally rigid without a supporting frame around them. This is the design roses and clematis both take to especially well, since the tight diamond spacing gives their tendrils frequent gripping points.
Approximate build time: a full weekend for a 4×6 foot panel, given the number of intersection points to secure.
3. Fan-Shaped Trellis
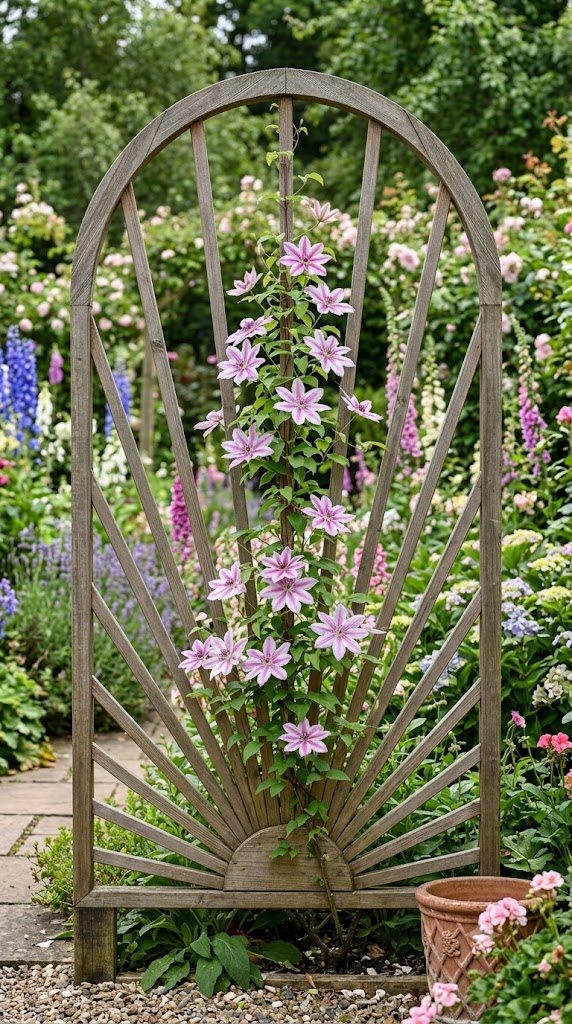
A fan trellis spreads narrow wood strips outward from a single base point, creating a dramatic, symmetrical shape that works especially well as a single statement piece rather than a full privacy screen.
I’d cut 8-10 strips of 1×1 or 1×2 cedar, each roughly 4-5 feet long, and fan them out from a shared base board, securing each strip individually with screws through the base. The spacing between strips at the top should be roughly 4-6 inches for the fan effect to read clearly from a distance.
This design is best suited to a single strong climber trained up the center, like a clematis or a well-supported climbing rose, rather than a dense, sprawling vine that would obscure the fan shape entirely once established.
4. Obelisk Pyramid Trellis
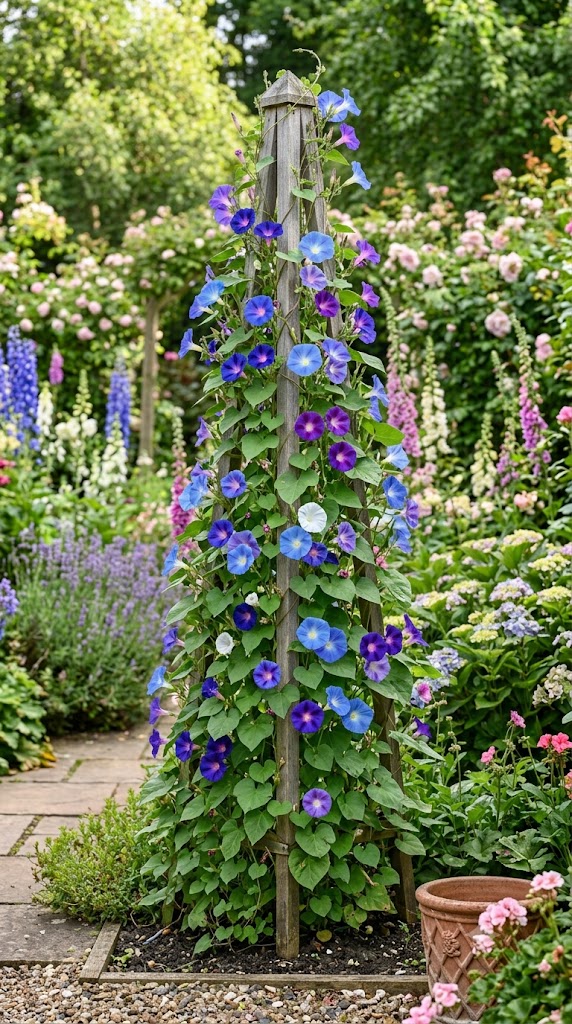
An obelisk is a freestanding, four-sided pyramid structure that rises above a flower bed, giving vertical height to a planting area without needing a wall or fence for support.
Build four legs from 1×2 or 2×2 cedar, roughly 6-7 feet long, angled inward slightly and joined at the top with a simple butt joint reinforced with a wood screw through each leg into a small square cap piece. Connect the four legs with horizontal cross-strips every 12-15 inches for climbing support and structural rigidity.
Because this design is freestanding rather than wall-supported, I’d sink each leg 8-12 inches into the soil for stability, or attach a wider base frame if you’d prefer to avoid digging. Sweet peas, beans, and morning glories all do especially well here, since the four-sided design gives them support from every angle as they climb.
5. Modern Horizontal Slat Screen
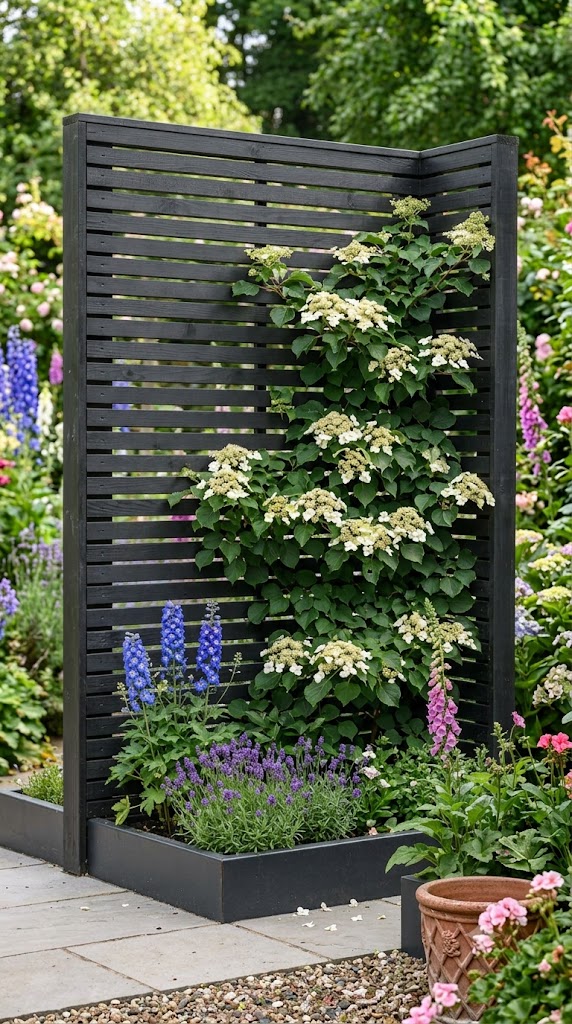
For a cleaner, more architectural look, horizontal slats read as more contemporary than a traditional diagonal lattice. This design doubles well as a light privacy screen in addition to plant support.
Use 1×4 or 1×6 cedar boards mounted horizontally with roughly 1-1.5 inch gaps between each board, attached to two vertical 2×4 support posts. I’d stain the boards a dark charcoal or black for the cleanest modern look, using an exterior-rated stain rather than paint, which tends to chip faster under direct sun exposure over multiple seasons.
This style suits looser, trailing vines like ivy or climbing hydrangea better than tightly-twining plants, since the wider horizontal gaps don’t give twining tendrils as many gripping points as a tighter lattice would.
6. Arched Garden Gateway
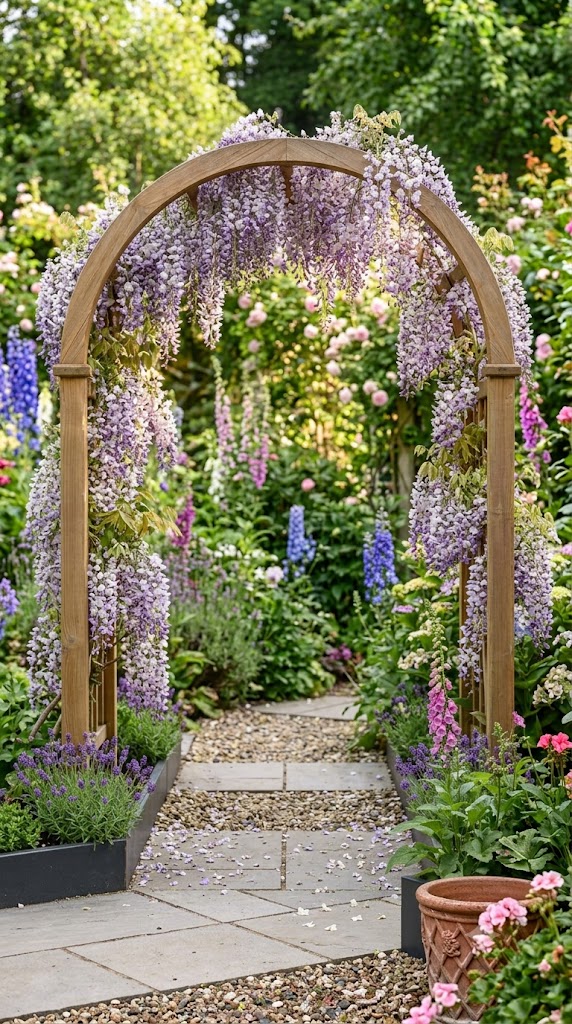
An arched trellis creates a walk-through entrance point, typically straddling a garden path, and works well planted with vines on both sides that eventually meet overhead.
This is a more advanced build — I’d use 2×4 pressure-treated lumber for the two vertical sides, then create the curved top using thin, flexible strips of cedar (roughly 1/4 inch thick) laminated together in layers and bent around a temporary curved form until the glue sets. If bending wood isn’t practical, a simpler alternative is joining several straight angled segments to approximate a curve.
Grapes, wisteria, and climbing roses are classic choices here, though wisteria in particular becomes very heavy over time, so I’d use pressure-treated 4×4 posts rather than 2×4 if wisteria is the intended plant.
7. Hexagon Honeycomb Panel
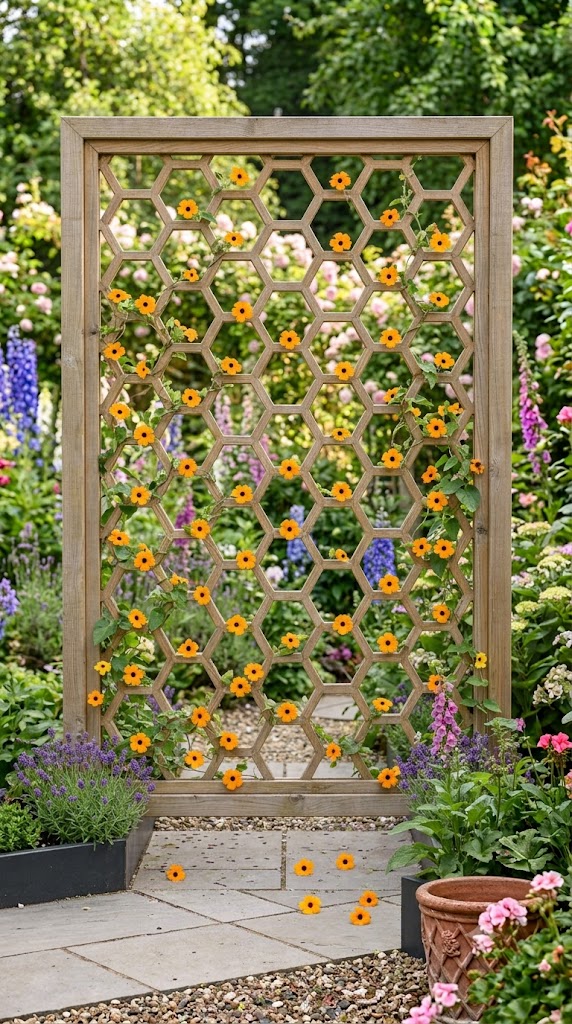
A honeycomb pattern is more visually distinctive than a standard lattice, built from repeating hexagon shapes rather than simple crossing strips.
Each hexagon is built from six equal-length strips (roughly 6-8 inches each) joined at 120-degree angles — this is easier to achieve with a miter saw set to cut consistent angles rather than by hand. Individual hexagons are then joined edge-to-edge to build up the full panel, framed by a sturdier border.
This is genuinely one of the more labor-intensive builds on this list, so I’d reserve it for a smaller accent panel (roughly 3×3 feet) rather than a full-sized privacy screen. Small climbing plants like black-eyed Susan vine work well against the smaller openings.
8. Repurposed Window Frame Trellis
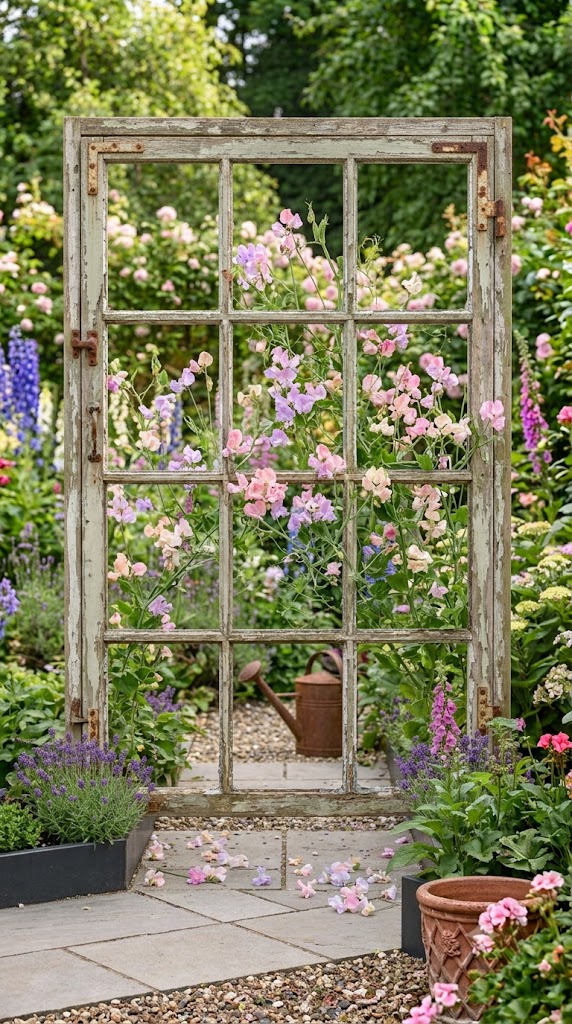
This is one of the most budget-friendly options if you have access to an old wooden window frame, since the existing muntins (the thin wood dividers between panes) already function as a built-in lattice structure once the glass is removed.
I’d carefully remove any remaining glass and putty, sand any rough or splintering edges, and treat the frame with an exterior sealant before mounting it against a wall or fence with sturdy L-brackets. Older frames sometimes have lead paint, so I’d test for this before sanding if the frame predates the 1970s-80s.
Sweet peas and morning glories both suit the smaller pane openings especially well, giving a charming, quilted look as they fill in each section over a season.
9. Farmhouse Grid Trellis
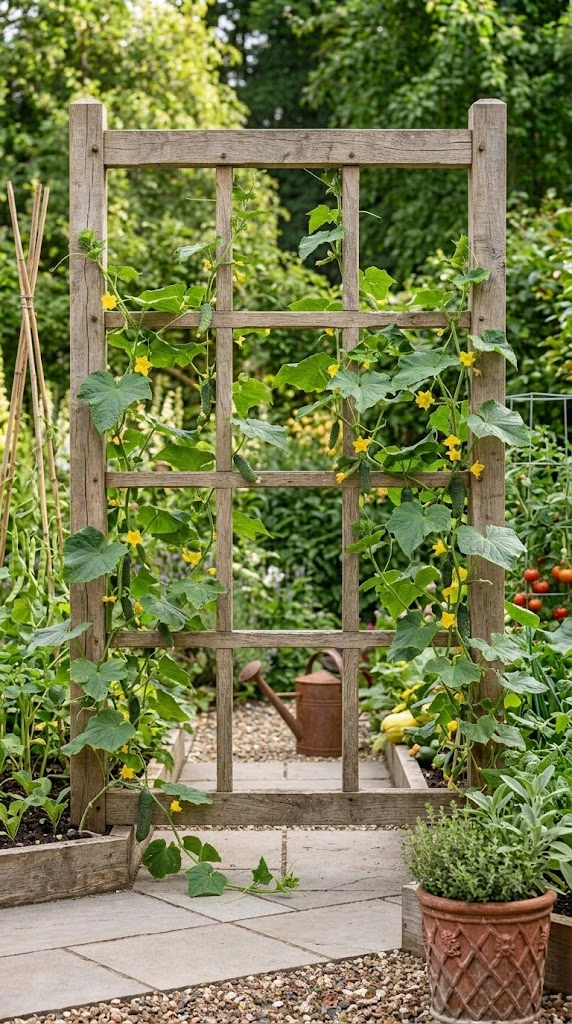
A grid trellis uses thicker lumber in a simple perpendicular pattern (unlike the diagonal diamond lattice), giving a sturdier, more rustic look suited to vegetable gardens as much as ornamental ones.
Build this from 1×3 or 1×4 cedar boards in a simple square or rectangular grid, spaced 6-8 inches apart in both directions, secured at each intersection with exterior screws. The thicker board width compared to a standard lattice gives this design noticeably more structural strength, making it a solid choice for heavier vegetable vines.
Cucumbers, pole beans, and peas all do well trained up a grid trellis, since the sturdy horizontal supports can handle the weight of developing vegetables in addition to the vine itself.
10. Pallet Wood Trellis
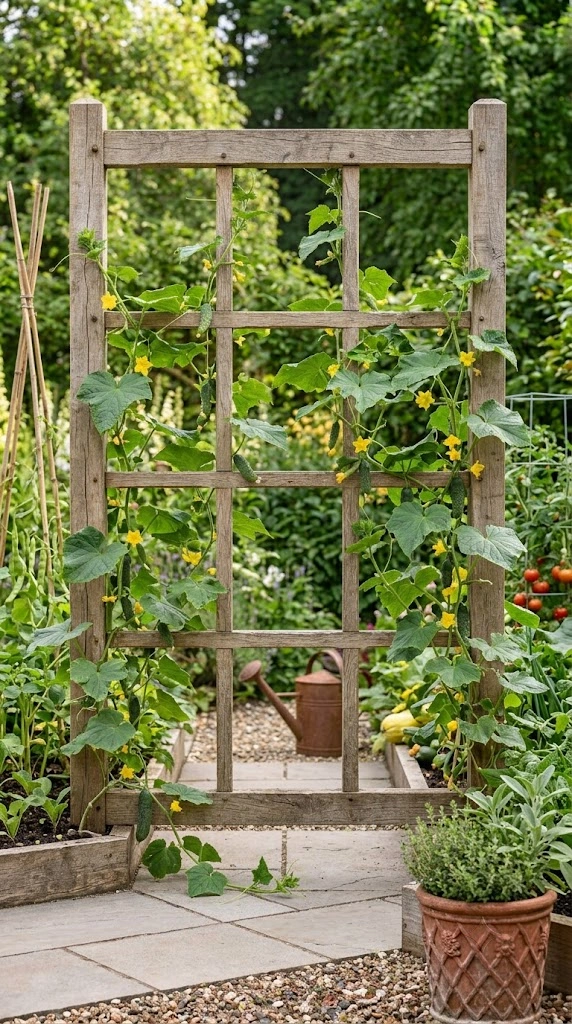
Reclaimed pallet wood is one of the cheapest ways to build a trellis, though it requires more prep work than buying new lumber, since pallet boards vary in condition and aren’t always food-safe or rot-resistant.
I’d disassemble the pallet carefully with a pry bar (rather than cutting through nails, which dulls blades quickly), then sand down any rough or splintered edges before reassembling the boards into a simple grid or ladder pattern. Since pallet wood isn’t naturally weather-treated, I’d apply an exterior sealant generously, and expect a shorter overall lifespan than cedar or redwood builds — typically 2-4 years versus 8-10+ for rot-resistant species.
This budget option works well for lighter annual vines like sweet peas or nasturtiums, which don’t require the structure to last more than a single growing season if needed.
11. Folding Privacy Panel Trellis
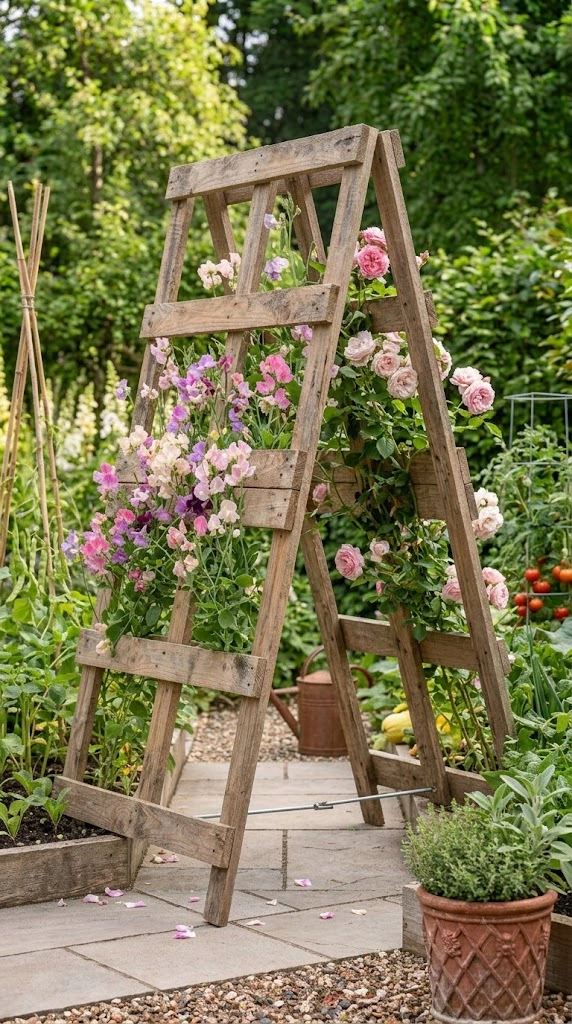
A folding trellis is genuinely useful if you rent or want the flexibility to rearrange your garden layout seasonally, since it isn’t permanently anchored to the ground.
Build two matching lattice or slat panels, then join them with a continuous piano hinge along one vertical edge, allowing the whole structure to fold flat for storage or open into an A-frame or straight screen configuration. I’d use 1×2 cedar for the panel frames to keep the whole structure light enough to move without help.
Climbing roses and clematis both work well here, though I’d avoid extremely heavy or woody vines like mature wisteria, since the folding hinge isn’t rated for the same load-bearing capacity as a permanently anchored frame.
12. Raised Bed Attached Trellis
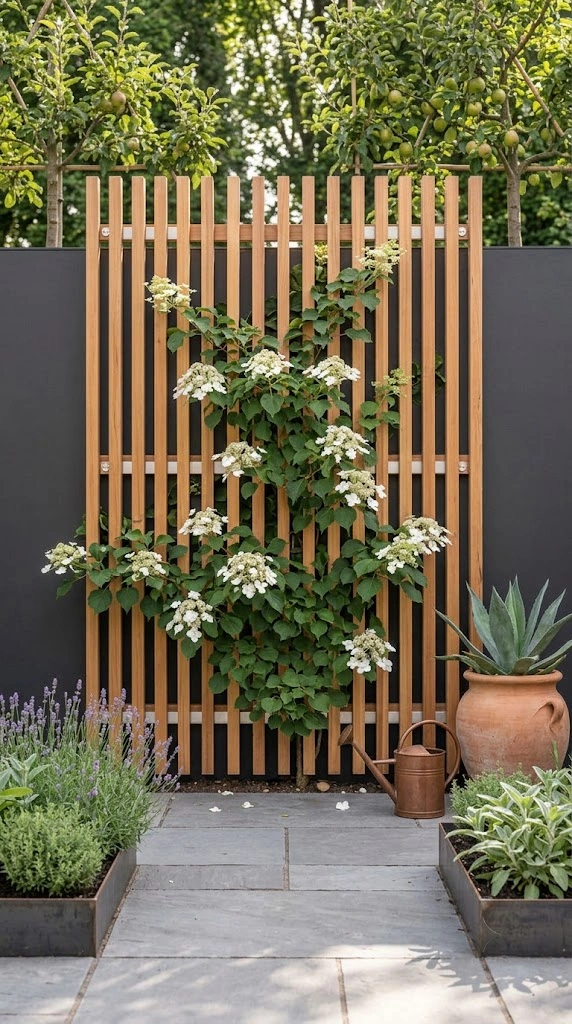
Attaching a trellis directly to an existing raised garden bed is one of the most practical builds on this list, since it eliminates the need for separate ground anchoring entirely.
I’d use 2×2 cedar posts bolted directly to the inside corners of the raised bed frame, rising 5-6 feet above the bed, with horizontal 1×2 supports spaced every 8-10 inches between the posts. Because the raised bed itself anchors the structure, this design is notably more wind-stable than most freestanding trellises.
This is the ideal design specifically for vegetable gardens — cucumbers, pole beans, and peas all benefit from the vertical growing space, which also makes harvesting easier and improves airflow around the plants compared to letting them sprawl on the ground.
13. Floating Slat Modern Wall
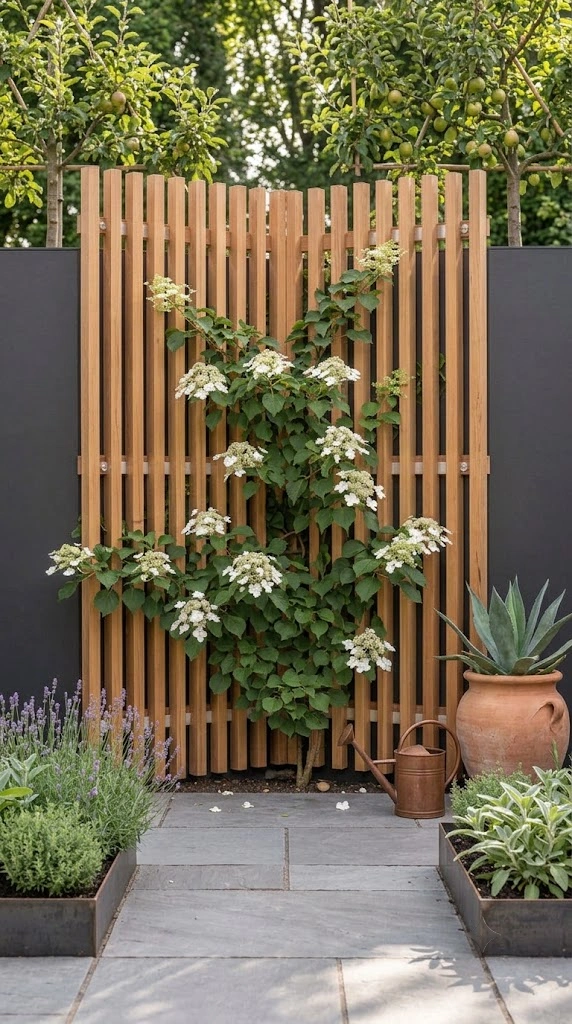
This design creates a semi-transparent screen effect using evenly spaced vertical slats mounted with a small gap behind a solid backing, so the slats appear to “float” slightly off the wall or fence behind them.
Mount 1×2 or 1×3 cedar slats vertically, spaced 1.5-2 inches apart, onto horizontal furring strips attached to the wall — the furring strips create the gap that gives this design its floating appearance and also improves airflow behind the vines, reducing moisture-related rot over time.
This works particularly well for climbing hydrangea or Boston ivy, which attach directly to a flat surface rather than twining around a support, since the slight gap behind the slats gives them room to grip without damaging the wall surface underneath.
14. Corner-Fitting Trellis
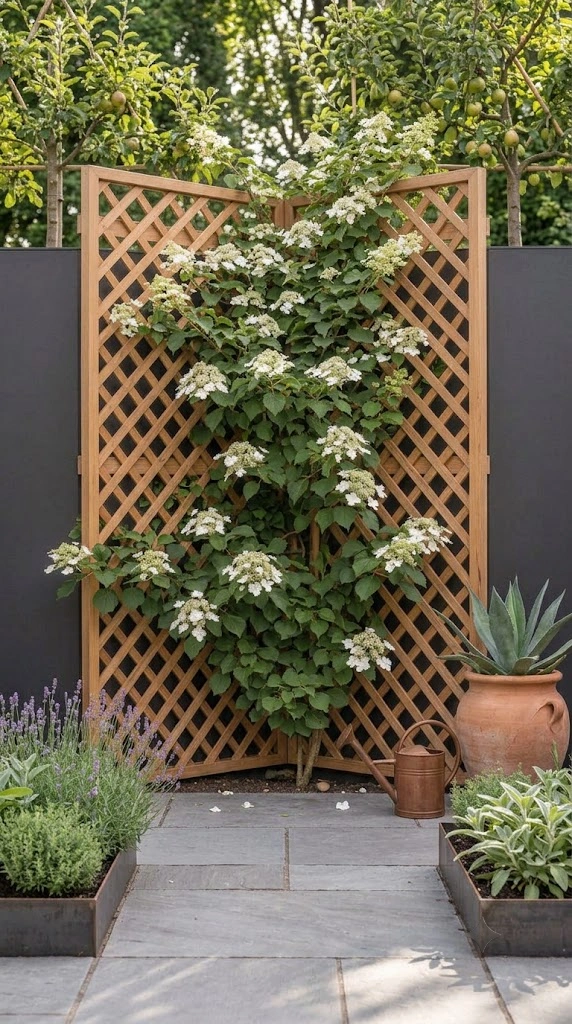
Built specifically to fit into an awkward corner where a standard rectangular trellis wouldn’t sit flush, this design uses two panels joined at a 90-degree angle rather than a single flat piece.
I’d build two simple lattice or slat panels sized to your specific corner dimensions, then join them along one edge with exterior corner brackets or a continuous hinge for a slight adjustable angle. This design is particularly useful for reclaiming a genuinely unused corner of a patio or yard that a flat trellis simply wouldn’t fit into cleanly.
Any moderate climber works well here — I’d choose based on the corner’s sun exposure rather than the trellis shape itself, since corners often get more shade than open wall space.
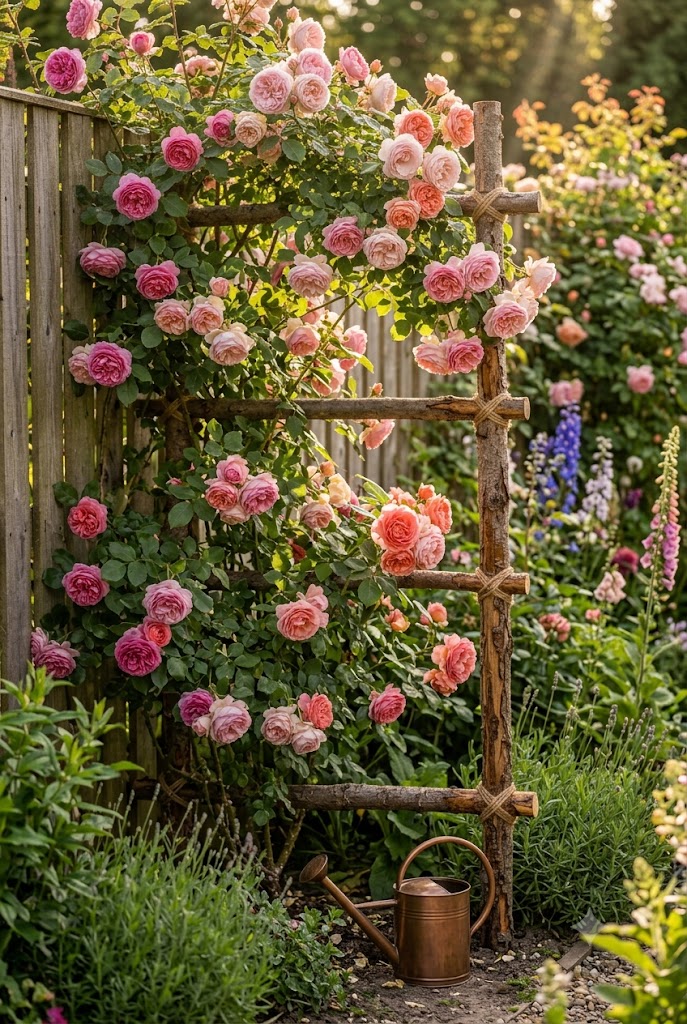
15. Rustic Branch and Twig Trellis
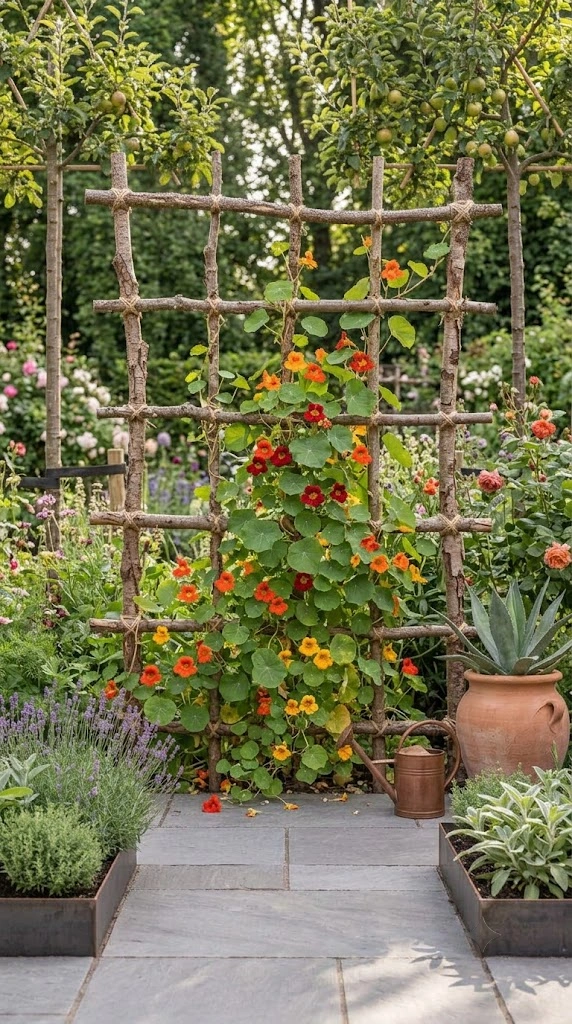
For the most natural, low-cost option, gathering straight fallen branches (roughly 1-2 inches in diameter) and lashing them together with garden twine or wire creates a genuinely rustic, handmade trellis unlike anything built from milled lumber.
I’d select branches from rot-resistant species if possible (cedar, oak, or willow all work well) and let them dry out for a few weeks before building, since green wood shrinks as it dries and can loosen joints that were tight at assembly. Lash horizontal branches to two or three vertical branches using a simple crisscross wrapping technique, pulling tight at each joint.
This style suits informal cottage-garden climbers particularly well — sweet peas, nasturtiums, and morning glories all look genuinely at home against the irregular, organic branch pattern, and the imperfection of hand-gathered wood is part of the intended charm here rather than something to correct.
My Professional Guide to Building a Trellis That Actually Lasts
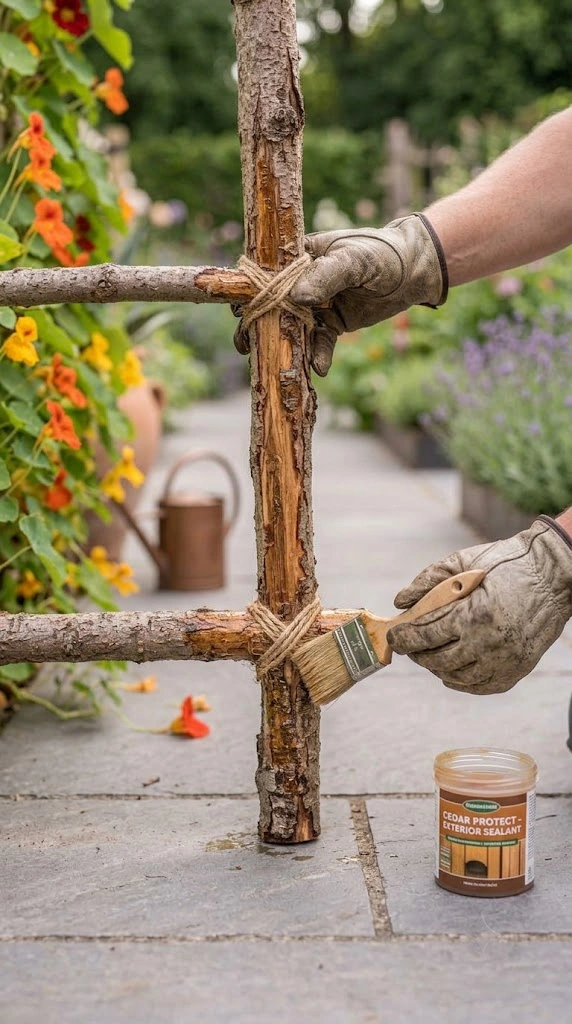
Regardless of which design you choose, wood selection matters more than almost any other decision. Cedar and redwood are both naturally rot-resistant and are worth the extra cost over standard pine for anything that will sit in soil or face consistent moisture — pine untreated will typically fail within 2-3 years outdoors, while cedar can last a decade or more with basic maintenance.
I’d also always match the trellis’s structural weight to the plant you’re actually growing. Lightweight annual vines like sweet peas need very little structural support, while mature wisteria, grapes, or climbing roses can eventually weigh well over a hundred pounds fully grown — building a delicate lattice for a plant that will eventually become that heavy is one of the most common trellis failures I’ve seen.
Finally, reseal exterior wood annually, particularly at the base where it meets soil. This single maintenance step does more to extend a trellis’s lifespan than the wood species or design choice alone.
Conclusion
A DIY wood trellis can be as simple as a weekend ladder build or as involved as a laminated arched gateway — but the ones that hold up season after season all come down to the same fundamentals: rot-resistant wood, joints built for the actual weight of your climbing plant, and a bit of annual maintenance. Choose the design that fits your space and skill level, match it to the right plant, and it’ll reward you with years of use rather than a single season.
Frequently Asked Questions
What is the best wood for a DIY trellis?
Cedar and redwood are both naturally rot-resistant and hold up significantly better outdoors than untreated pine, which typically fails within a few years of consistent moisture exposure.
How do I keep a wood trellis from rotting?
Treat the wood with an exterior sealant before installation, pay special attention to the base where it meets soil, and reseal annually — this single step extends lifespan more than wood species alone.
What plants are best for a wood trellis?
Lighter annual vines like sweet peas and morning glories work well on almost any trellis design, while heavier perennials like wisteria, grapes, and climbing roses need sturdier, thicker lumber built specifically to handle their eventual weight.
How long does a DIY wood trellis last?
A well-built cedar or redwood trellis with annual maintenance can last 8-10+ years, while budget options like pallet wood typically last 2-4 years due to less weather-resistant material.