16 Small Walk-In Closet Ideas & Layouts for Maximum Storage
The most effective small walk-in closet layouts use vertical space rather than added floor space. A double-hanging clothing wall, an L-shaped corner layout, and floor-to-ceiling shelving are the three highest-capacity, lowest-cost solutions for compact closets. Keeping a clear walkway is just as important as adding storage — a closet that stores more but is hard to move through quickly becomes frustrating.
I’ve planned dozens of small closets, and the ones that actually work long-term are never the ones with the most furniture — they’re the ones where every wall has a specific job. Below are 16 small walk-in closet ideas, each with materials, exact steps, a styling tip, and a ready-to-use image prompt so you can visualize the layout before buying anything.
At-a-Glance Comparison Table
| Idea | Best For | Difficulty | Approx. Budget |
|---|---|---|---|
| Double-Hanging Clothing Wall | Any closet, quick upgrade | Easy | $ |
| L-Shaped Corner Layout | Corner closets | Medium | $$ |
| Floor-to-Ceiling Shelving | High-ceiling closets | Medium | $$ |
| Slim Walk-In Wardrobe Corridor | Narrow/galley closets | Medium | $$ |
| Pull-Out Accessories | Any closet with gaps | Easy | $ |
| Back-of-Door Storage | Very small closets | Easy | $ |
| Drawers + Open Shelves | Balanced storage needs | Medium | $$ |
| Narrow Center Island | Larger small closets | Advanced | $$$ |
| Dedicated Shoe Wall | Shoe collectors | Medium | $$ |
| Adjustable Modular Storage | Changing storage needs | Medium | $$ |
| Built-In Dressing Nook | Closets with spare wall | Medium | $$ |
| Corner Vanity With Storage | Awkward corners | Medium | $$ |
| Open + Concealed Storage Mix | Mixed wardrobes | Medium | $$ |
| Budget Tension-Rod System | Tight budgets, renters | Easy | $ |
| Vertical LED Lighting Strips | Any closet, quick upgrade | Easy | $ |
| Fold-Out Steaming Station | Closets used daily | Medium | $$ |
Build a Double-Hanging Clothing Wall
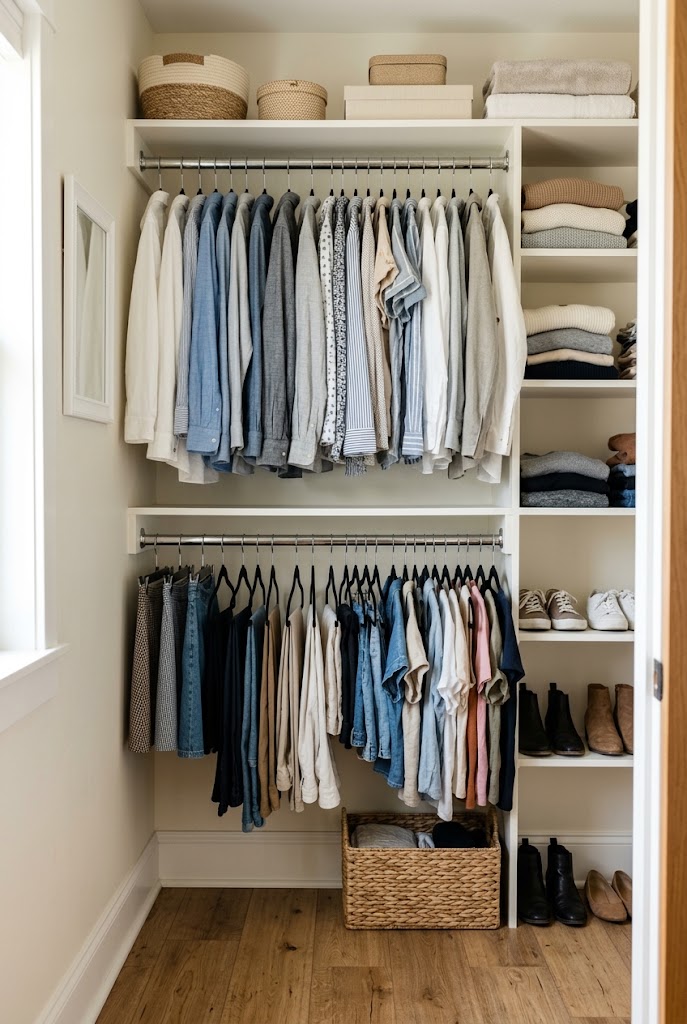
Double hanging is one of the most effective upgrades for a compact closet because it multiplies capacity without touching the floor plan. I install the upper rail for shirts, jackets, and folded trousers, and the lower rail for shorter garments, which keeps both levels organized instead of visually crowded.
What You’ll Need: two hanging rods, wall brackets, measuring tape, wall anchors suited to your wall type, slim matching hangers.
Quick How-To: Measure the wall before installing anything. Leave clearance between the two rods so garments don’t overlap. Mount the upper rod high enough for comfortable access, then add the lower rod beneath it, reserving another section for longer dresses and coats.
Styling Tip: Use identical slim hangers throughout — a consistent profile makes the whole wall look intentional.
2. Use an L-Shaped Corner Layout
An L-shaped arrangement uses two adjoining walls while keeping the center completely open. I assign the longer wall to everyday hanging clothes and the shorter return wall to shelves, drawers, and accessories — this is especially useful in narrow closets where a straight single-wall layout wastes the corner entirely.
What You’ll Need: corner shelving or closet modules, hanging rails, drawers or baskets, wall-mounting hardware.
Quick How-To: Start with the longest wall and assign your most-used category to it. Continue storage around the adjacent wall so the corner stays functional instead of dead space. Keep a clear walkway through the center.
Styling Tip: Match the finish across both walls — natural wood or soft white — so the L-shape reads as one built-in system.
3. Add Floor-to-Ceiling Shelving
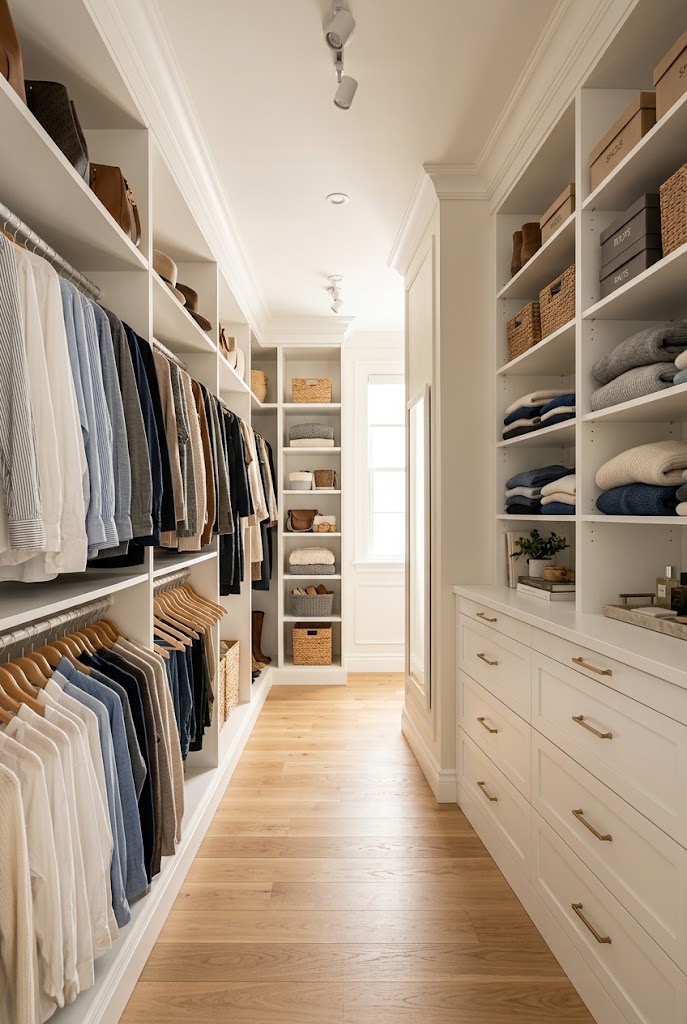
When floor space is limited, height becomes your biggest asset. Floor-to-ceiling shelving stores folded clothing, handbags, baskets, and seasonal items without expanding the footprint. I keep everyday pieces between waist and eye level and push rarely used items to the top shelves.
What You’ll Need: tall shelving units, adjustable shelves, storage baskets, a step stool, secure wall anchors.
Quick How-To: Measure the full wall height and divide it into practical zones. Place daily items in the middle section and infrequent items above. Anchor tall units securely so they can’t tip forward.
Styling Tip: Use matching baskets on the highest shelves — they hide seasonal clutter while finishing the wall visually.
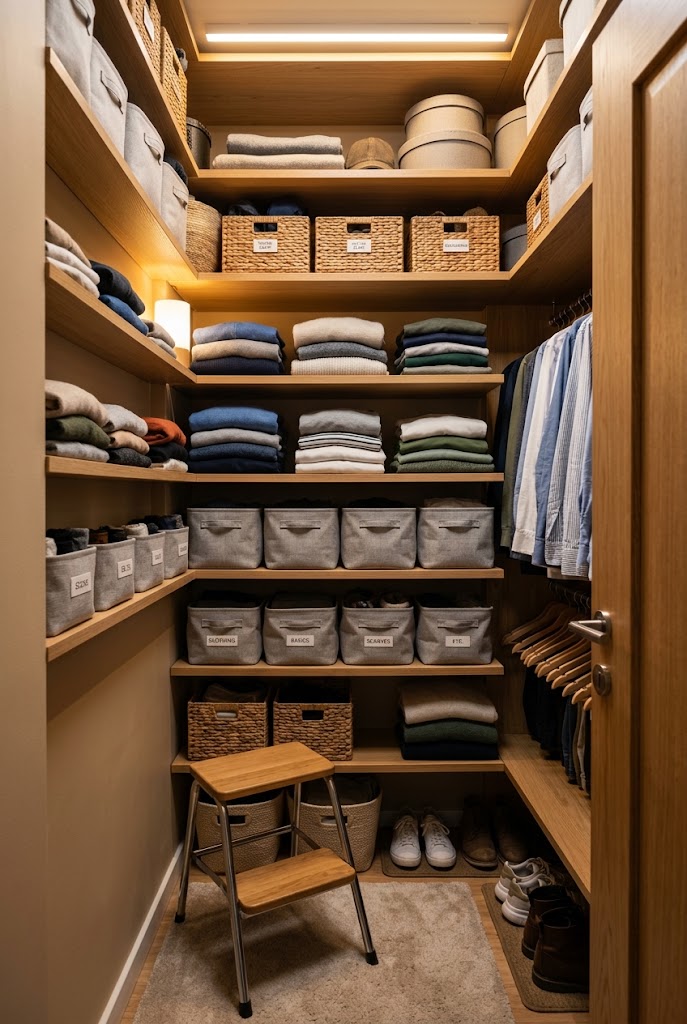
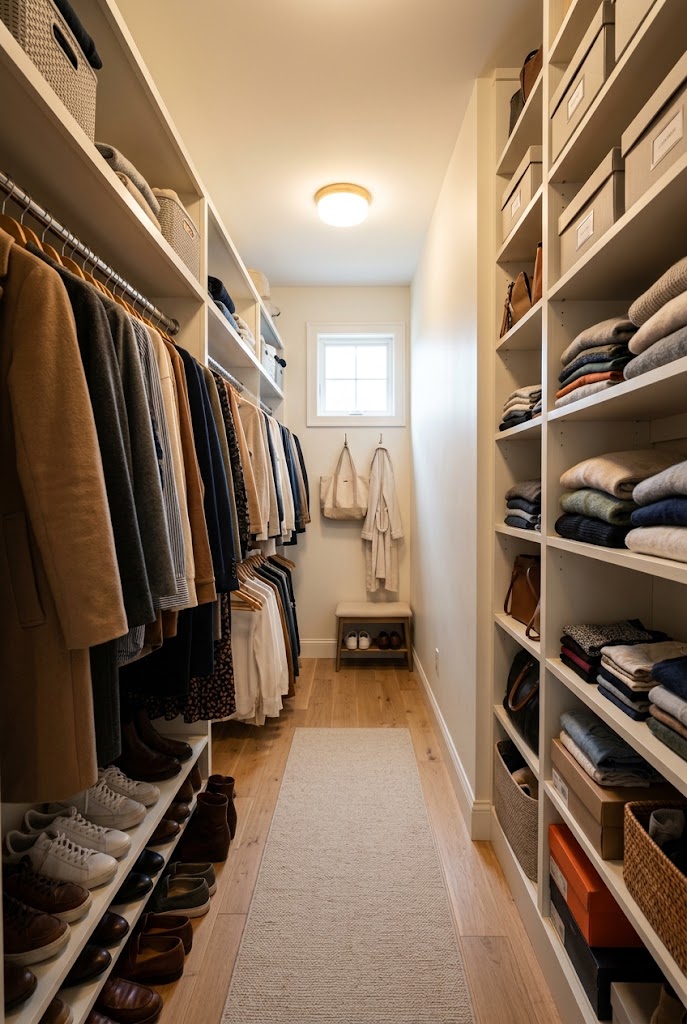
4. Create a Slim Walk-In Wardrobe Corridor
A narrow closet doesn’t need deep cabinetry on both sides. I use one deeper storage wall and one shallow wall — the shallow side handles shoes, folded clothing, hooks, or accessories — which preserves a comfortable walkway instead of the common mistake of filling both walls and losing all movement space.
What You’ll Need: one standard-depth wardrobe system, shallow shelves, hooks, slim hangers, shoe storage.
Quick How-To: Install deeper hanging storage on the wall with the most usable depth. Keep the opposite side considerably shallower for accessories or shoes. Test the walkway before permanently installing anything.
Styling Tip: Paint the walls and shallow storage the same light shade — uninterrupted color makes the corridor feel wider.
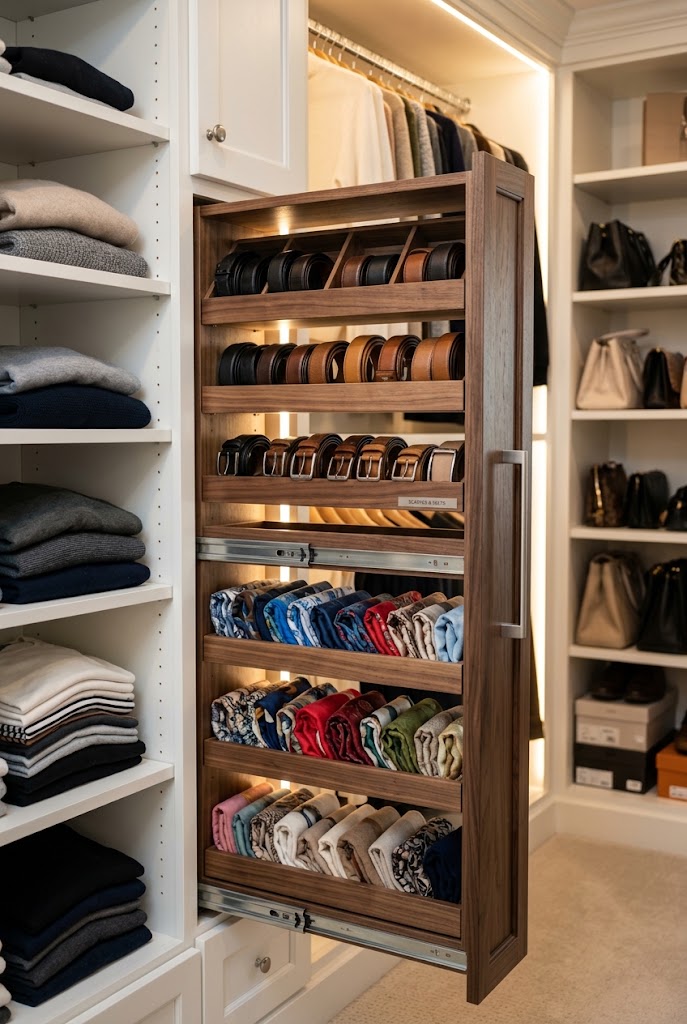
5. Install Pull-Out Accessories
Belts, scarves, ties, jewelry, and handbags are harder to stack efficiently than clothing, which is exactly why pull-out organizers work so well — they turn narrow, unused gaps into functional storage without eating into floor space.
What You’ll Need: pull-out accessory racks, narrow drawers or trays, cabinet hardware, labeled organizers.
Quick How-To: Identify unused gaps between hanging sections or shelving. Install pull-out hardware per the manufacturer’s measurements and group accessories by type. Place frequently used items at comfortable hand height.
Styling Tip: Group accessories by color or material in shallow trays — a simple visual system keeps small items easy to find.
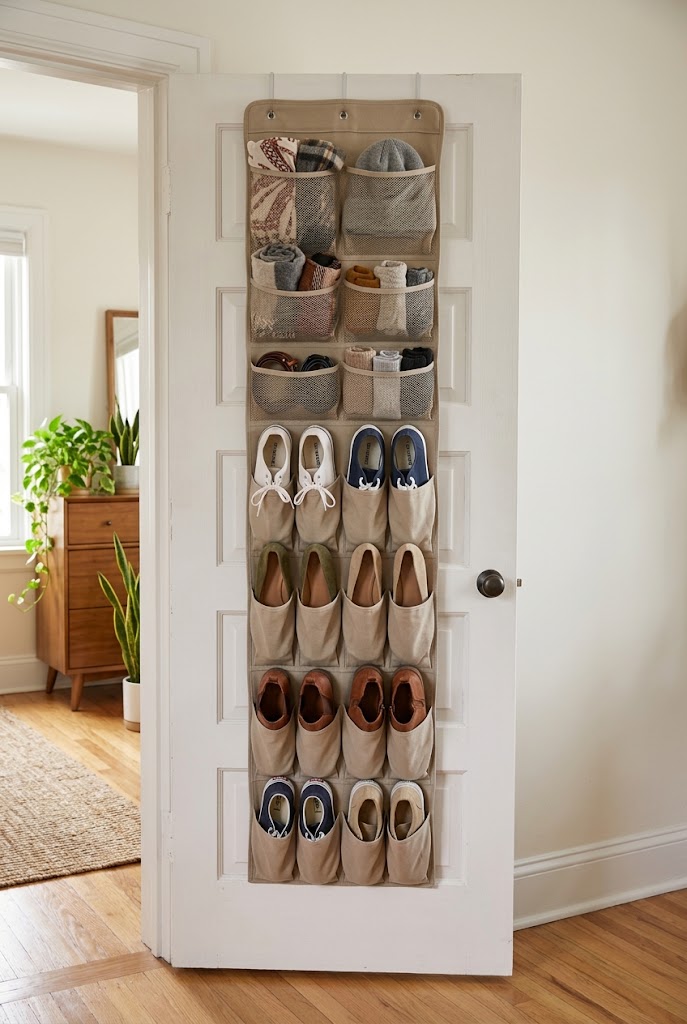
6. Turn the Back of the Door Into Storage
The closet door is one of the most overlooked storage surfaces in the room. A slim over-door organizer holds shoes, handbags, or hair accessories without touching the main closet walls — ideal when the room is too small for another cabinet.
What You’ll Need: over-door organizer or mounted rail system, hooks, small baskets, adhesive or screw-mounted hardware.
Quick How-To: Check door clearance first and choose an organizer that won’t interfere with the frame. Assign each pocket, basket, or hook a specific category rather than mixing items together.
Styling Tip: Keep it visually simple — neutral fabric pockets or matching baskets read cleaner than mismatched plastic bins.
7. Combine Drawers With Open Shelves
Drawers and open shelving together strike the best balance between accessibility and visual calm. I put drawers in the easiest-to-reach central zone for underwear, socks, and workout clothing, and reserve open shelves for sweaters, handbags, and decorative baskets.
What You’ll Need: compact drawer unit, adjustable shelving, baskets, drawer dividers, labels.
Quick How-To: Place drawers in the central reachable zone. Install open shelves above or beside them, adjusting heights to what each section stores. Avoid overly deep shelves — items disappear behind one another.
Styling Tip: Leave slight breathing room on open shelves — under-filled shelves usually look more organized.
8. Add a Narrow Center Island
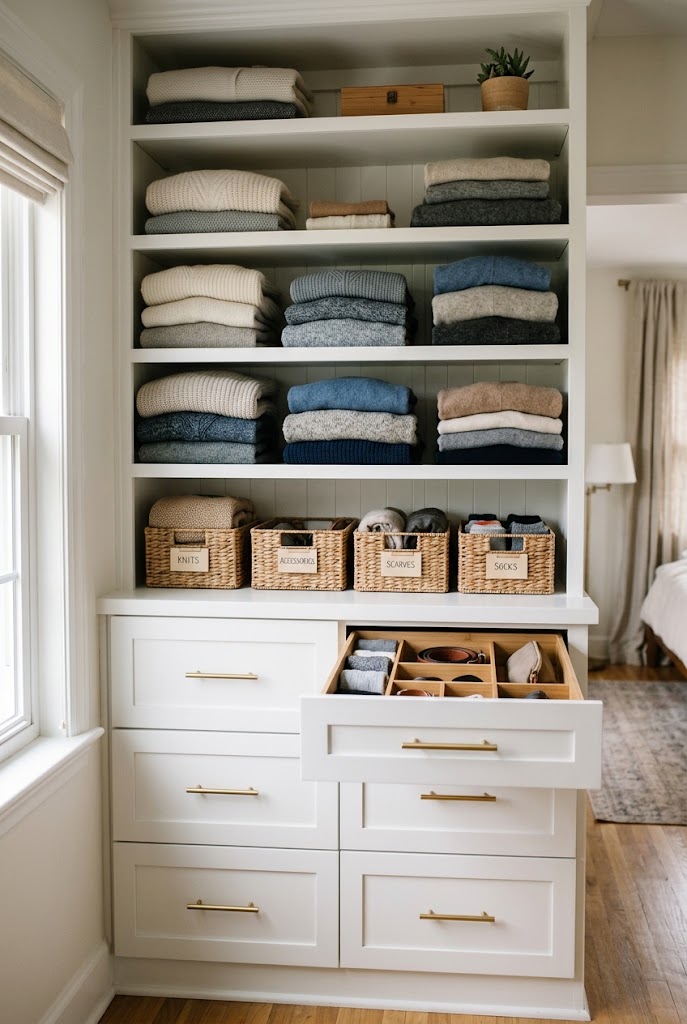
A full-size island can overwhelm a small closet, but a narrow version adds valuable drawer storage without blocking movement. I always confirm clearance around it first — enough room to open drawers without obstructing the main walkway.
What You’ll Need: narrow drawer cabinet or custom island, drawer organizers, measuring tools, optional countertop material.
Quick How-To: Measure the walking space before purchasing. Mark the footprint with tape on the floor and walk around it imagining the drawers open. If movement feels restricted, choose a narrower model.
Styling Tip: A wood or stone-look top makes a simple drawer unit feel custom-built while adding warmth.
9. Create a Dedicated Shoe Wall
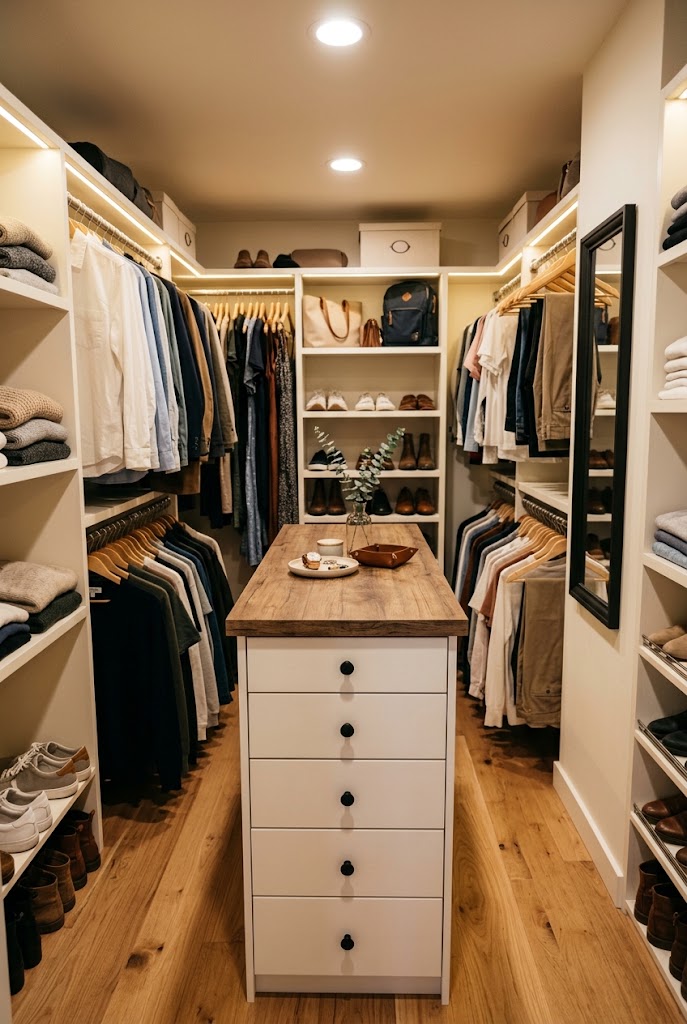
Shoes scattered across the floor eat up walking space fast. A dedicated vertical shoe wall with adjustable shelves keeps every pair visible — I place frequently worn shoes at waist or knee height and reserve lower shelves for heavier footwear.
What You’ll Need: adjustable shoe shelves, dividers, boot supports, optional low-profile shoe boxes.
Quick How-To: Measure your shoe collection before setting shelf spacing. Place frequently worn pairs at comfortable height and reserve lower shelves for boots. Use simple supports to keep boots upright.
Styling Tip: Arrange shoes by type first, then color, for an easy-to-scan, boutique-style wall.
10. Use Adjustable Modular Storage
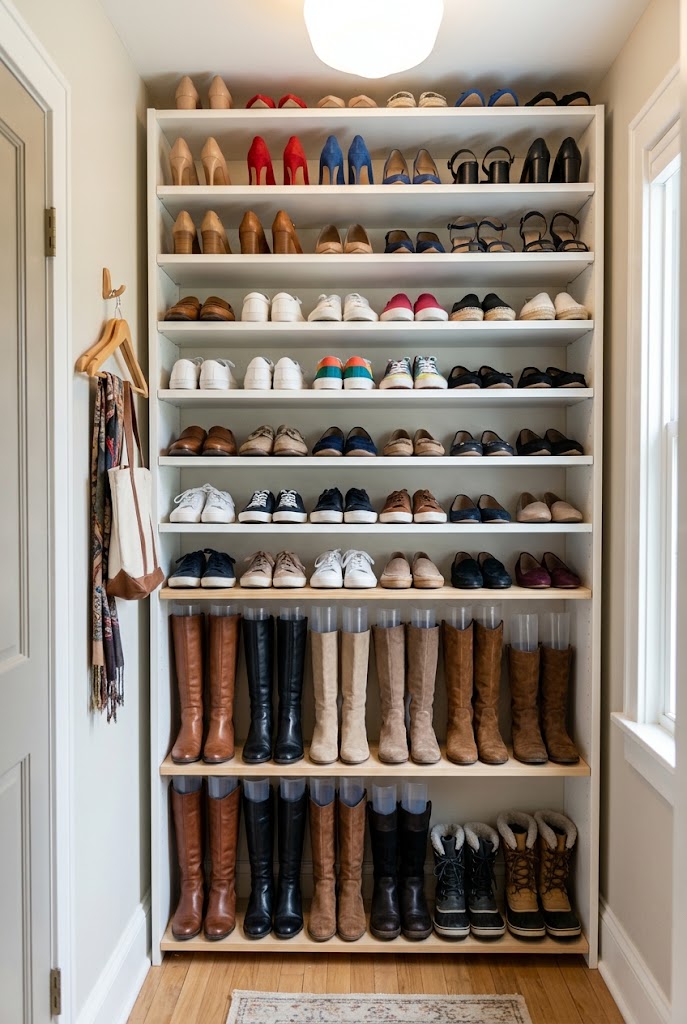
A modular system pays off when your storage needs shift throughout the year. Instead of permanently dedicating a section to one category, adjustable shelves and rails let you reconfigure hanging, folded, and shoe storage as your wardrobe changes.
What You’ll Need: modular closet system, adjustable brackets, shelves, hanging rails, storage bins.
Quick How-To: Start with your largest clothing categories and build the system around them. Leave several shelves adjustable instead of fixing every level. Reassess after a few months and move components based on actual use.
Styling Tip: Keep the framework visually consistent — matching shelves and hardware look intentional, not temporary.
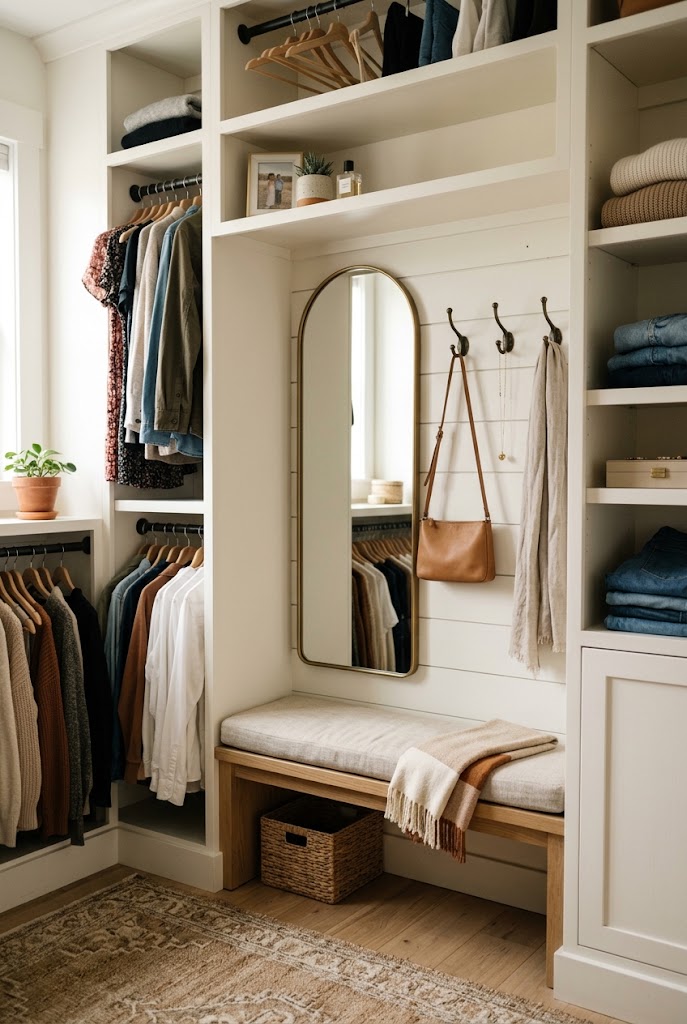
11. Add a Built-In Dressing Nook
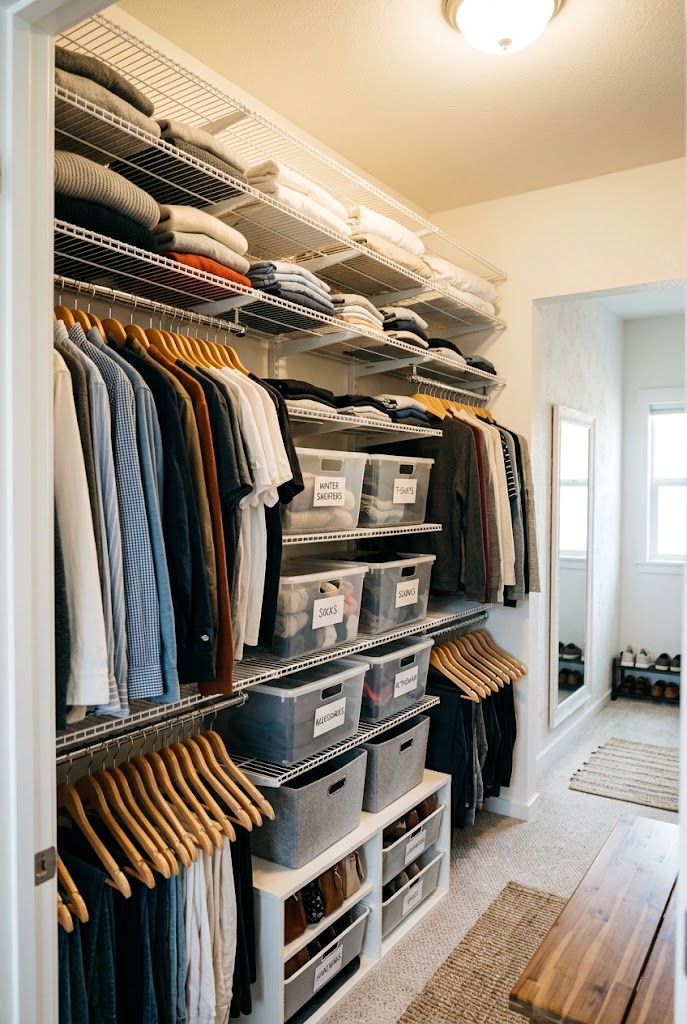
An unused wall section doesn’t have to become more storage — a compact dressing nook with a slim bench and mirror adds function without interrupting the primary storage route.
What You’ll Need: slim bench, wall mirror, small wall hooks, optional floating shelf.
Quick How-To: Choose the least useful wall section for seating. Mount the mirror vertically to maximize visual height and add hooks nearby for frequently worn items. Keep the bench shallow enough to preserve the walkway.
Styling Tip: Add one soft textile — a small cushion or runner — for warmth without over-decorating.
12. Design a Corner Vanity With Storage
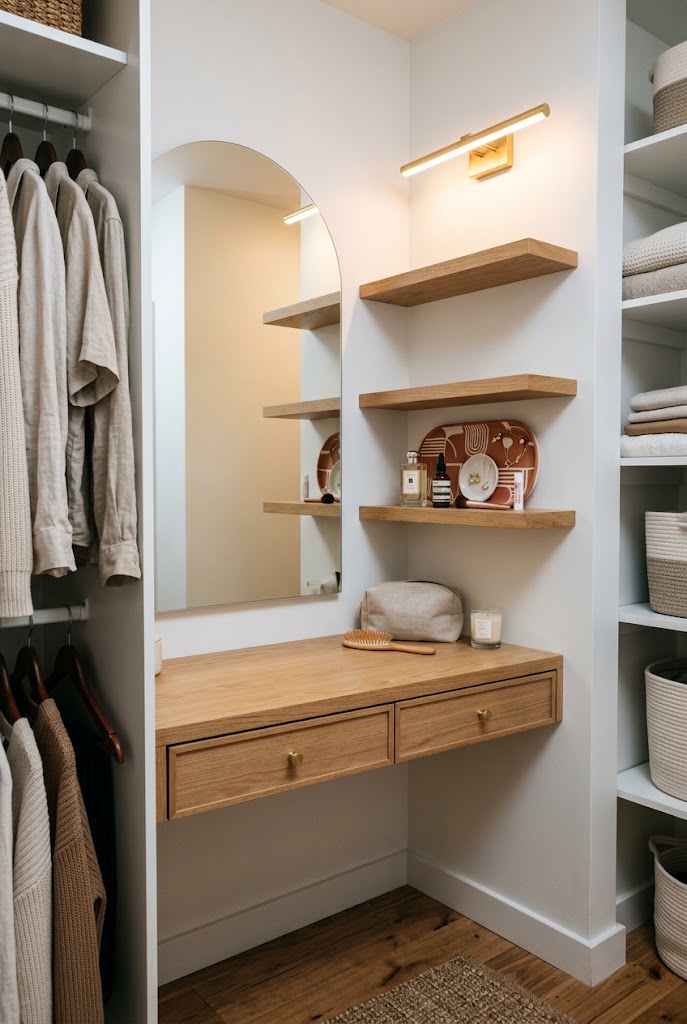
An awkward corner becomes genuinely useful with a compact vanity for jewelry, cosmetics, and hair tools — keeping those items separate from clothing storage. Floating furniture works especially well because it preserves visible floor space underneath.
What You’ll Need: compact floating vanity, wall mirror, shallow drawers, small organizers, wall anchors.
Quick How-To: Choose a corner away from the main hanging route. Mount the vanity at comfortable height, use shallow drawer organizers for small items, and add a mirror above while keeping the surrounding wall uncluttered.
Styling Tip: Use one attractive tray for daily essentials — visible clutter is the fastest way to undo a clean corner.
13. Mix Open Hanging With Concealed Storage
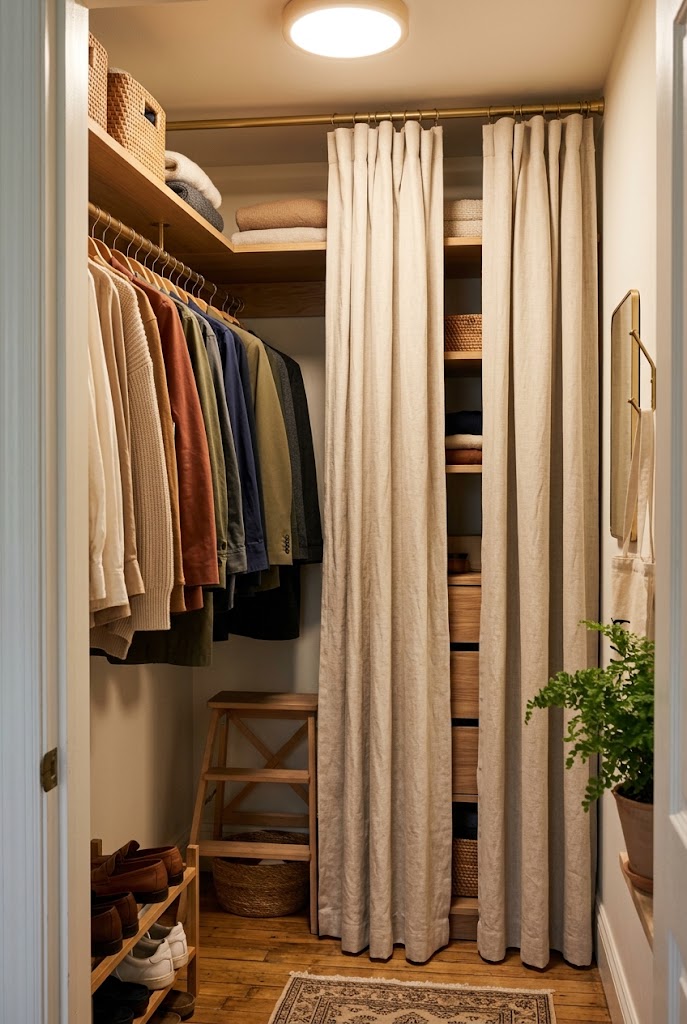
Combining visible and hidden storage keeps a small closet practical without visual noise. Open sections make everyday outfits easy to see, while closed cabinets or curtains conceal bulky seasonal items and less attractive bins.
What You’ll Need: hanging rails, shallow cabinets or curtains, storage bins, shelf dividers, matching hangers.
Quick How-To: Reserve open space for regularly worn clothing. Use upper or less accessible sections for seasonal garments and spare linens. If using curtains, install a ceiling-mounted track so they take minimal space when open.
Styling Tip: Keep exposed clothing organized by category or color and conceal anything visually inconsistent behind matching curtains or fronts.
14. Budget Tension-Rod System
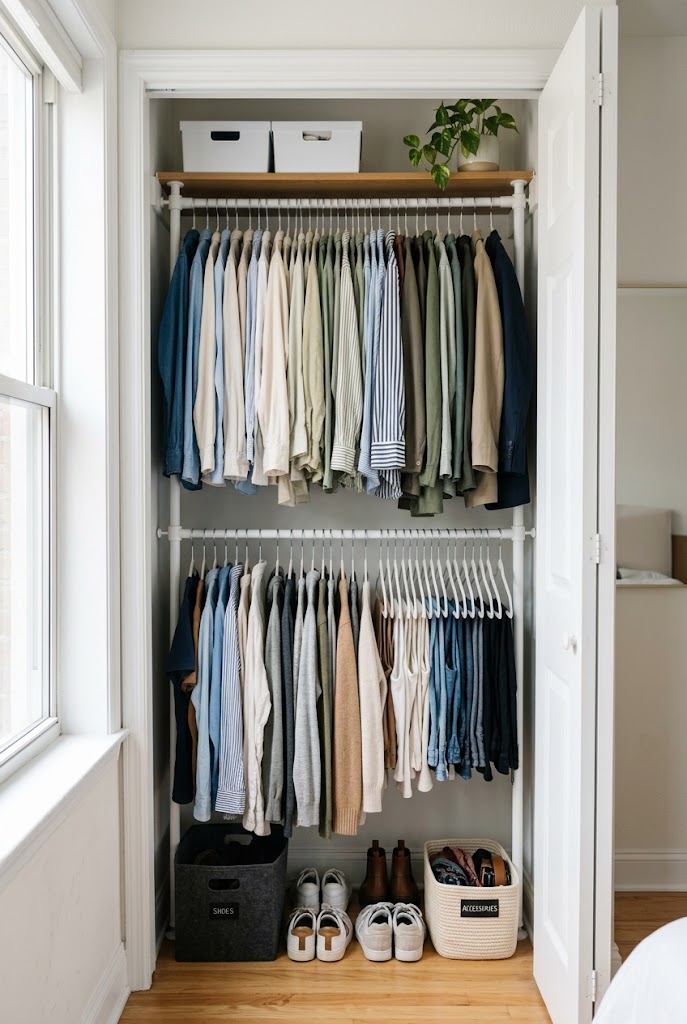
You don’t need a built-in system to get a functional layout — tension rods installed between two walls create instant extra hanging or shelf-support levels for a fraction of the cost, and they leave no permanent marks, which makes this ideal for renters.
What You’ll Need: adjustable tension rods, slim hangers, small tension-mounted shelves or baskets.
Quick How-To: Measure the wall-to-wall distance and install tension rods at two heights for double hanging. Add a tension-mounted shelf section for folded items or shoes if space allows.
Styling Tip: Choose rods in a finish that matches existing hardware so the setup doesn’t look temporary.
15. Vertical LED Lighting Strips
Poor lighting makes any closet feel smaller and messier than it is. Vertical LED strips along shelving edges or hanging sections add visibility exactly where you need it and give the whole space a noticeably more premium feel for very little cost.
What You’ll Need: battery or plug-in LED strip lighting, adhesive mounting clips, optional motion sensor switch.
Quick How-To: Run LED strips along the vertical edges of shelving units or inside hanging sections. Use a motion sensor switch so lights activate automatically when you enter.
Styling Tip: Choose warm white light rather than cool white — it reads as more upscale and flatters clothing colors better.
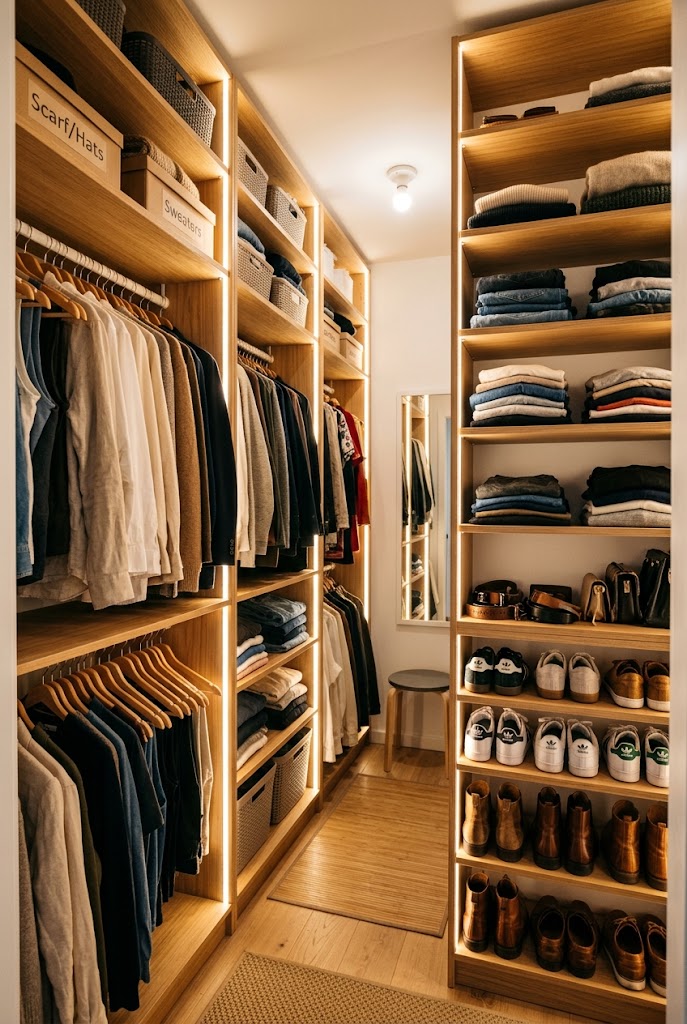
16. Fold-Out Steaming Station
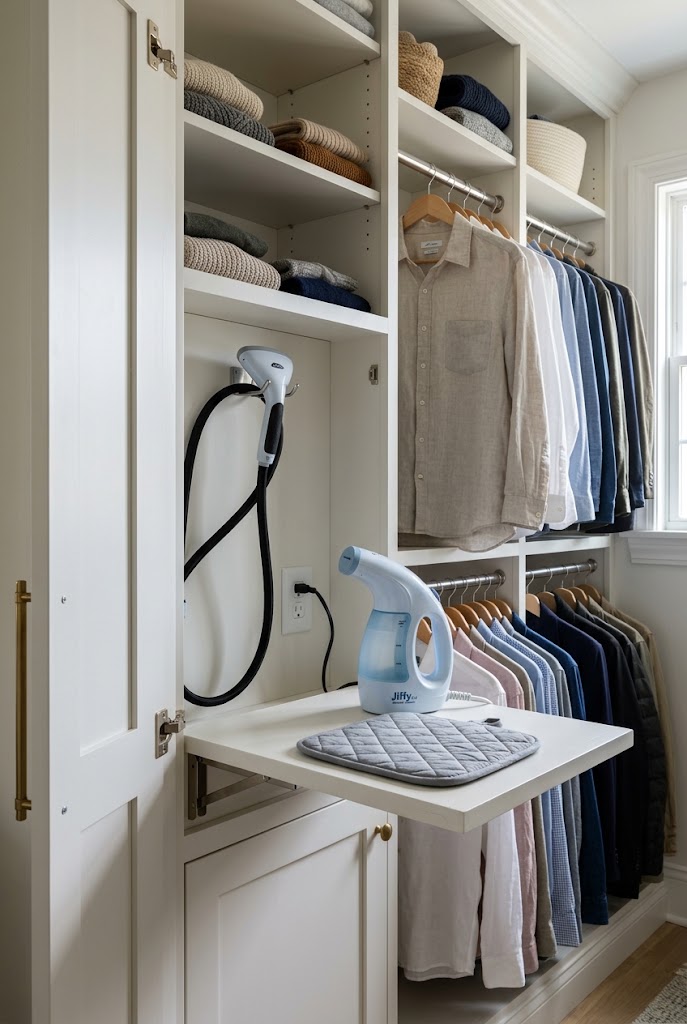
For closets used daily, a fold-out shelf or small hinged panel dedicated to a garment steamer and ironing pad keeps a frequently used tool from cluttering the floor or a shelf, and folds flat when not in use.
What You’ll Need: small fold-down shelf or hinged panel, wall brackets, garment steamer, compact ironing pad.
Quick How-To: Mount the fold-down shelf at a comfortable working height near an outlet. Store the steamer and pad on or beside it, folding the shelf flat when not in use.
Styling Tip: Choose a shelf finish that matches surrounding cabinetry so the station blends in when closed.
My Professional Guide
Budget Breakdown by Approach
- Budget/Renter-Friendly: $50–$150 — tension rods, over-door organizers, baskets, LED strips
- Mid-Range Upgrade: $150–$500 — modular shelving, drawer units, pull-out accessories
- Full Custom Build: $500–$2,000+ — built-in cabinetry, center island, corner vanity, professional installation
Measuring Before You Buy
Always measure the full wall height, depth, and the width of your intended walkway before purchasing any unit. A walkway under 30 inches wide will feel cramped even with excellent storage on either side.
Weight & Anchoring Basics
Any shelving taller than waist height should be secured to wall studs, not drywall anchors alone — this is the most common safety oversight in DIY closet builds, especially with floor-to-ceiling units.
Maintenance Rhythm
Reassess your closet layout every 3–4 months rather than only at seasonal changeovers. Storage needs shift faster than most people expect, and modular systems only pay off if you actually adjust them.
Conclusion
A small walk-in closet doesn’t need to feel like a compromise. The most successful layouts come from making deliberate choices about what deserves prime storage space, what can move upward, and what belongs behind doors or in shallow organizers. Start with the layout that solves your biggest storage problem, then layer in smaller details — baskets, hooks, dividers, and lighting. You don’t need to transform the whole closet at once; even one well-planned wall or properly used corner can make a real difference.
FAQ
How do you make a very small walk-in closet functional?
Identify your actual storage needs instead of filling every wall automatically. Use vertical storage, double hanging, shallow shelving, and clearly defined zones, while keeping a comfortable walkway.
What is the best layout for a narrow walk-in closet?
A corridor-style layout with one primary hanging wall and one shallower storage wall usually works best. Use the deeper side for clothing and the shallower side for shoes, accessories, or hooks.
How can I add more storage without making the closet feel crowded?
Use vertical space before adding floor furniture. Double hanging rails, tall shelving, pull-out accessories, and door storage substantially increase capacity without reducing walking space.
Should a small walk-in closet have an island?
Only if sufficient clearance remains around it. A narrow drawer unit can work well, but a large island can make a compact closet hard to navigate — test dimensions with tape on the floor first.
How do I keep a small closet organized long-term?
Give every storage zone a specific purpose and avoid mixing categories. Reassess the layout every few months and use dividers for small items so organization matches how you actually use the space.
What colors work best in a small walk-in closet?
Light neutrals help reflect available light, but consistency matters more than any single color — matching walls, cabinetry, and storage containers reduces visual interruption and makes the room feel cohesive.